Bleeding brakes and changing brake fluid
Good brakes are vital for your safety every time you take your motorbike on the road. It is therefore crucial to change not only the brake pads but also the brake fluid regularly in a hydraulic braking system.
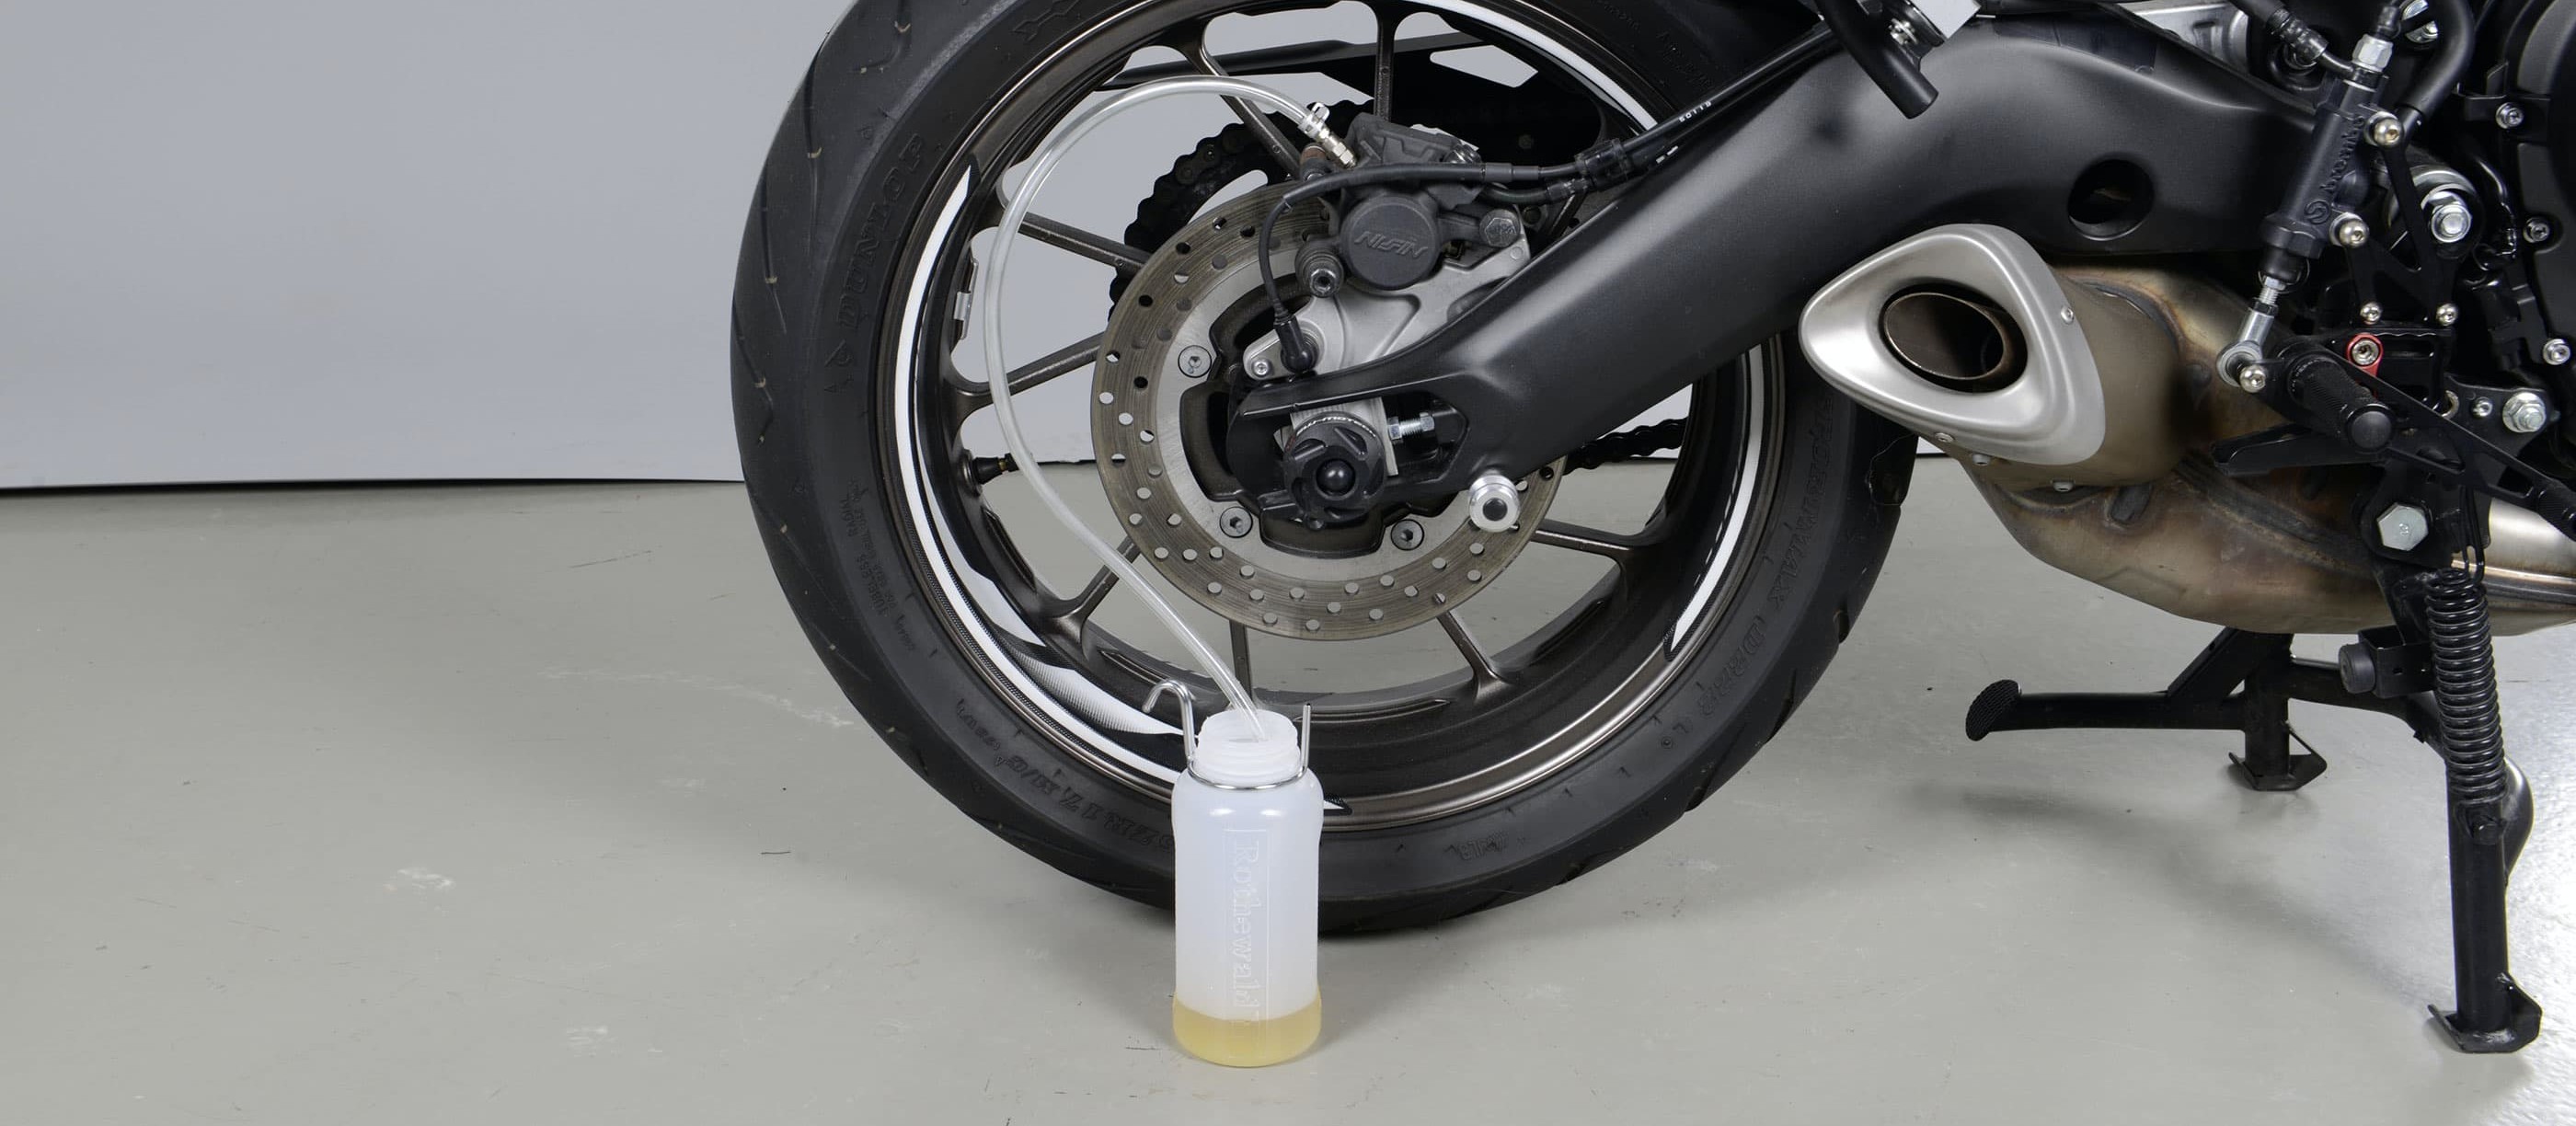
Note: The videos are in German.
- Changing brake fluid on a motorcycle
- Bleeding the brakes
- Changing brake fluid – now let's get started
- Method 1: change fluid via the hand lever or foot lever
- 01 – Align the brake fluid reservoir horizontally
- 02 – Preparing the workplace
- 03 – Push on the box end wrench and attach the tube
- 04 – Carefully unscrew the cover
- 05 – Open the bleeder valve and pump out fluid
- 06 – Pump out with brake lever
- 07 – Pump out liquid
- 08 – Bleeding
- 09 – Pay attention to fill level – do not overfill
- 10 – Pressure point on lever
- Method 2: Change fluid using the vacuum pump
- 06 – Draw off brake fluid and air
- 07 – Check
Changing brake fluid on a motorcycle
Can't see through the sight glass of brake fluid reservoir? Is it all just black? Then it's high time to replace the old swill with fresh, clear, light yellow brake fluid. Can you pull the handbrake lever up to the throttle twistgrip? Are you wondering what "pressure point" means? Then it's time to tend to the hydraulic system of your brake without delay, as there may be air in the system that needs to be removed. Remember, if you want to ensure the roadworthiness of your brakes, you must regularly maintain them. You can see how to do this here.
As described in our DIY tips Basic knowledge of brake fluid, hydraulic fluid ages over time. It absorbs water and air irrespective of the mileage of the vehicle, even in a closed system. This means that the pressure point of the brake starts to feel spongy, or the hydraulics can no longer cope with the thermal loads that arise during emergency braking. It is therefore essential to replace the brake fluid at the maintenance interval recommended by the manufacturer, and also to bleed the braking system at the same time.
Important: this work must be carried out with utmost care! Work on the braking systems is critical to roadworthiness and safe biking, and requires in-depth technical knowledge of vehicle mechanics. Don't put your safety at risk! If you have even a shred of doubt about your ability to carry out this task, leave it to your motorcycle workshop.
This applies above all for braking systems with ABS control, which are normally equipped with two brake circuits. The first is a control circuit, which is activated by the brake pump and actuates sensors, and the second is a regulator circuit, which is activated by a pump or pressure modulator and actuates the brake pistons. As these kind of brake systems normally need to be bled, a process which is normally activated electronically via a workshop computer, this work cannot be carried out at home. Therefore, only the maintenance of braking systems without ABS is described below!
Make sure that neither painted vehicle parts nor your own body come into contact with the poisonous glycol-based brake fluid DOT 3, DOT 4 or DOT 5.1 at any time. It is aggressive to paint finishes, surfaces and also the skin! In case of an emergency, thoroughly rinse the affected areas as quickly as possible using plenty of water. Silicone-based brake fluid DOT 5 is also poisonous and leaves behind a stubborn film of grease. Utmost care should therefore be taken to keep it away from brake discs and pads.
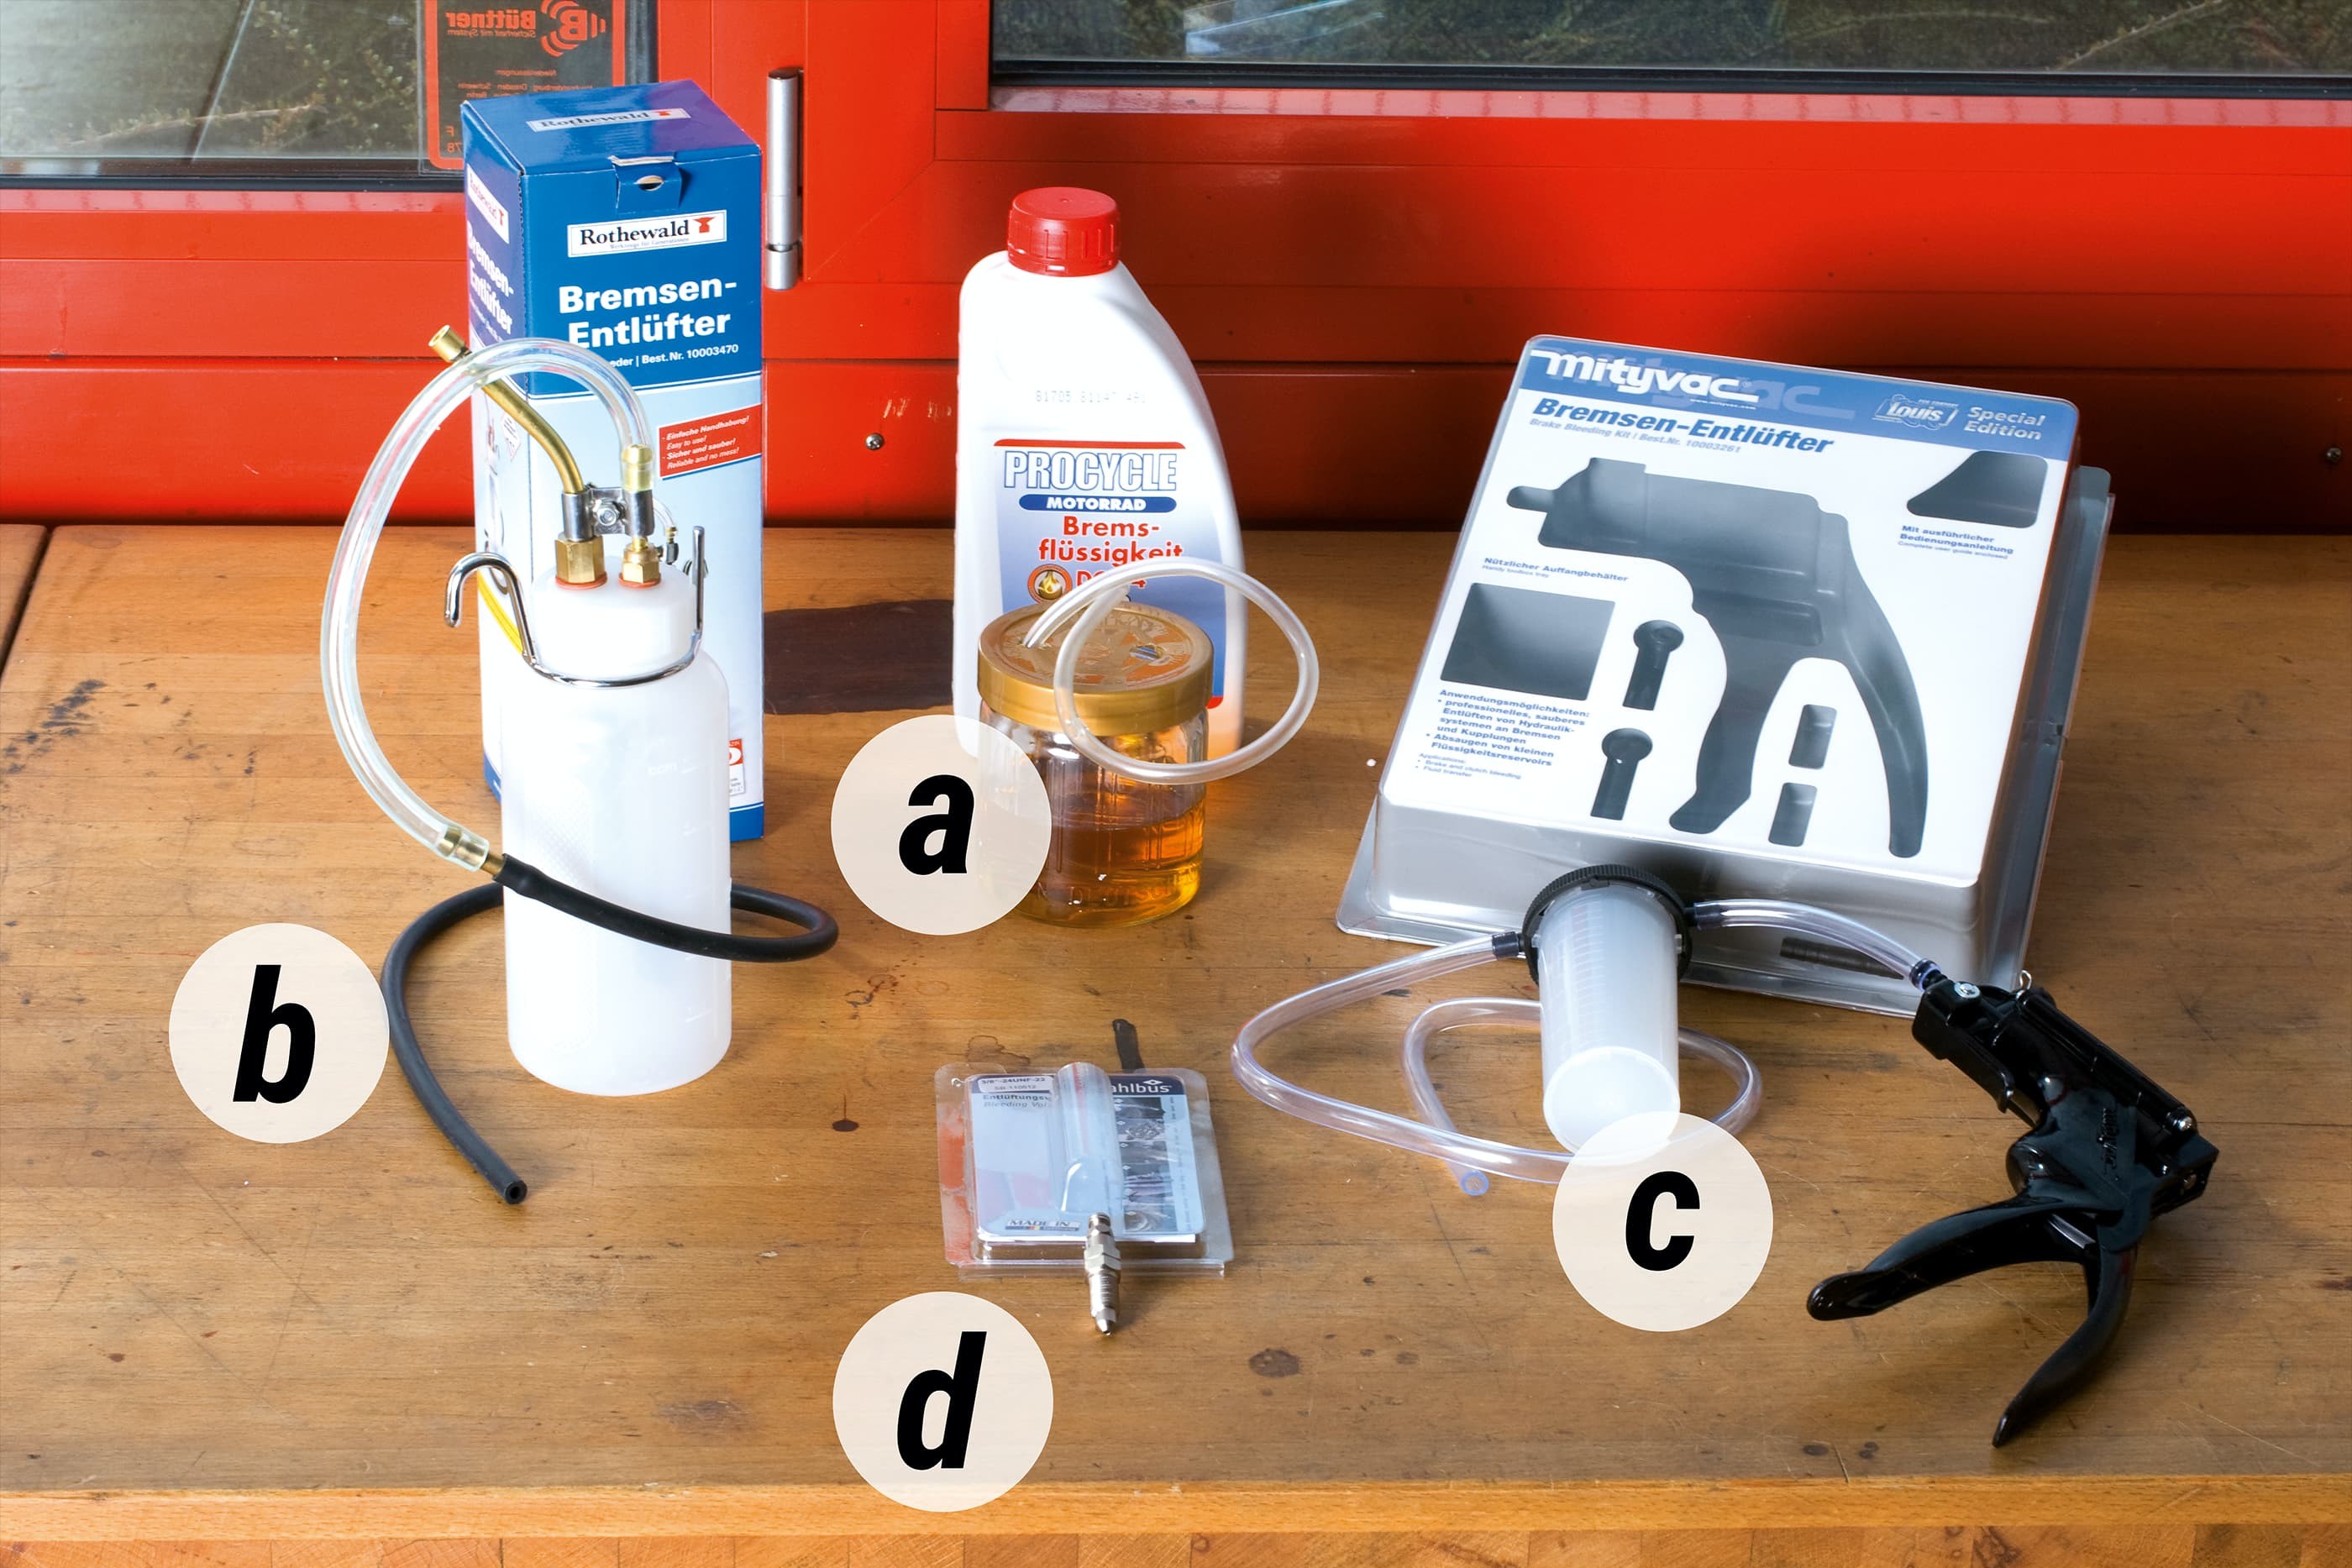
A range of tools are available for bleeding the system
- Abb. 1a – transparent tube with empty vessel
- Abb. 1b – brake bleeder with a check valve
- Abb. 1c – vacuum pump
- Abb. 1d – Stahlbus bleeder valve which incorporates a check valve
Bleeding the brakes
The old brake fluid can be removed and the braking system also bled at the same time in two ways, namely either by pumping out the fluid with the brake lever/brake pedal into a collection vessel or by drawing it off with a vacuum pump (see Fig. 1c).
When pumping out, push the brake fluid through a transparent tube into an empty vessel (see Fig. 1a). Before starting, pour some new brake fluid into this container (approx. 2 cm) to ensure that air cannot be accidentally drawn back into the hydraulic system. Make sure the container is placed on even ground – the end of the tube must remain submerged in the fluid. A safer and easier way is to use a brake bleeder with a check valve (see Fig. 1b), which reliably prevents air from being drawn back in.
Alternatively, a Stahlbus bleeder valve which incorporates a check valve (see Fig. 1d) is also very suitable for this job and replaces the original brake bleeder valve. It remains permanently on the vehicle and helps significantly with all future brake maintenance.
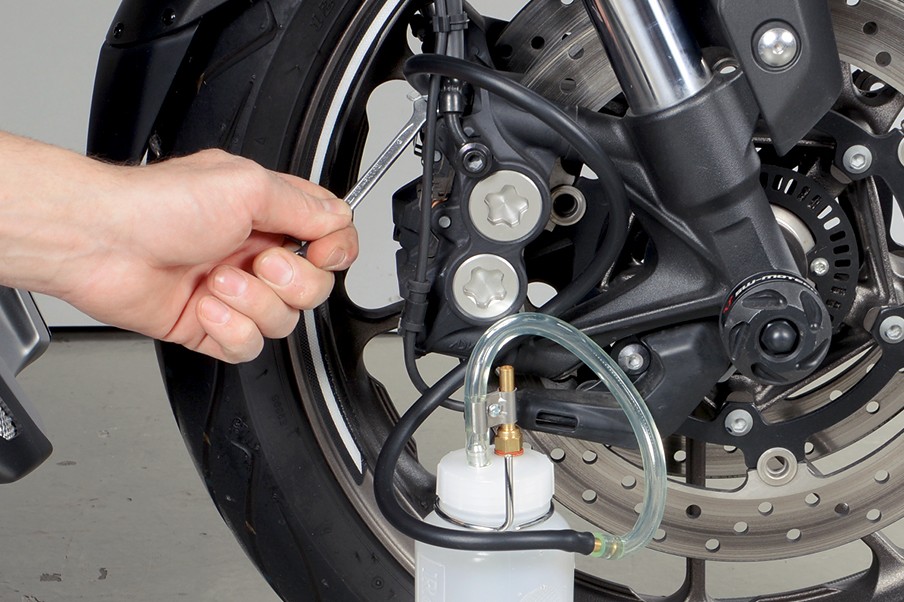
Brake bleeder with check valve.
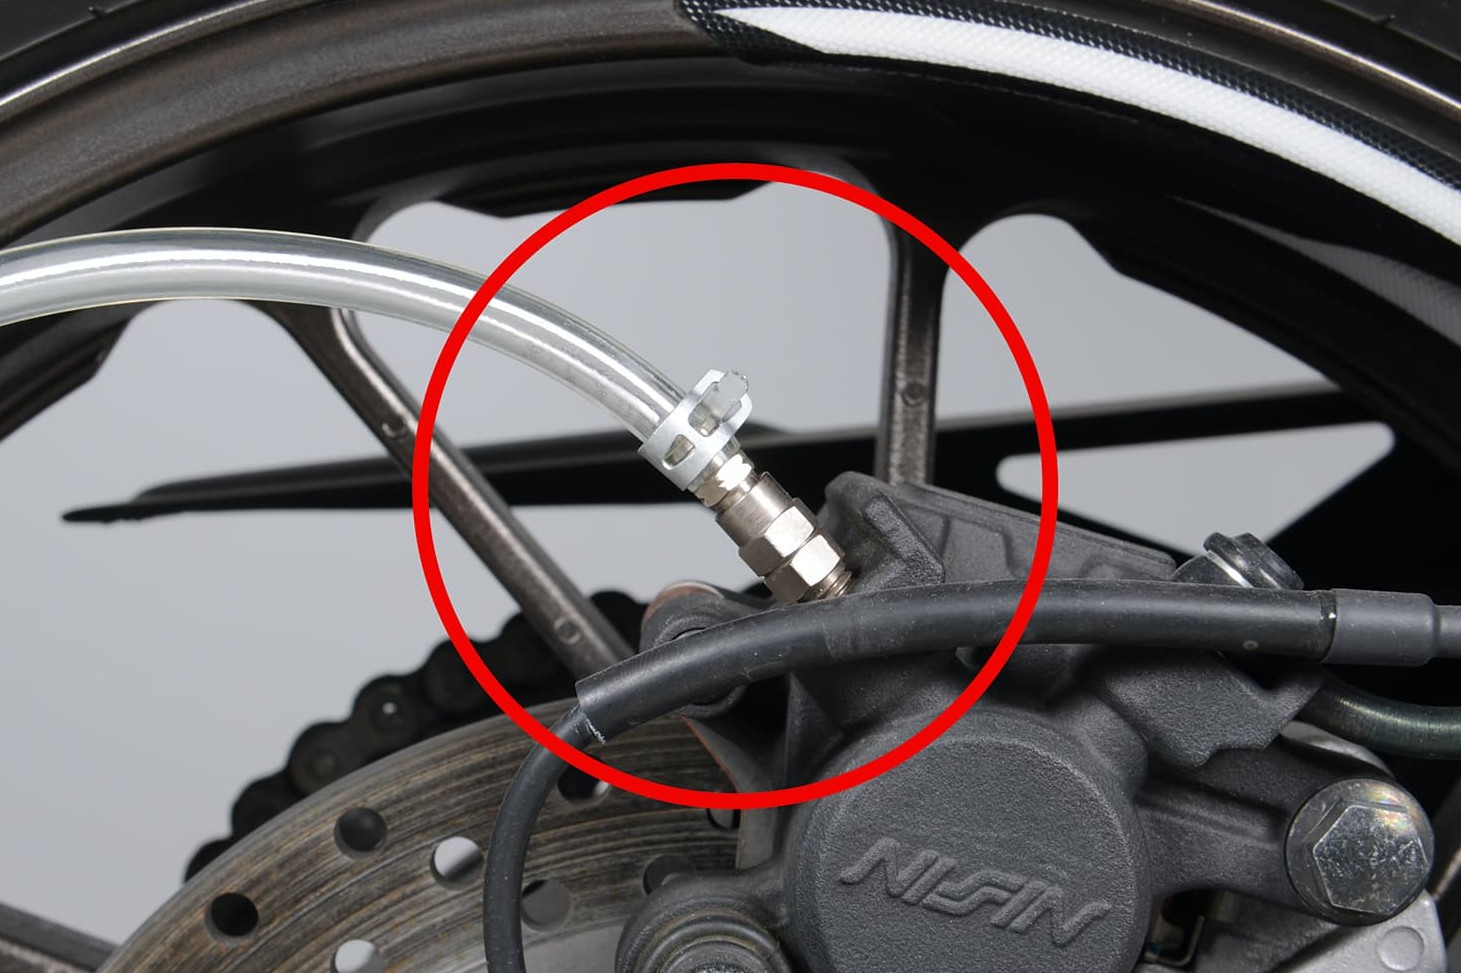
Stahlbus bleeder valve
When bleeding, you should keep an eye on the fill level in the reservoir of the system: Never allow this to run empty as otherwise air will re-enter the system and you will have to start all over again. Always fill with fresh fluid in good time!
The reservoir can empty in no time at all when using a vacuum pump, especially in the case of the low-volume reservoirs and brake calipers typically found on crossers and scooters. In this case, a better option is to bleed by pumping the brake lever/brake pedal. A vacuum pump on the other hand, makes work considerably easier if the brake lines are long and the volumes of fluid in the reservoir and brake caliper are very large.
Changing brake fluid – now let's get started
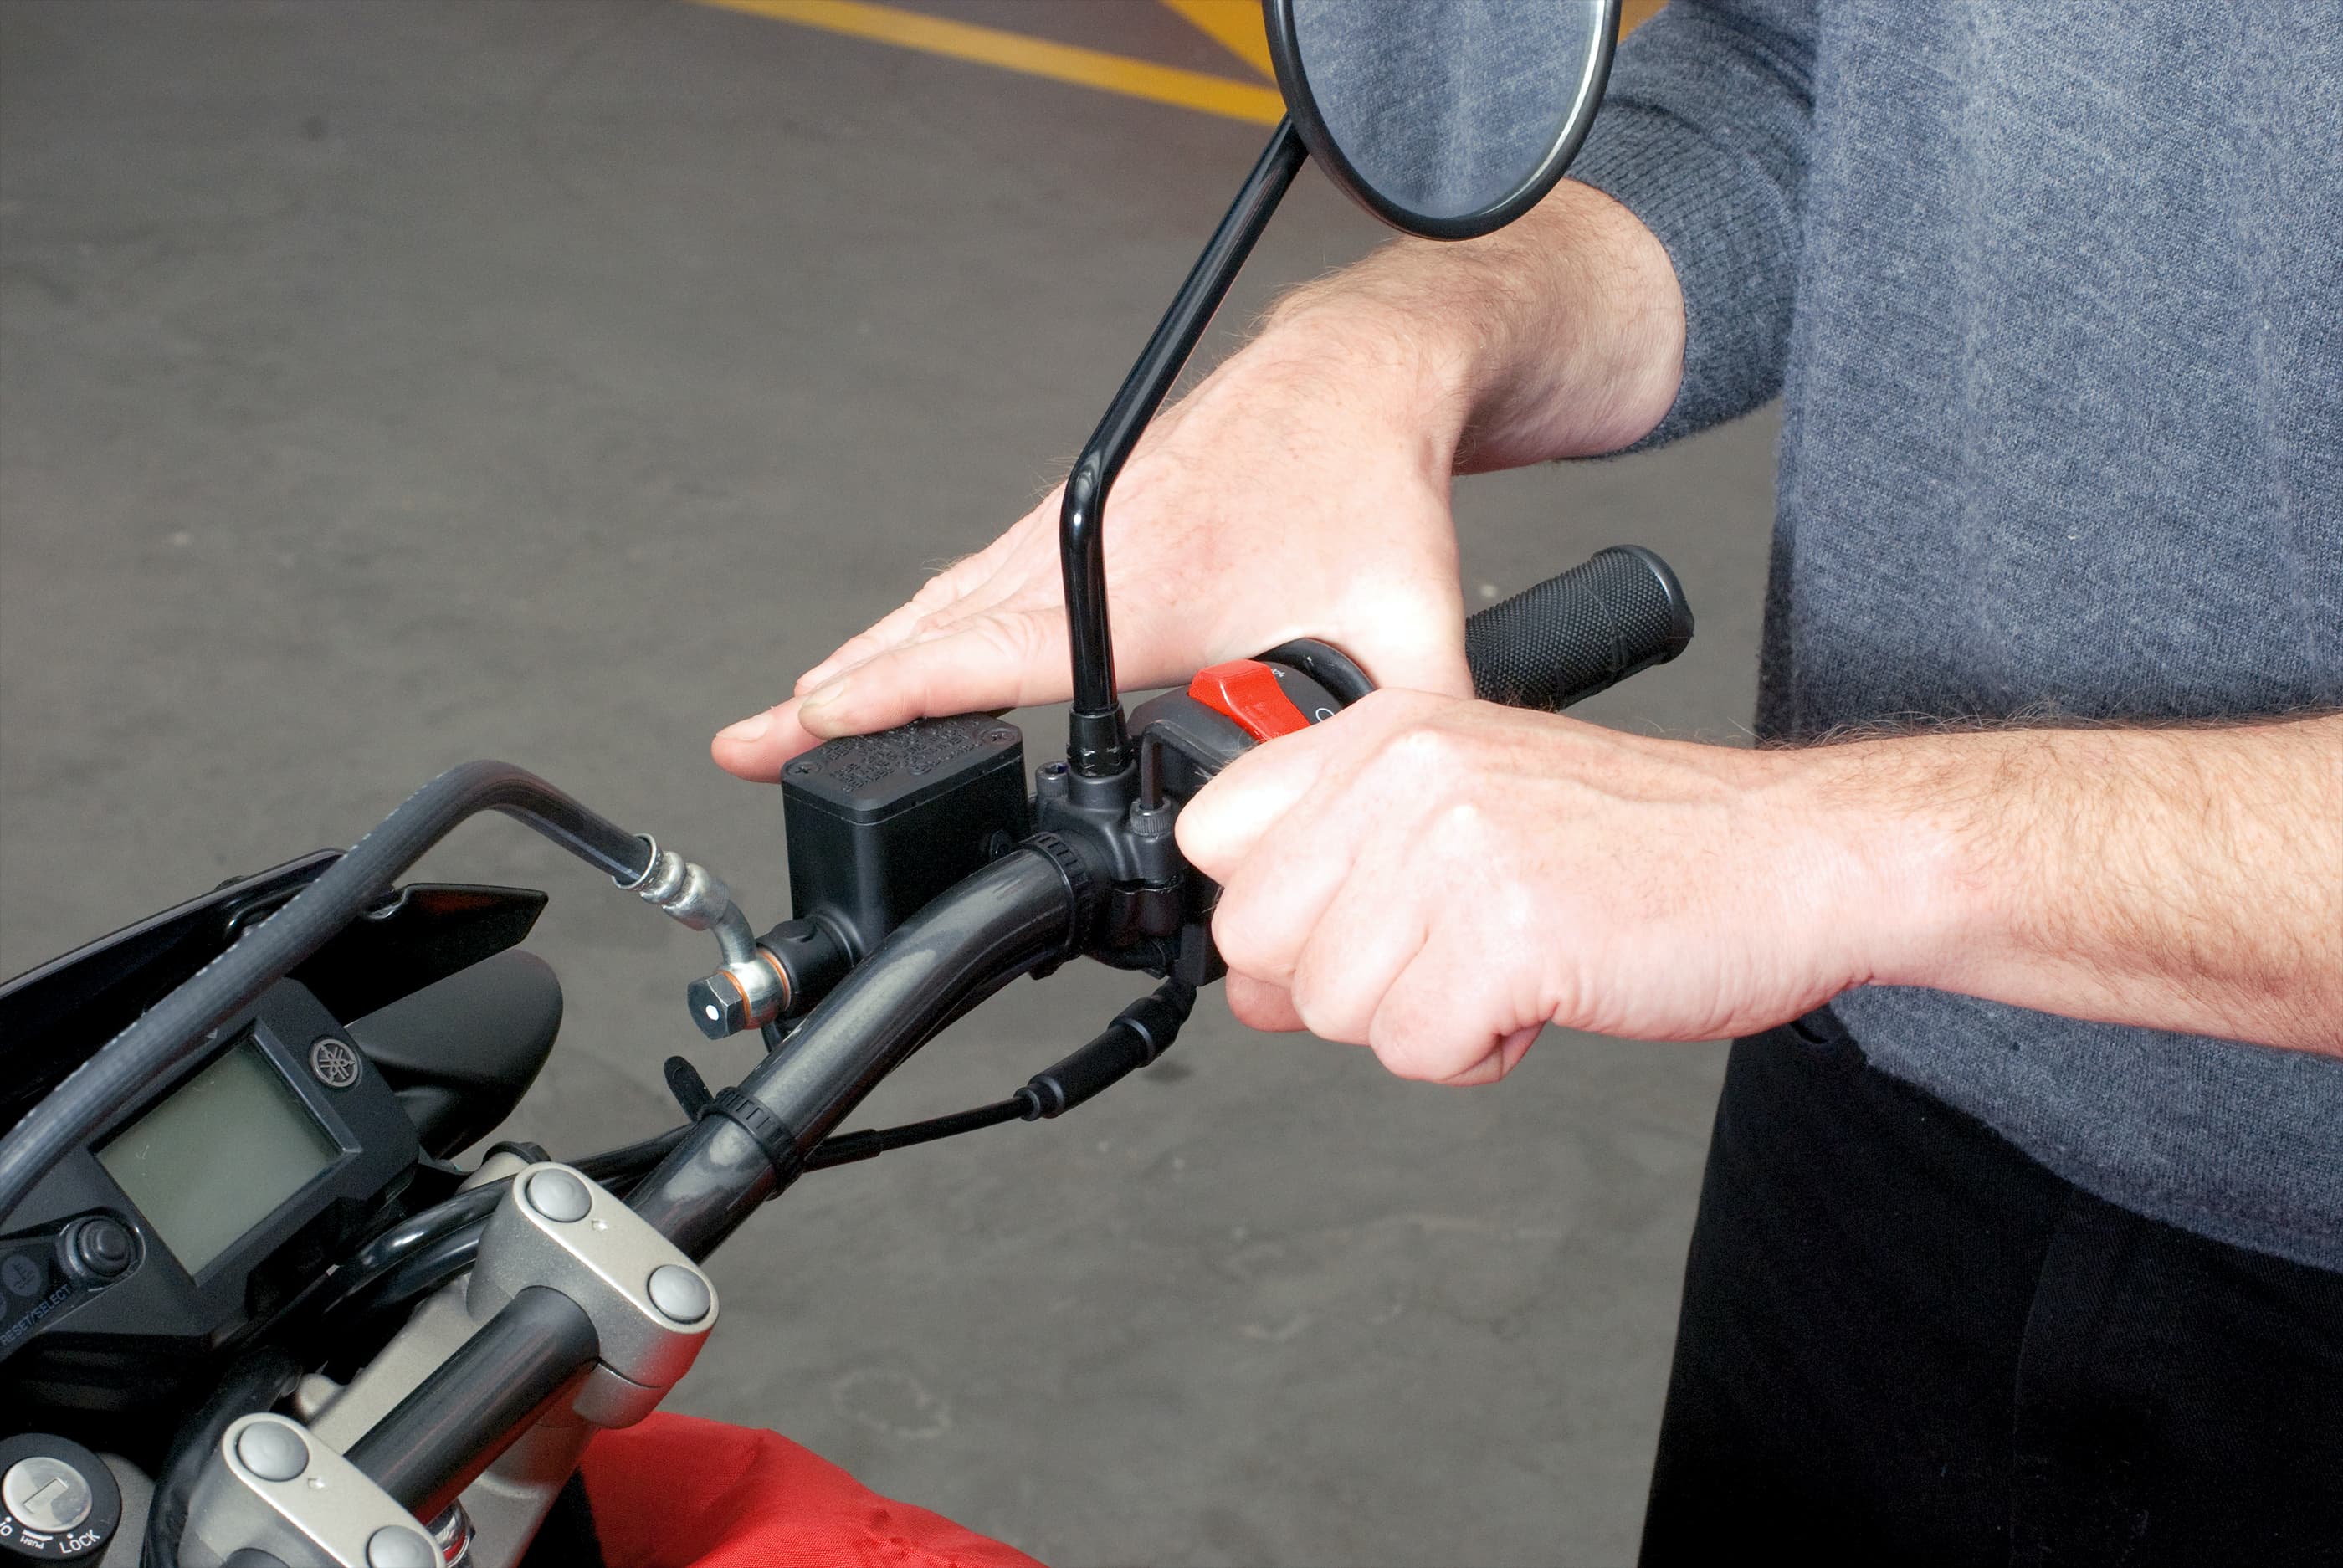
Method 1, step 1: align the brake fluid reservoir horizontally
Method 1: change fluid via the hand lever or foot lever
01 – Align the brake fluid reservoir horizontally
The vehicle must first of all be securely jacked up. It should be standing so that the brake fluid reservoir (when still closed) is roughly horizontal. The best way to do this is to use a suitable paddock stand for the relevant vehicle model. Information on jacking up can be found in our DIY tips Basic knowledge of paddock stands.
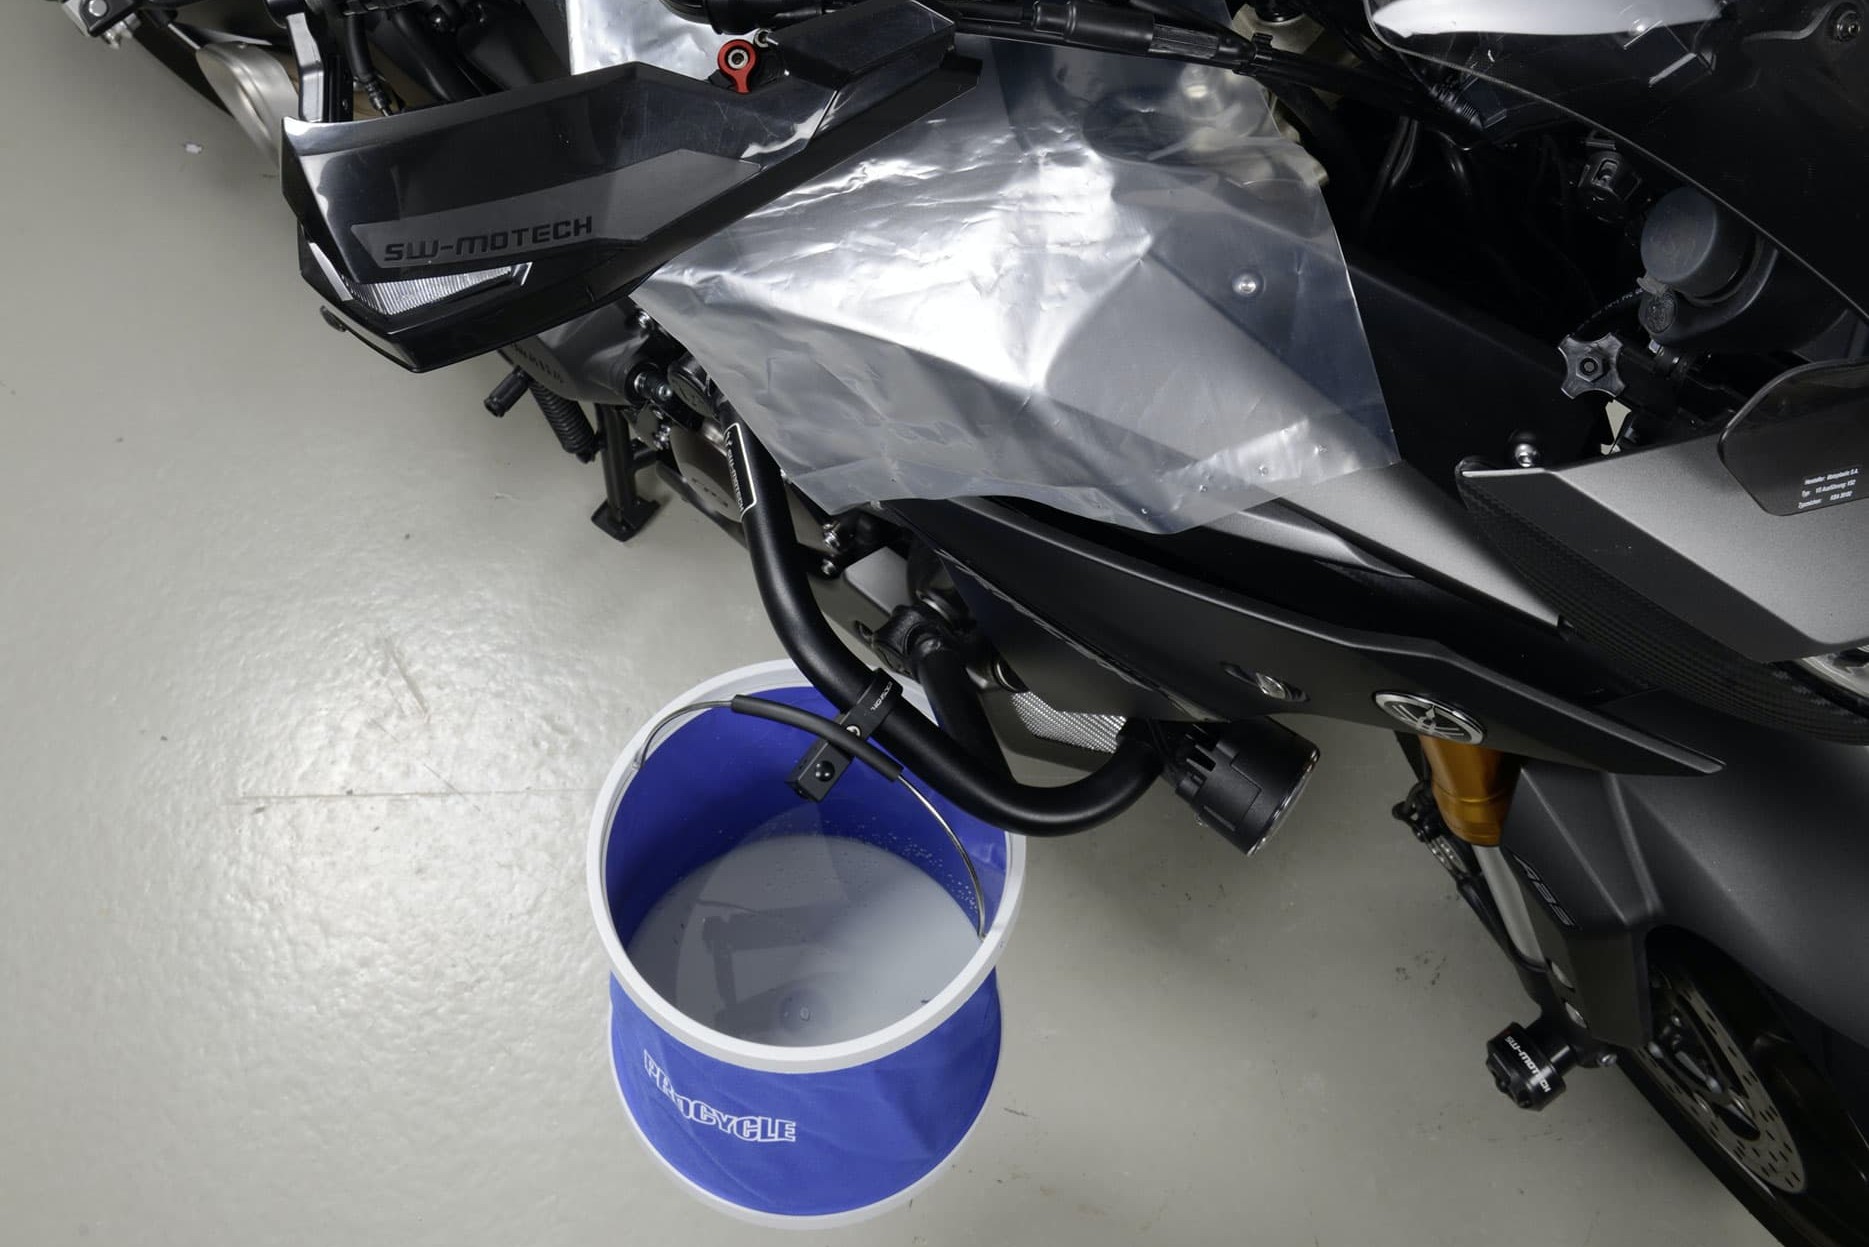
Method 1, step 2: preparing the workplace
02 – Preparing the workplace
Now cover all painted parts of the motorcycle with a suitable plastic film or similar so that splashes of brake fluid cannot cause any problems. It's no harm to be a bit pedantic when carrying out this work as very few people can do this without at least some small spillages. It would after all be a shame to spoil the appearance of your bike. To be on the safe side, have a bucket of clear water handy just in case.
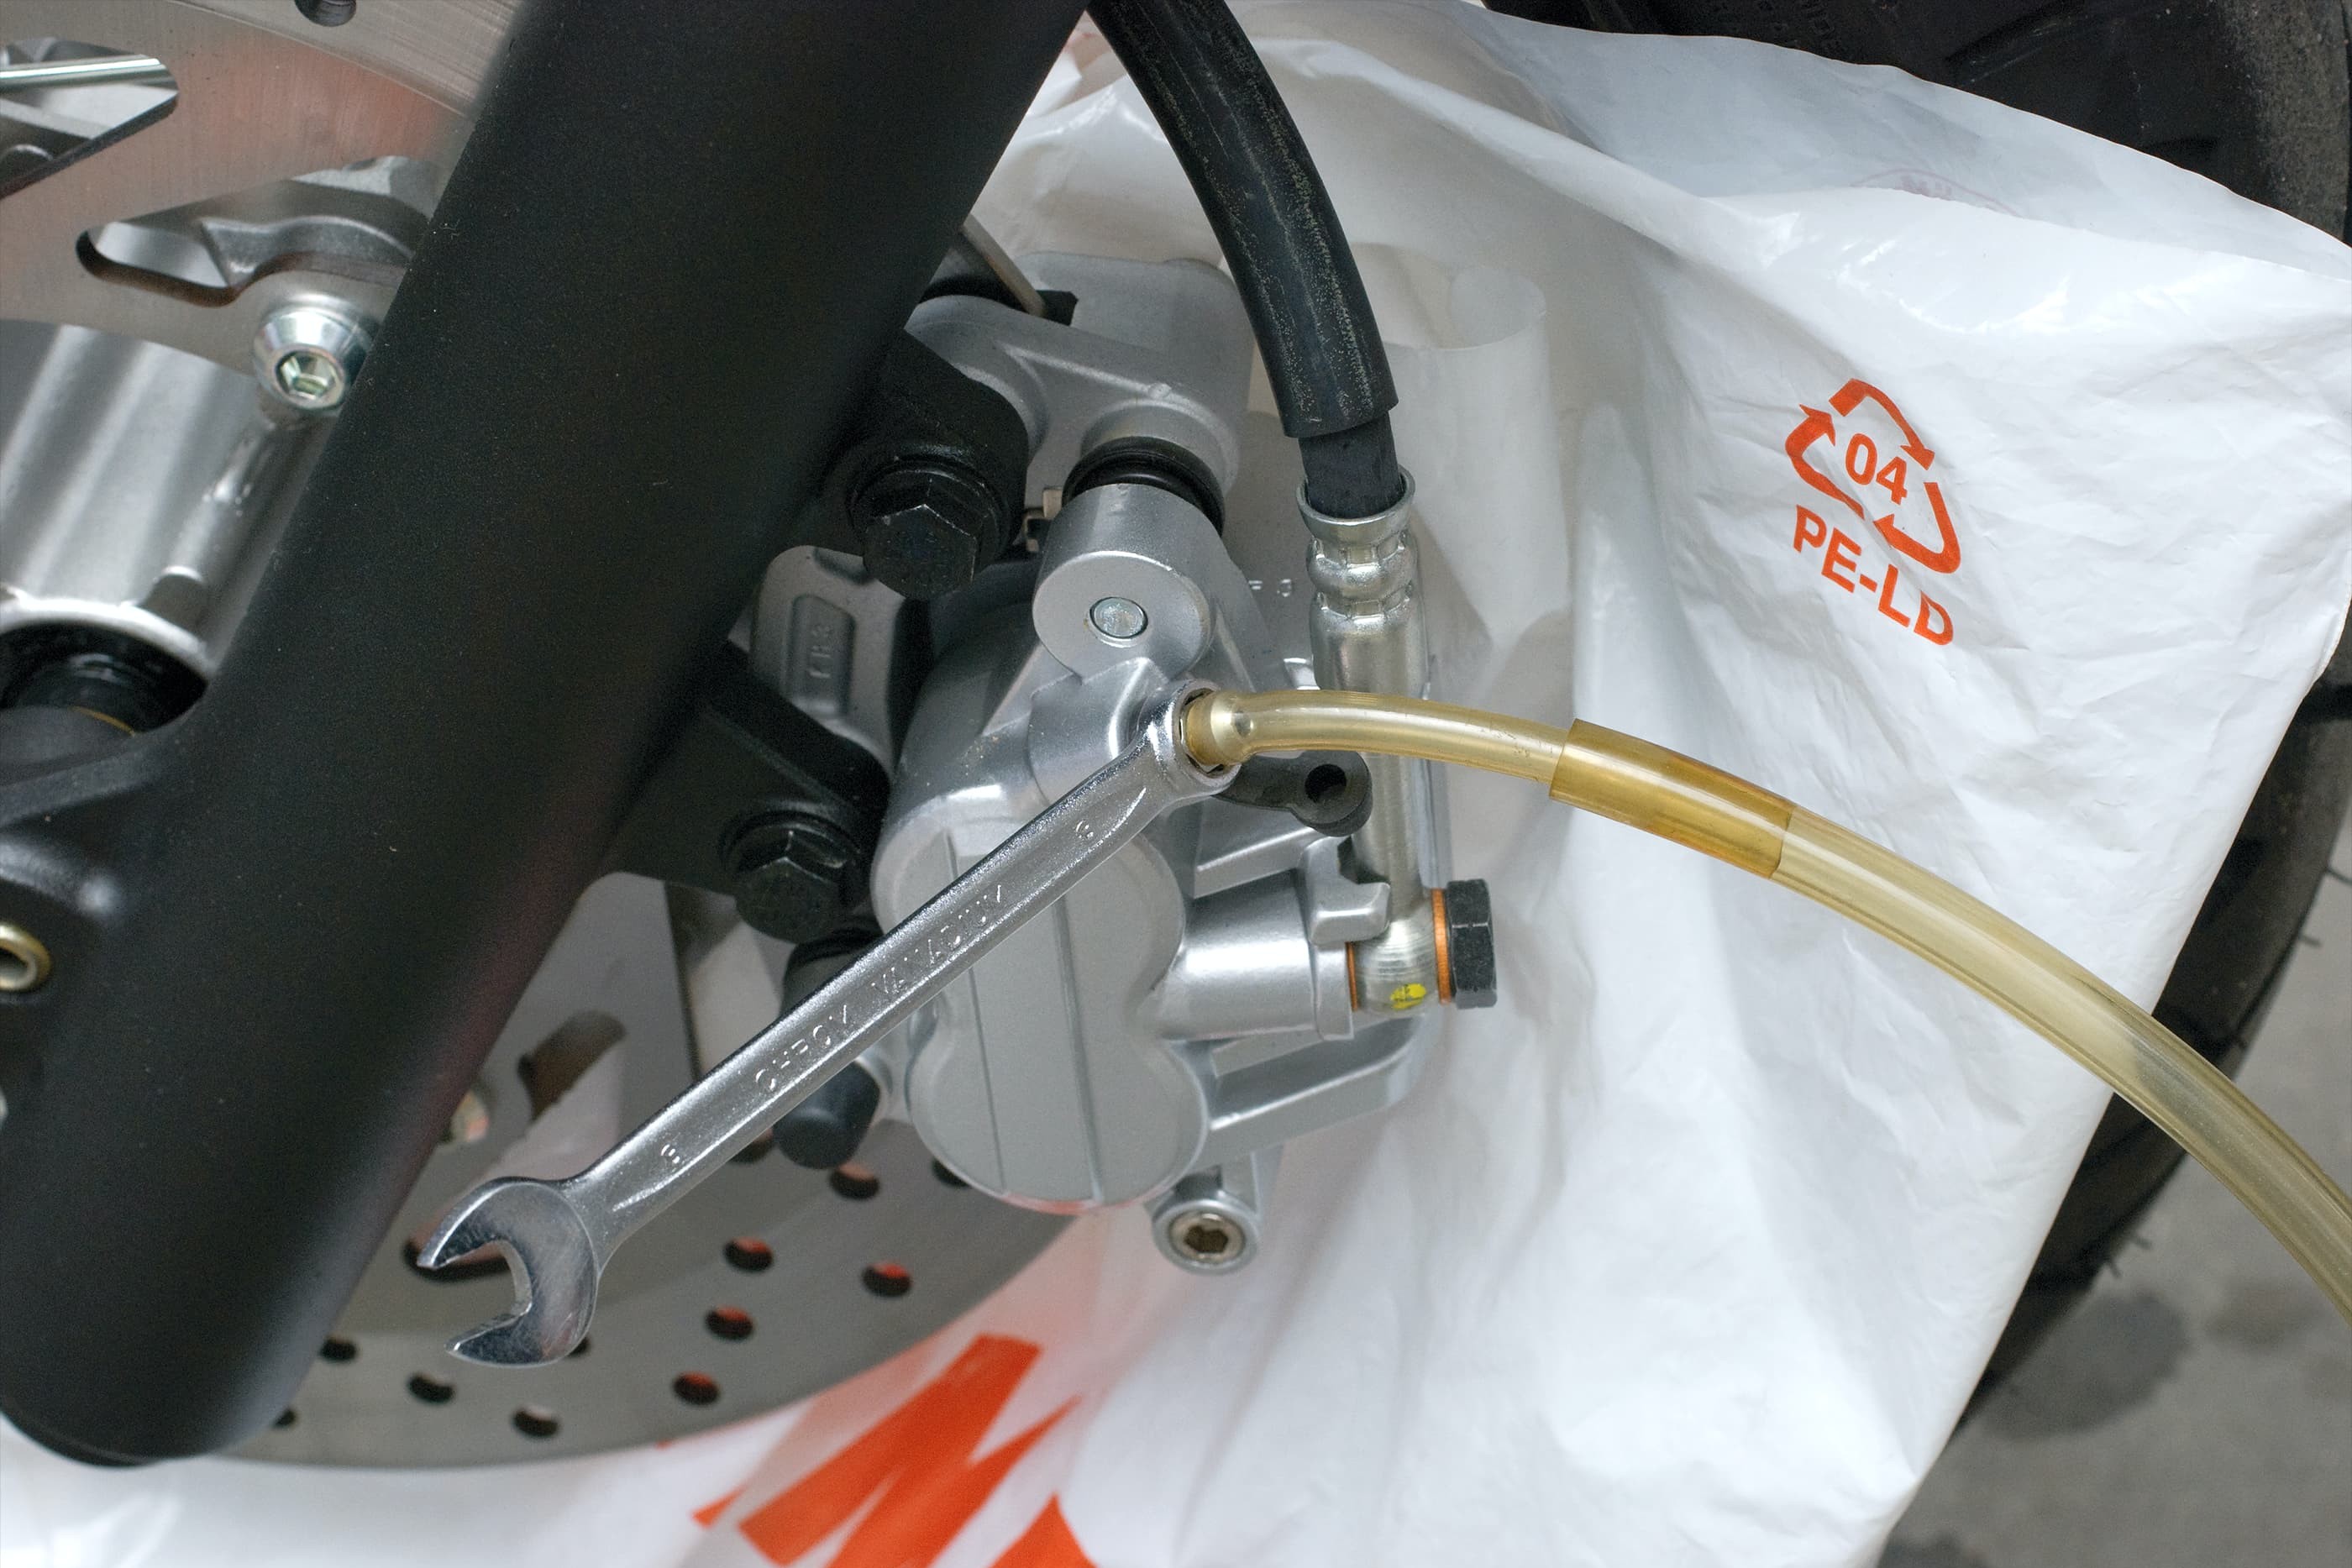
Method 1, step 3: push on the box end wrench and attach the tube
03 – Push on the box end wrench and attach the tube
The brake system is initially bled at the bleeder valve which is furthest from the brake fluid reservoir. To do this, fit a suitable box end wrench on the brake calliper bleeder valve and attach the tube for the brake bleeder or container. Make sure that the tube is securely attached to the bleeder valve and cannot slip back off on its own. If you are using an older tube, it is helpful to cut a small piece off the end using side cutters to ensure a firm grip. Make sure the hose is securely fitted to the bleeder valve and that the valve is not loose in its thread as either of these situations can cause a thin line of air bubbles to form in the tube. To be absolutely on the safe side, you could fasten the tube, e.g. using a clip or cable tie.
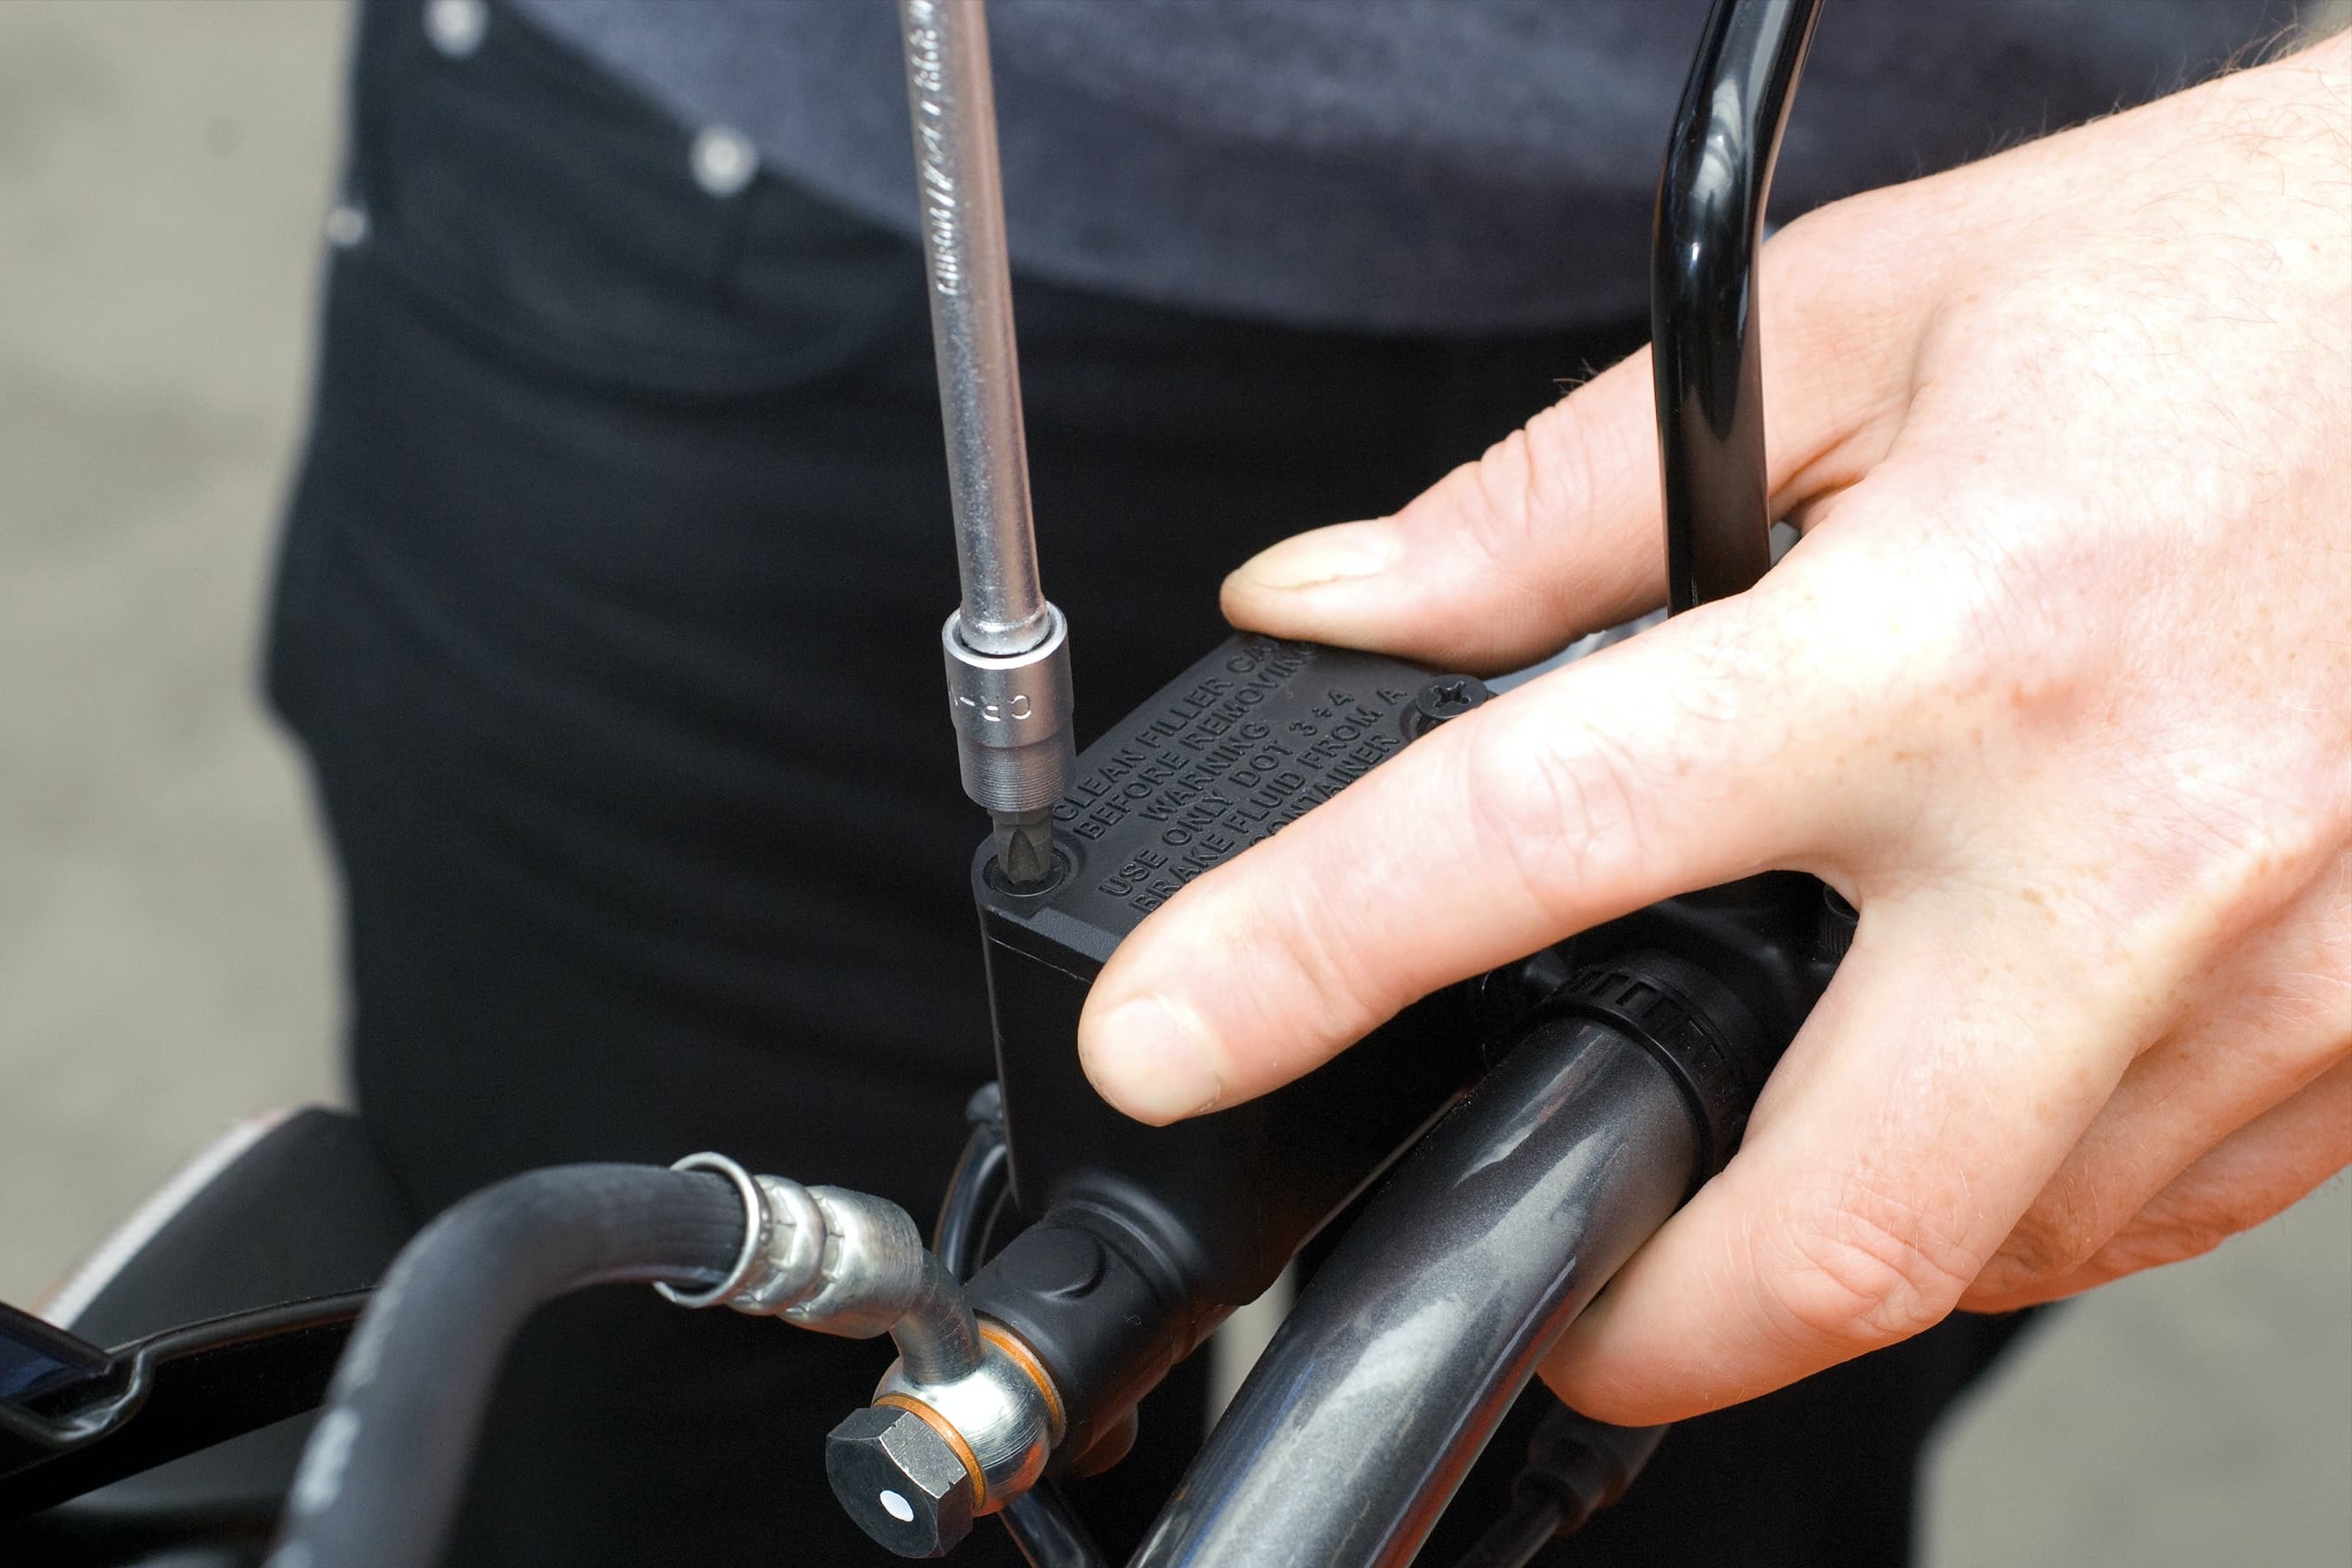
Method 1, step 4: carefully unscrew the cover
04 – Carefully unscrew the cover
Carefully remove the screws of the brake fluid reservoir cover. When turning cross-head screws, be sure to use a screwdriver that fits well, as these screws are very easy to strip. Seized screws can be loosened by tapping gently on the screwdriver with a hammer. Carefully open the cover of the brake fluid reservoir and place it together with the rubber insert neatly to one side.
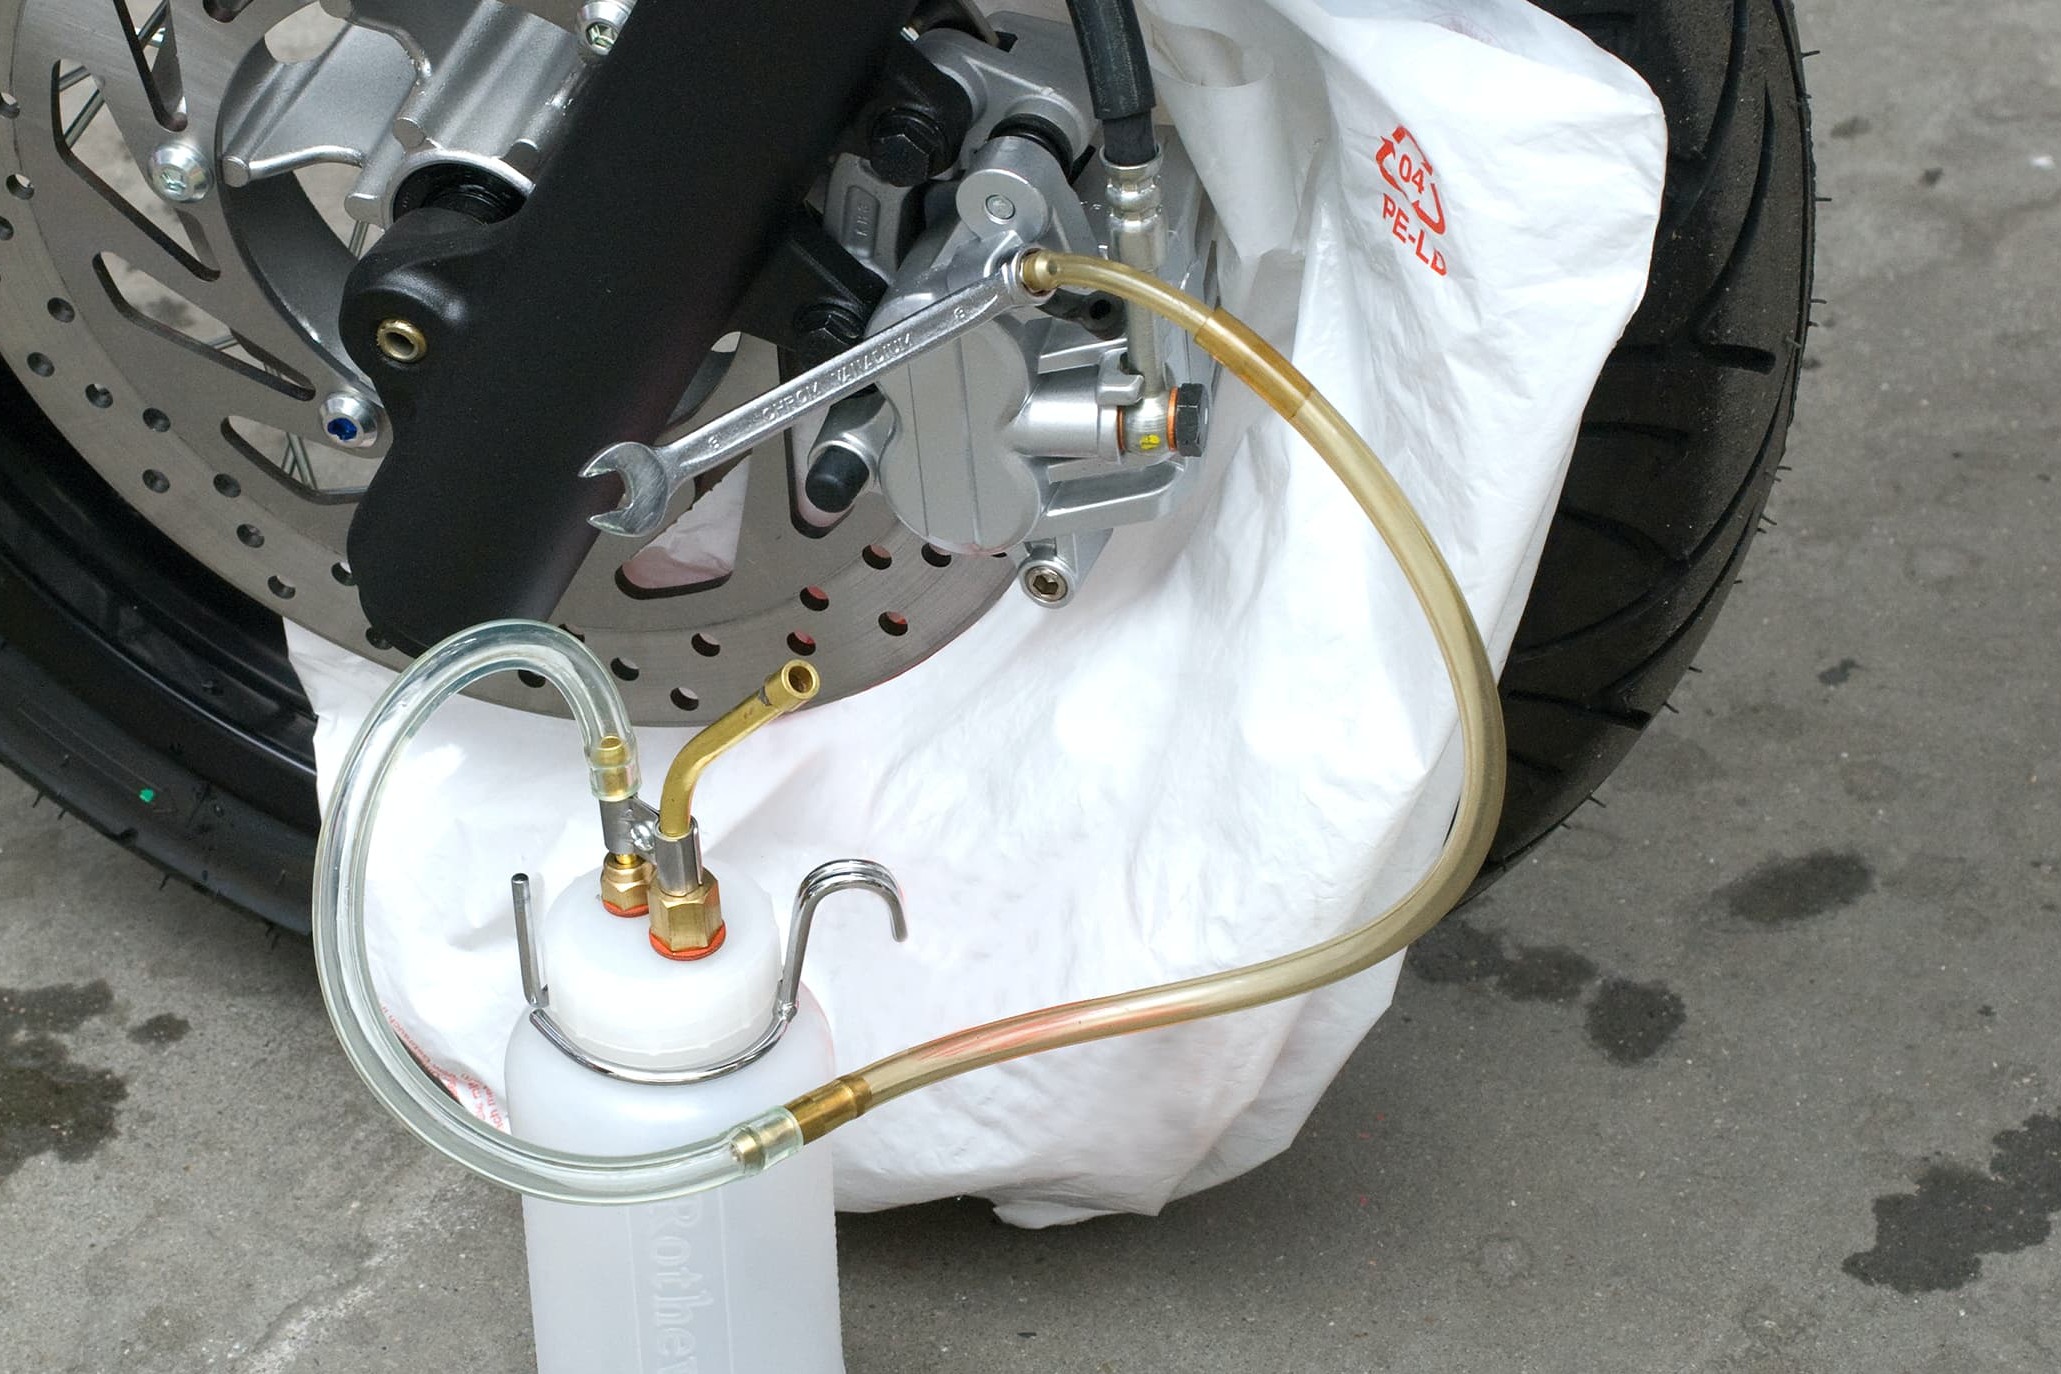
Method 1, step 5: open the bleeder valve and pump out fluid
05 – Open the bleeder valve and pump out fluid
Now carefully open the bleeder valve with the box end wrench by turning it through one half revolution. A snug fitting wrench should also be used in this case as the valve will normally be quite difficult to turn if it has not been opened in a while.
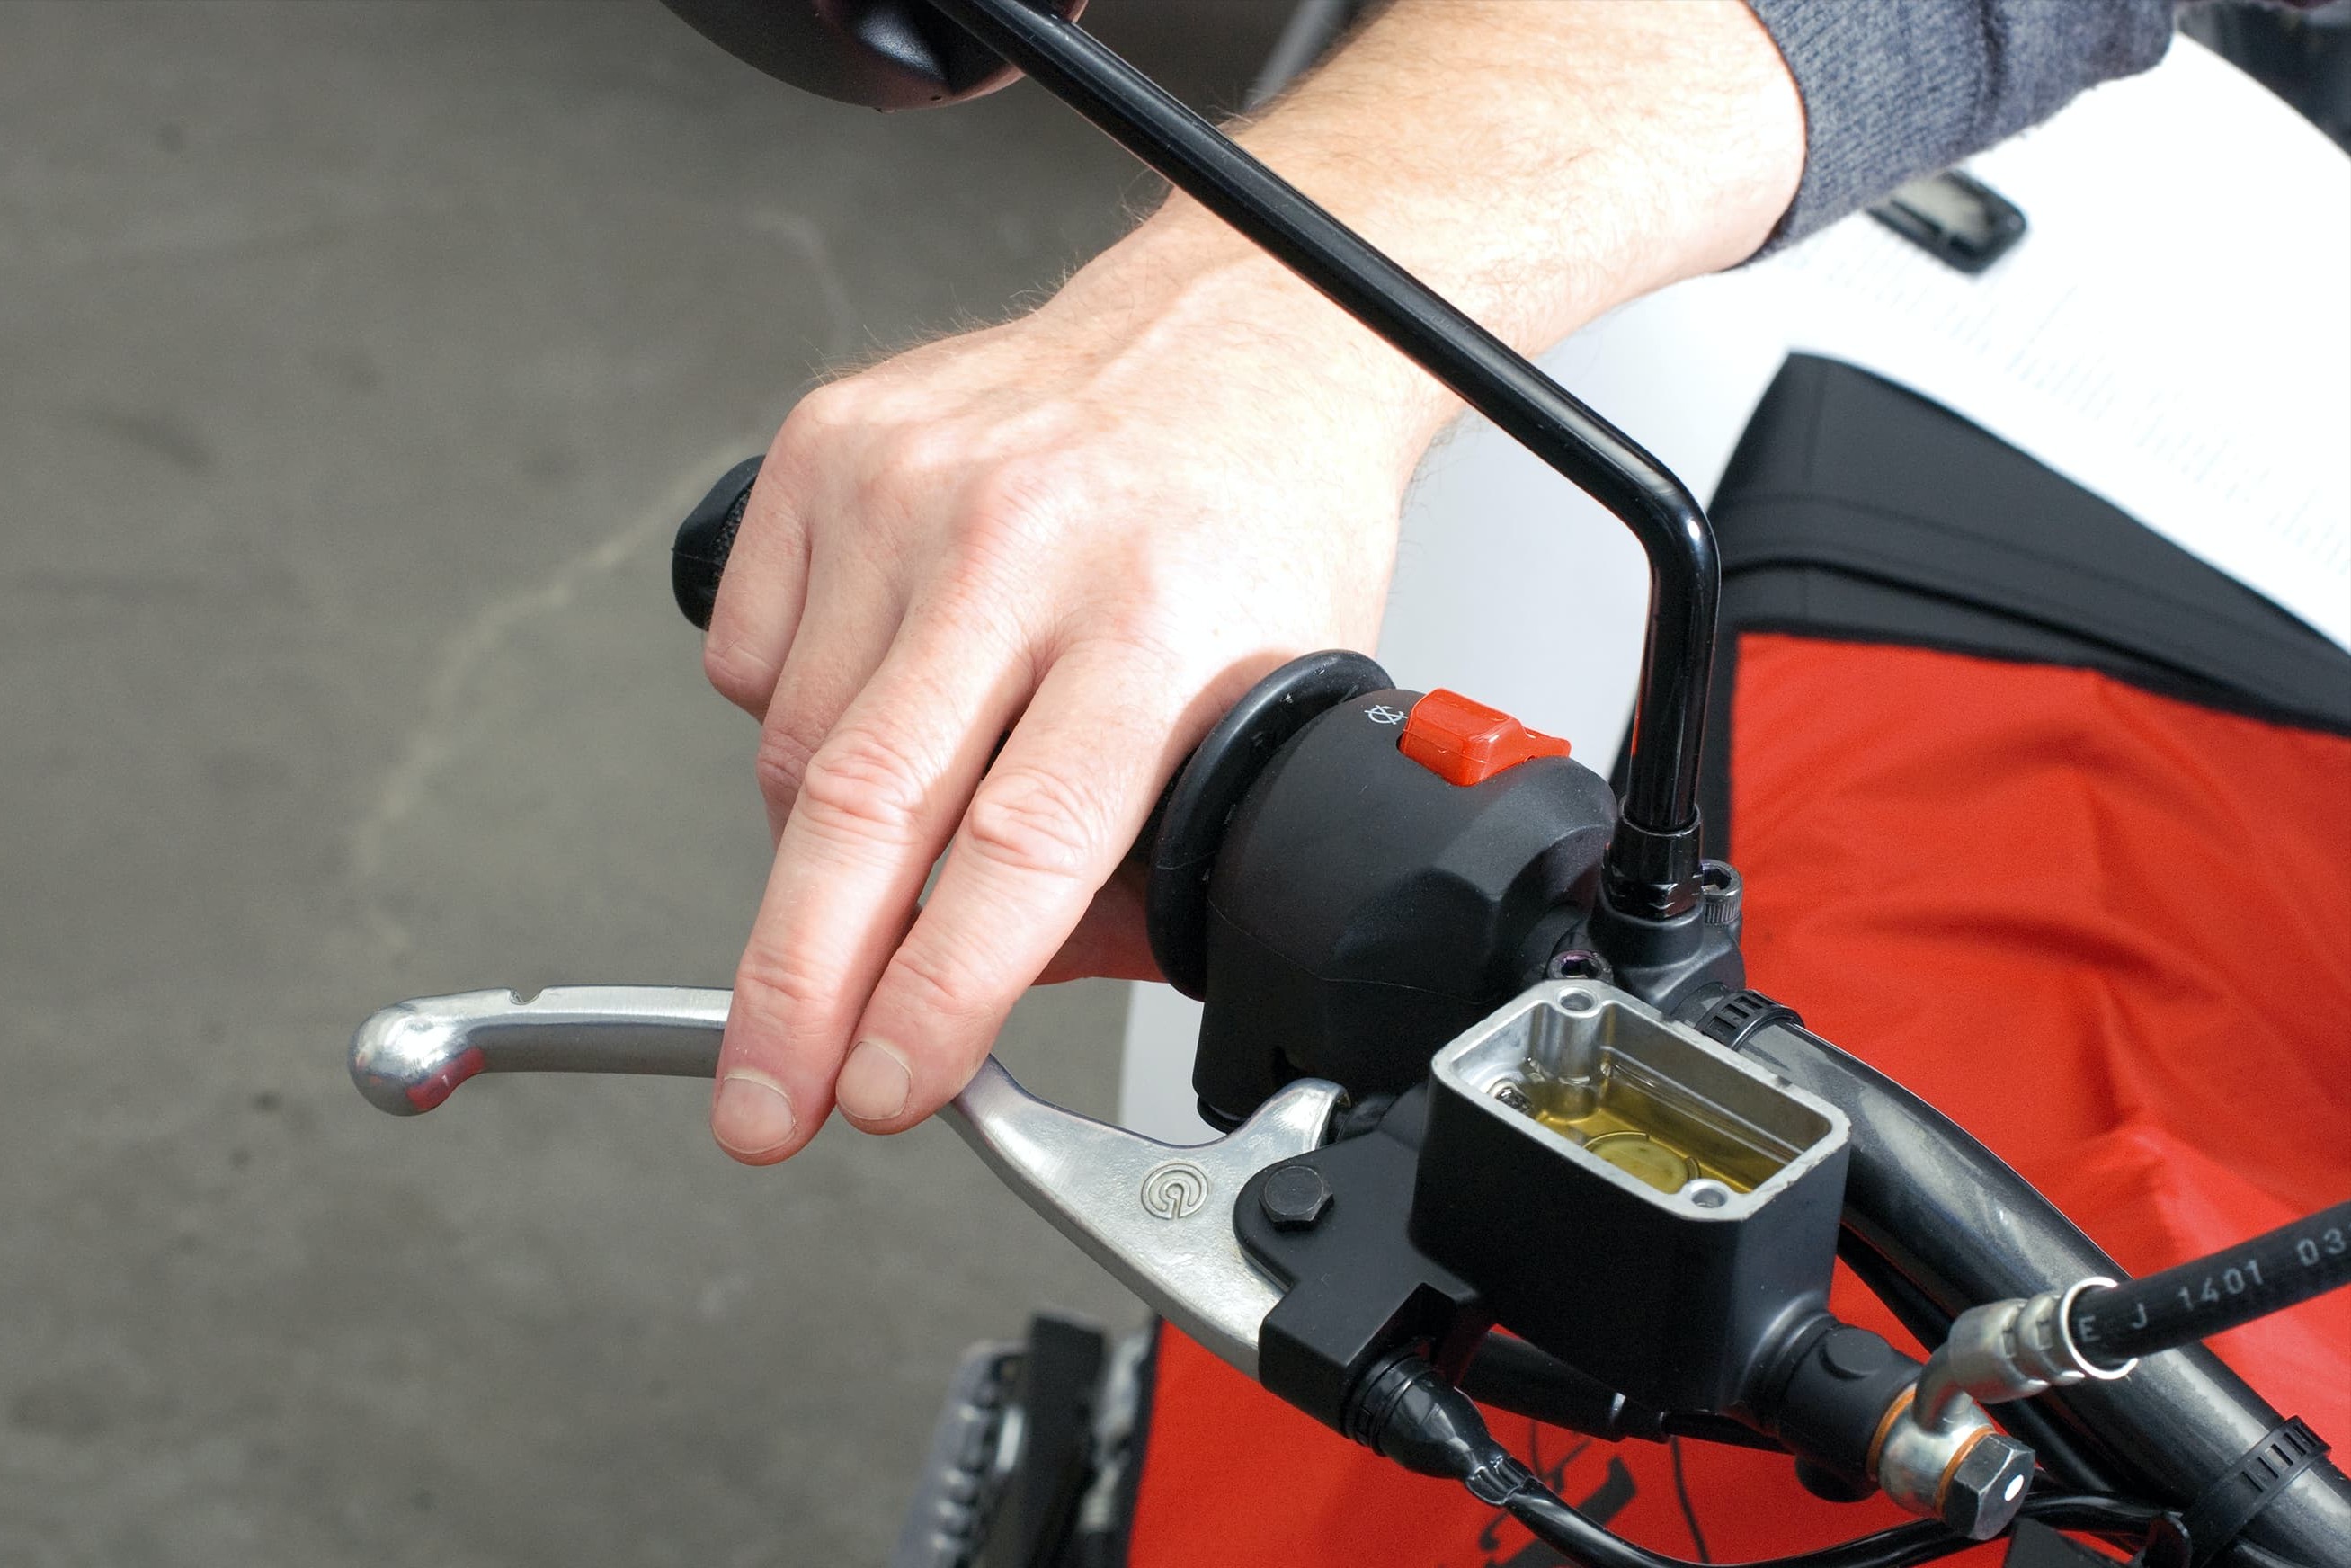
Method 1, step 6, Fig. 1: pump out with brake lever
06 – Pump out with brake lever
Pump the old brake fluid out of the system using the brake lever or brake pedal. Do this very carefully, as a number of brake cylinders have a tendency to eject fluid from the vent hole in the brake fluid reservoir with force and splash painted parts of the vehicle. Make sure the brake fluid reservoir never runs empty!
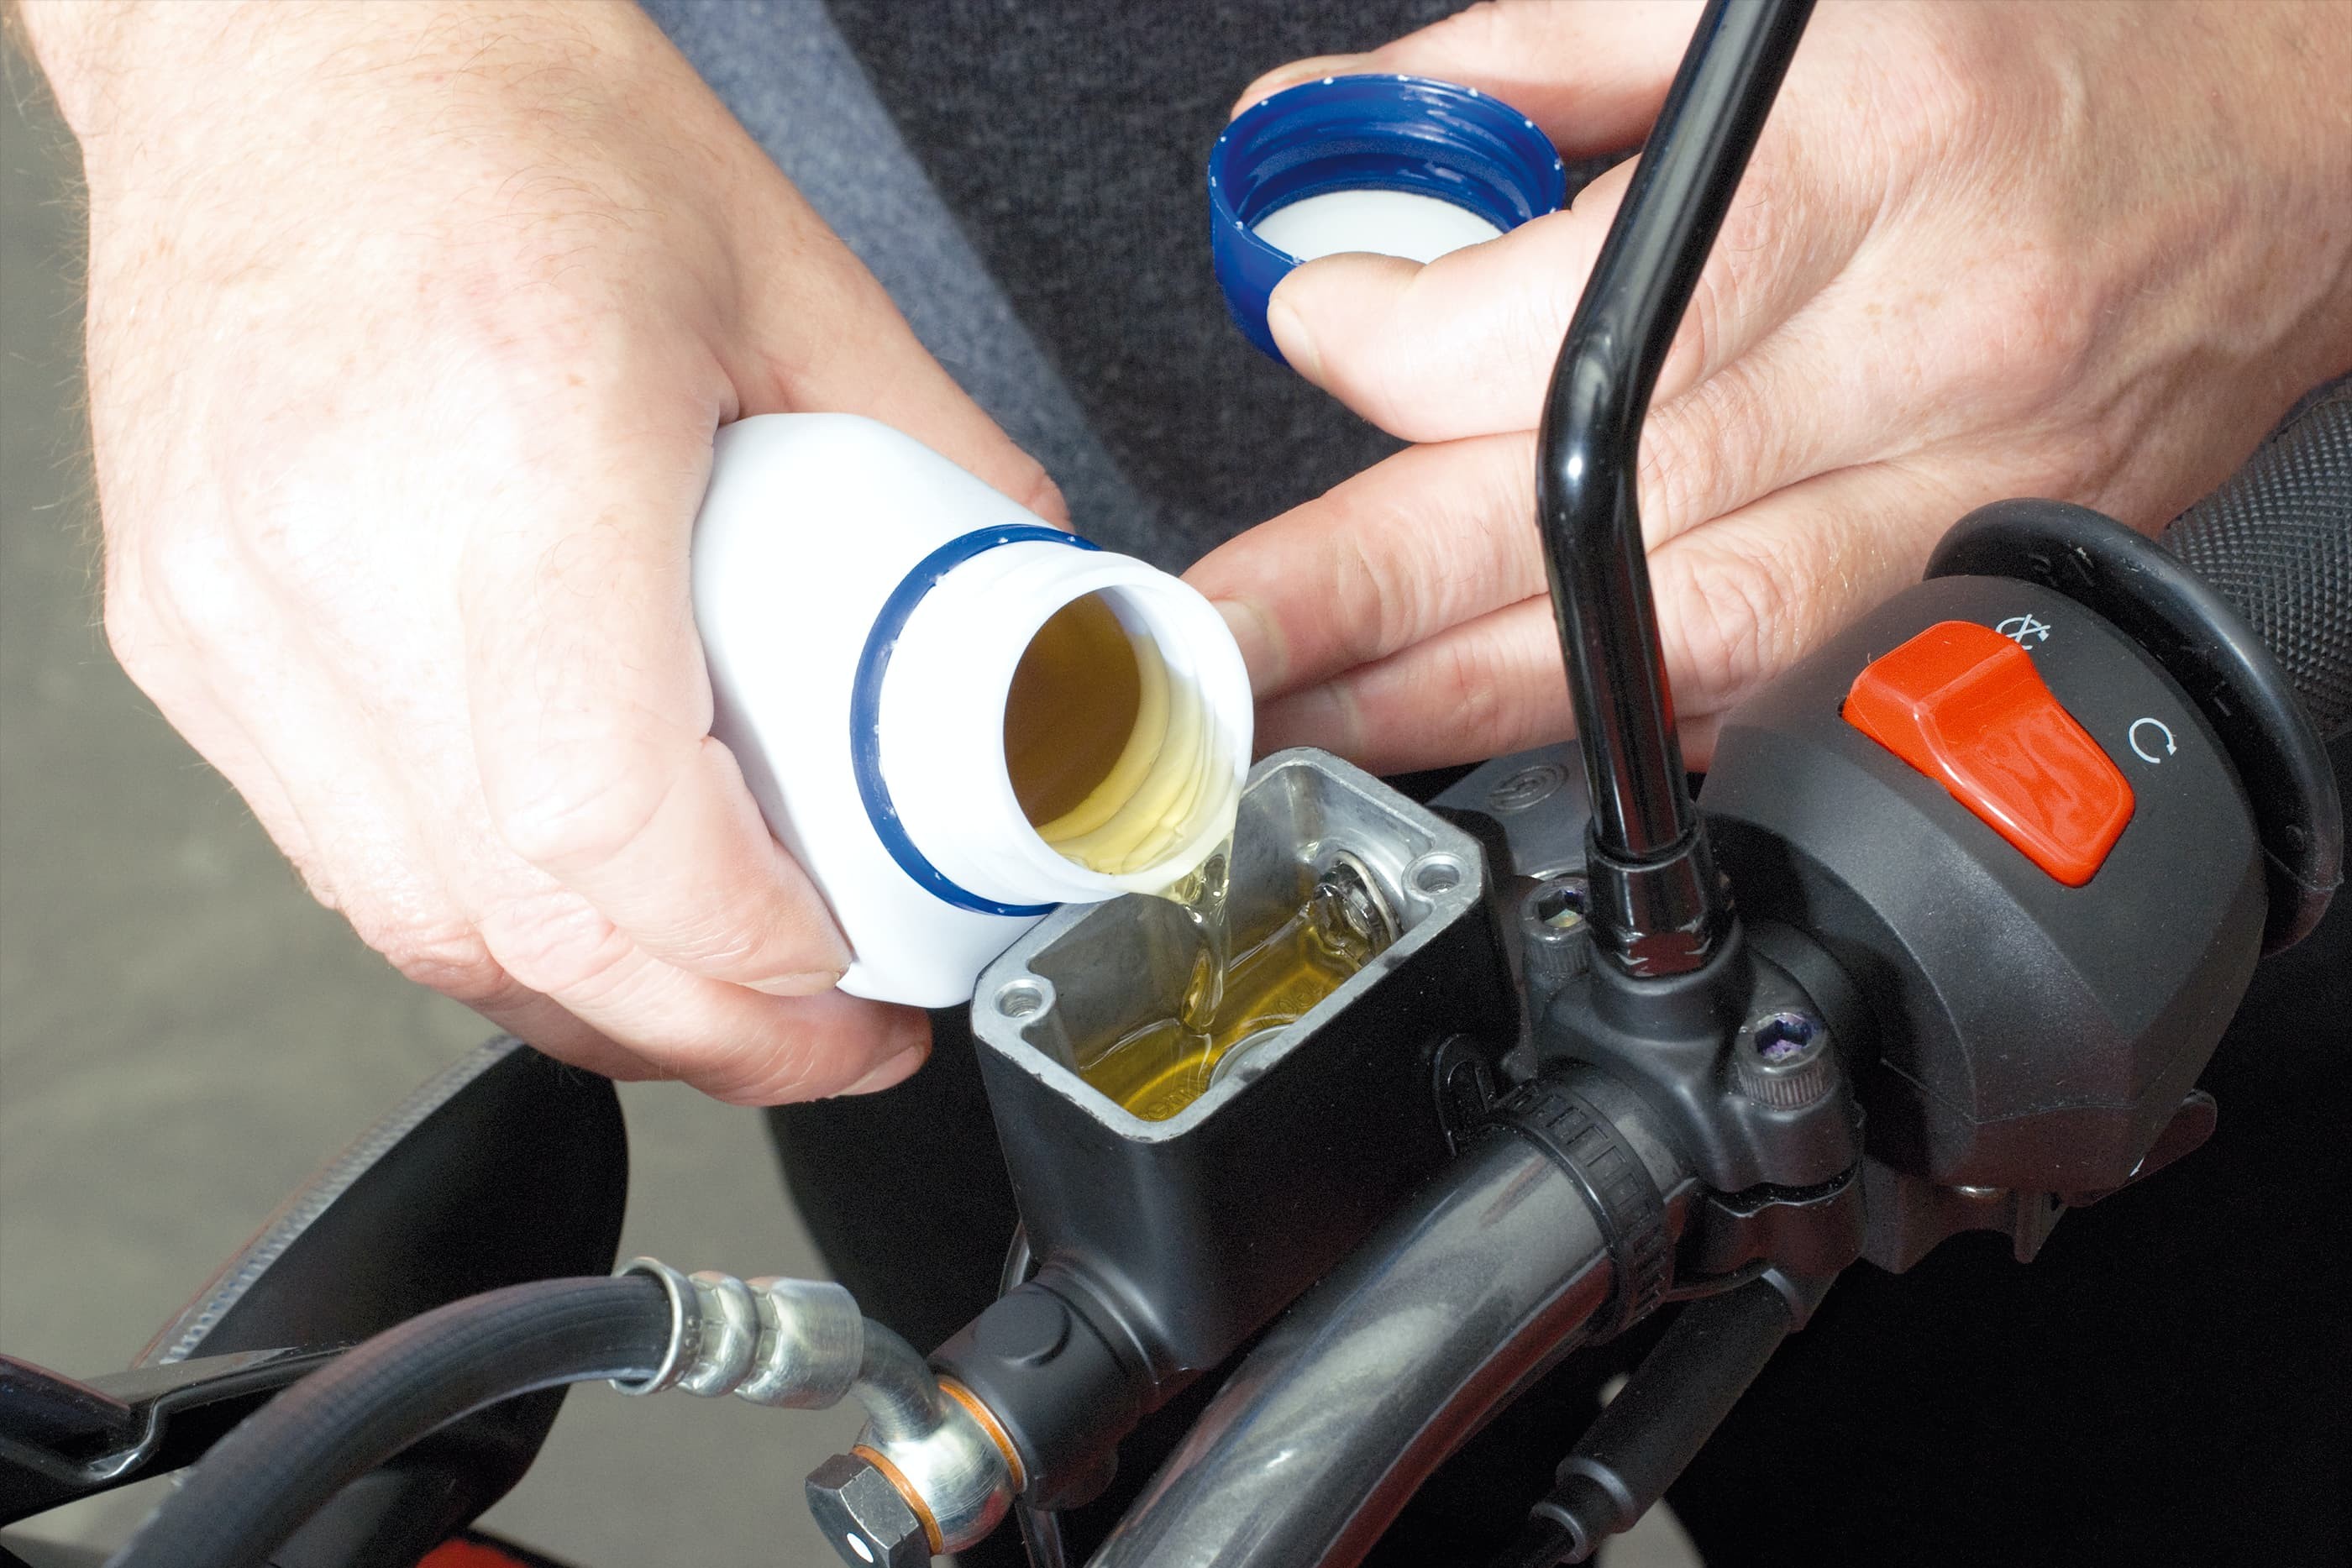
Method 1, step 6, Fig. 2: replenish with new fluid in good time
As you do so, also replenish the brake fluid in the brake fluid reservoir as soon as the level visibly drops – as previously described: Do not allow air to enter the system!
f the fluid does not appear to flow easily, this can be remedied with a small trick: after every pumping operation, close the bleeder valve, then release the lever or pedal, open the valve again and continue pumping. Although slightly more laborious, this procedure is effective and systematically expels air bubbles from the system. You can save yourself the bother altogether by using a brake bleeder with a check valve or the Stahlbus valve, as the check valve prevents the return of fluid or air.
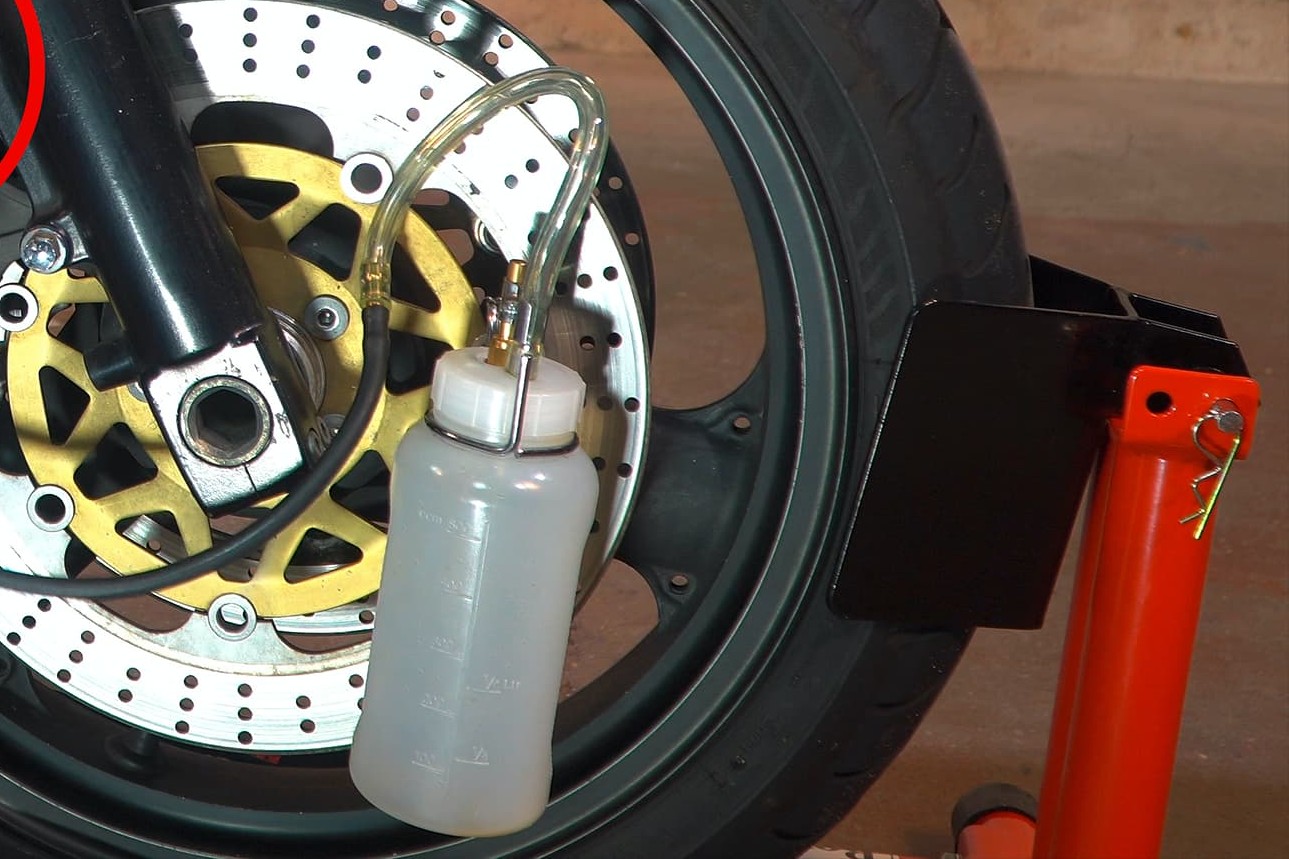
Method 1, step 7, Fig. 1: pump out until only new bubble-free fluid is produced
07 – Pump out liquid
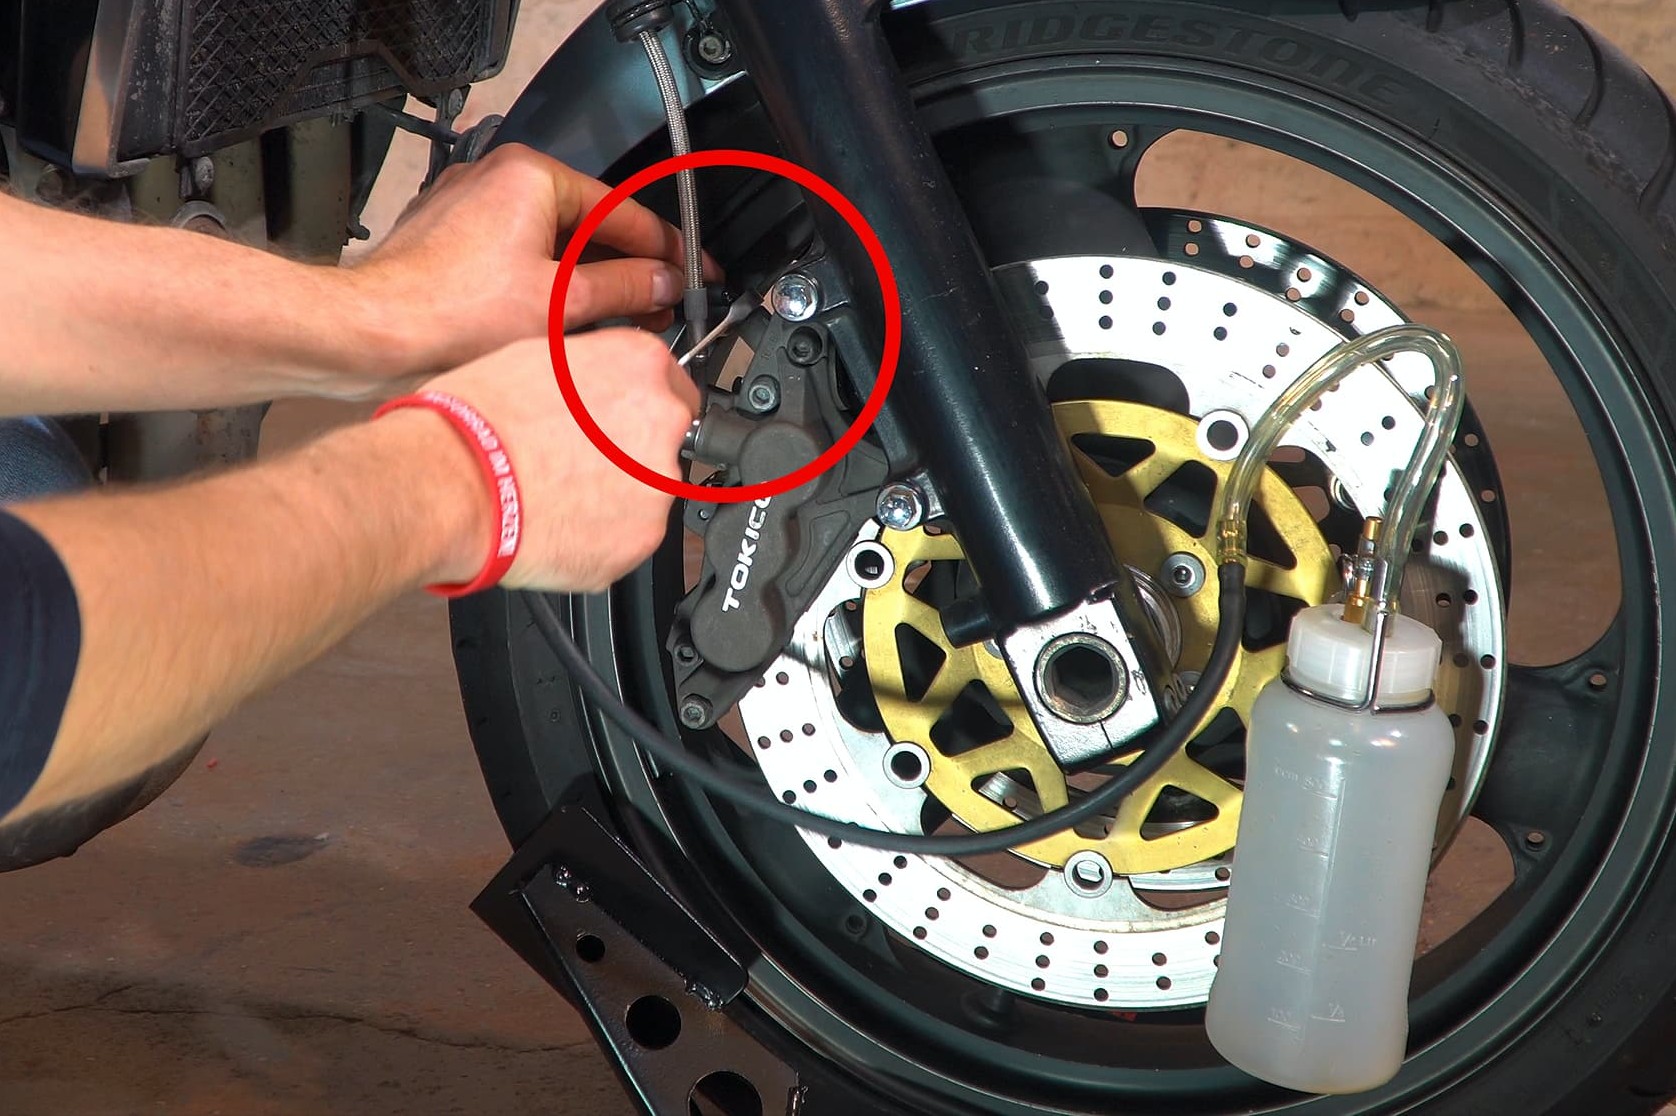
Continue, keeping a close eye on the level in the brake fluid reservoir, until only new, clean, bubble-free fluid runs through the transparent tube.
Method 1, step 7, Fig. 2: close the bleeder valve
Pull the lever/pedal one last time and hold it firmly, then close the bleeder valve.
08 – Bleeding
Depending on the system, carry out the bleeding operation at the next bleeder valve of the brake system or, in the case of a double-disc brake, at the second brake caliper of the system, as previously described.
Method 1, step 9: pay attention to fill level – do not overfill
09 – Pay attention to fill level – do not overfill
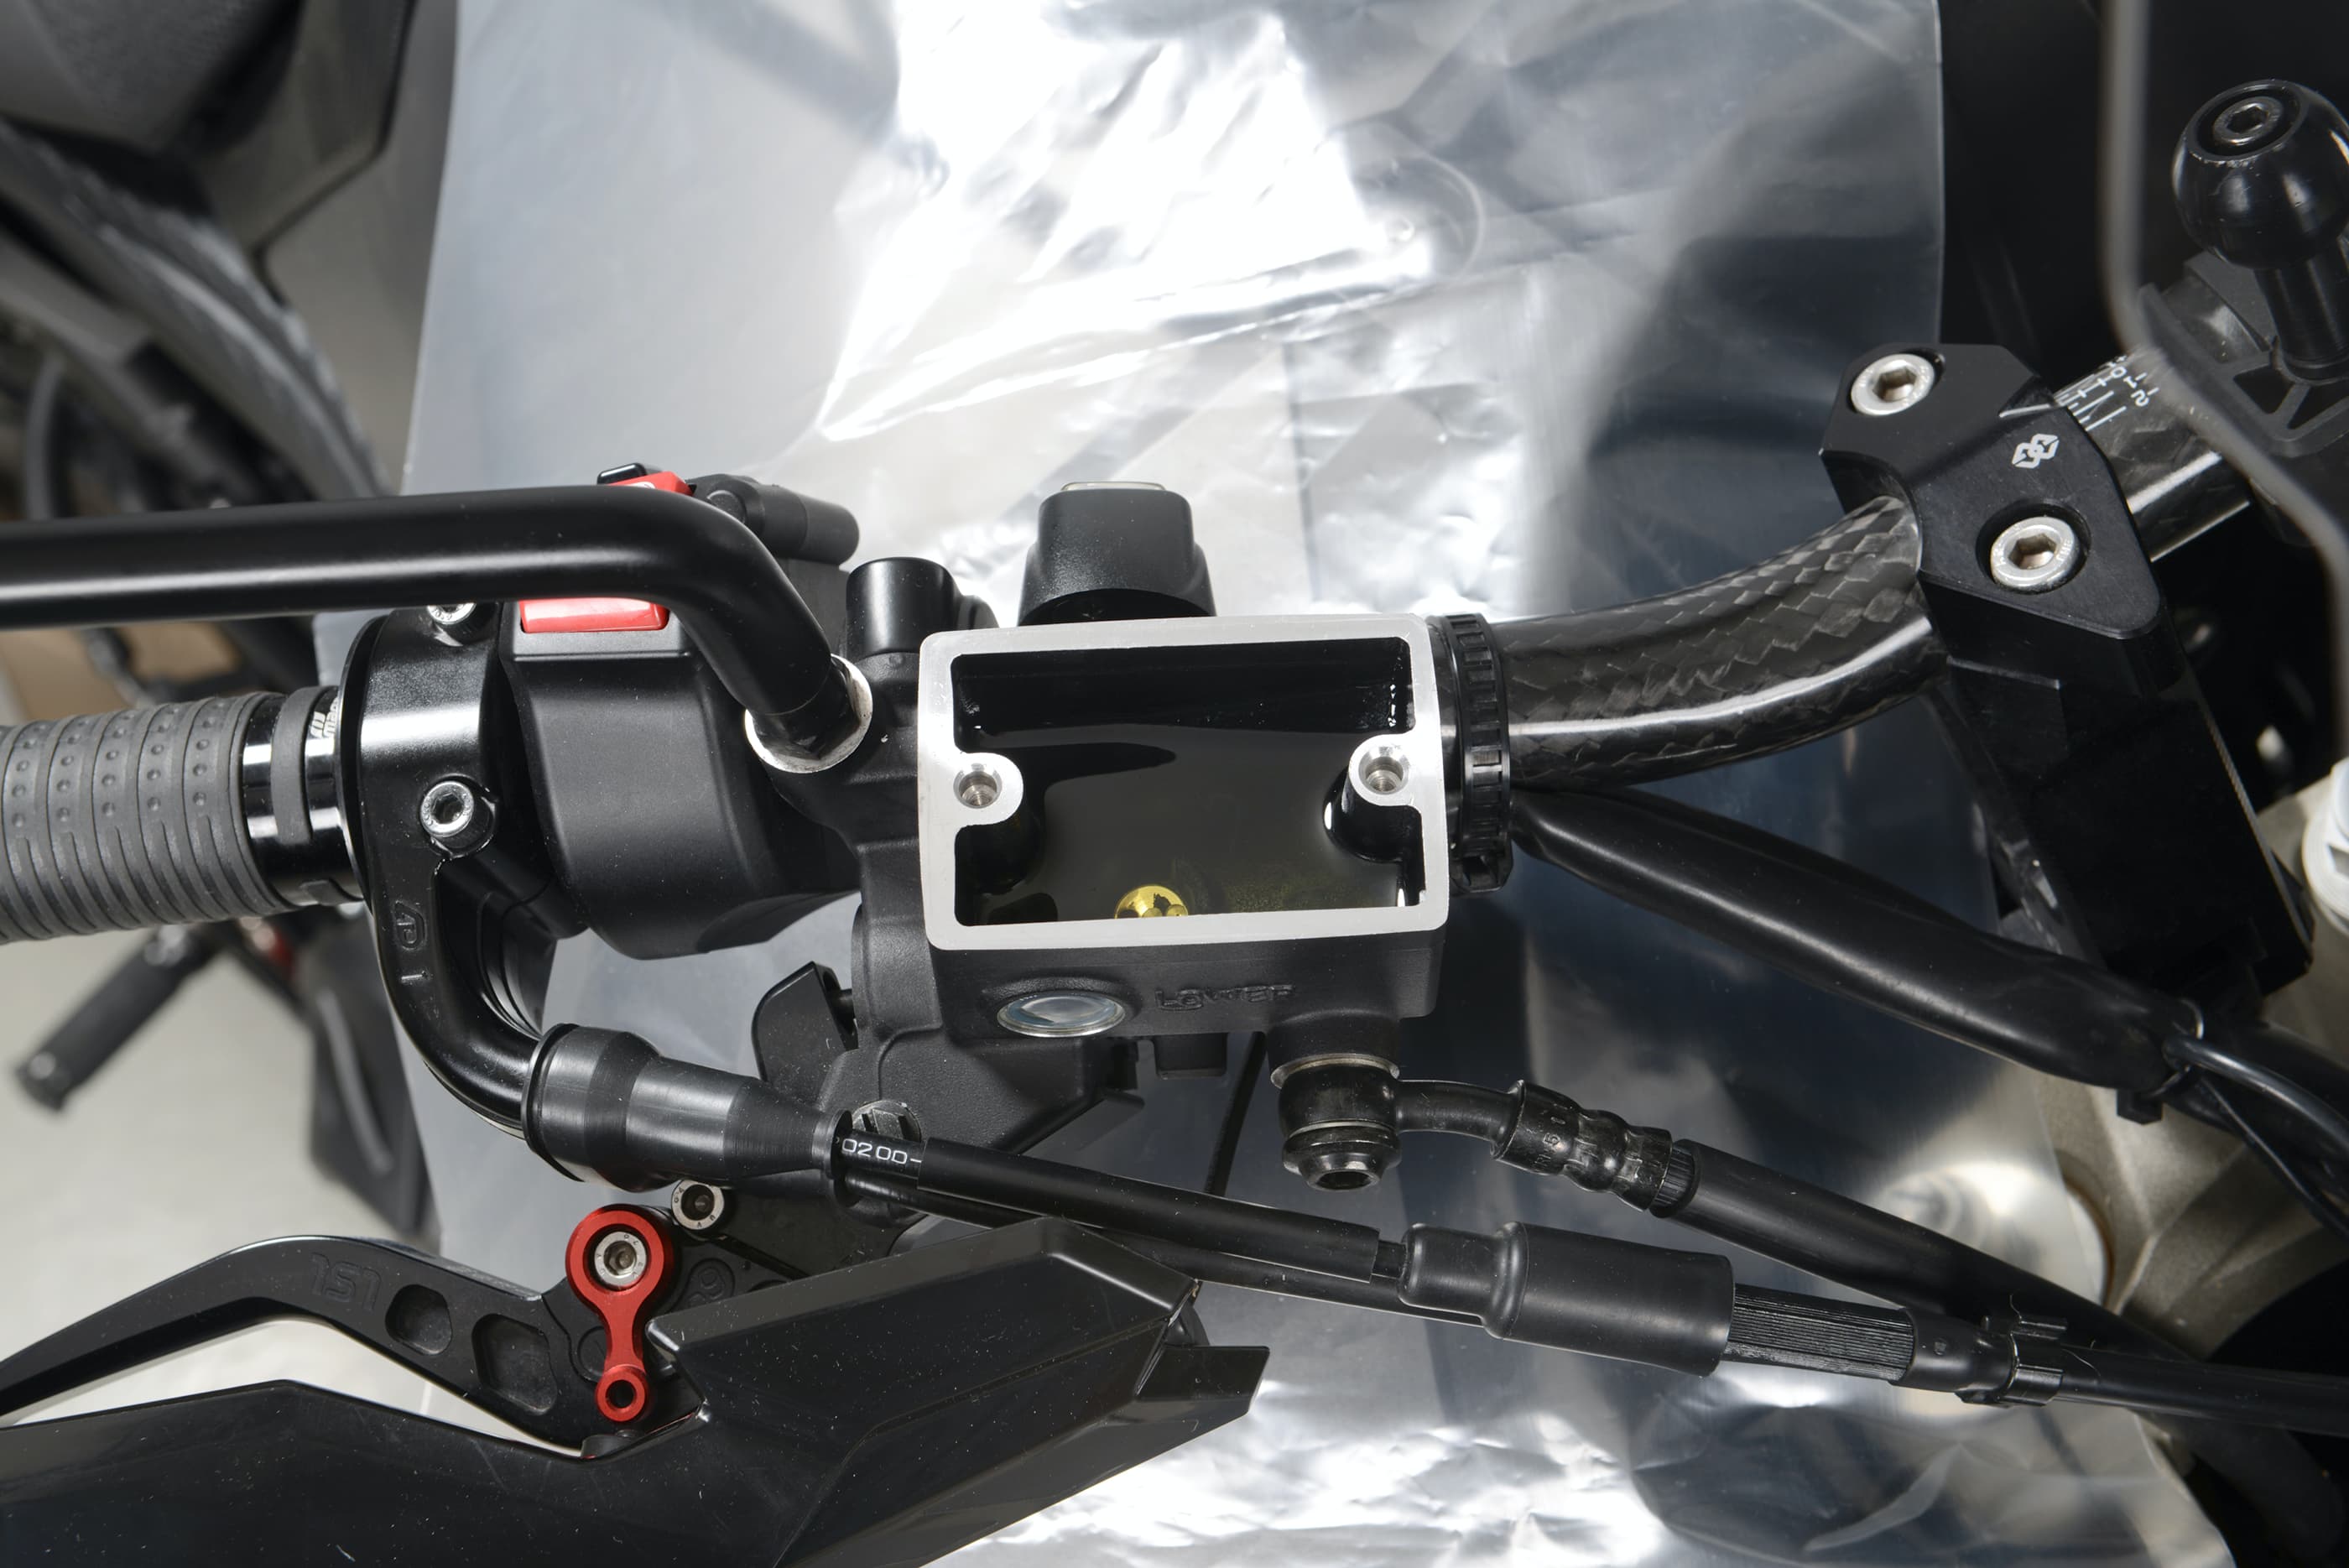
Once the brake system has been bled at all the bleeder valves, fill the brake fluid reservoir up to the maximum mark, making sure it is horizontally aligned. Then close it with the cleaned and dried (!) rubber insert and the cover.
If the brake pads are already slightly worn, do not fill the reservoir right up to the maximum mark as otherwise there would be too much brake fluid in the system when the pads are replaced. Example: if the pads are 50% worn, fill up to halfway between the min. and max. mark.
Now tighten the cross-head screws (which are normally very soft) using a precise fitting screwdriver and applying a deft touch! Do not tighten too tightly, as otherwise you may encounter problems the next time the brake fluid needs to be changed. Check the vehicle over carefully once again for splashes of brake fluid, thoroughly wash these off before they can do any damage to the paintwork.
10 – Pressure point on lever
Then operate the brake lever/pedal several times to build up the pressure in the brake lever assembly. Check after a short free travel of the lever or pedal whether you can consistently feel a firm pressure point – you should not be able to pull the brake lever on the handlebar all the way up to the handle with a spongy resistance, for example. As previously described, an inadequate, soft pressure point could be due to residual air in the system (in these cases, repeat the bleeding operation), but also a leaking brake caliper or a worn piston in the hand pump.
Please note: if a firm pressure point is still not present after bleeding several times and carefully checking the tightness, the following procedure has proven to be effective: pull the brake lever firmly and fix it to the throttle twistgrip, e.g. with a cable tie. This produces a build-up of pressure in the system which should then ideally be left overnight. This allows stubborn fine air bubbles to gradually rise to the surface of the brake fluid reservoir. Remove the fixing the next day, recheck the pressure point or bleed again one final time.
Method 2, step 6: Draw off brake fluid and air – observing the fill level in the container
Method 2: Change fluid using the vacuum pump
Proceed as described in Method 1, Steps 01 to 05, and continue as follows:
06 – Draw off brake fluid and air
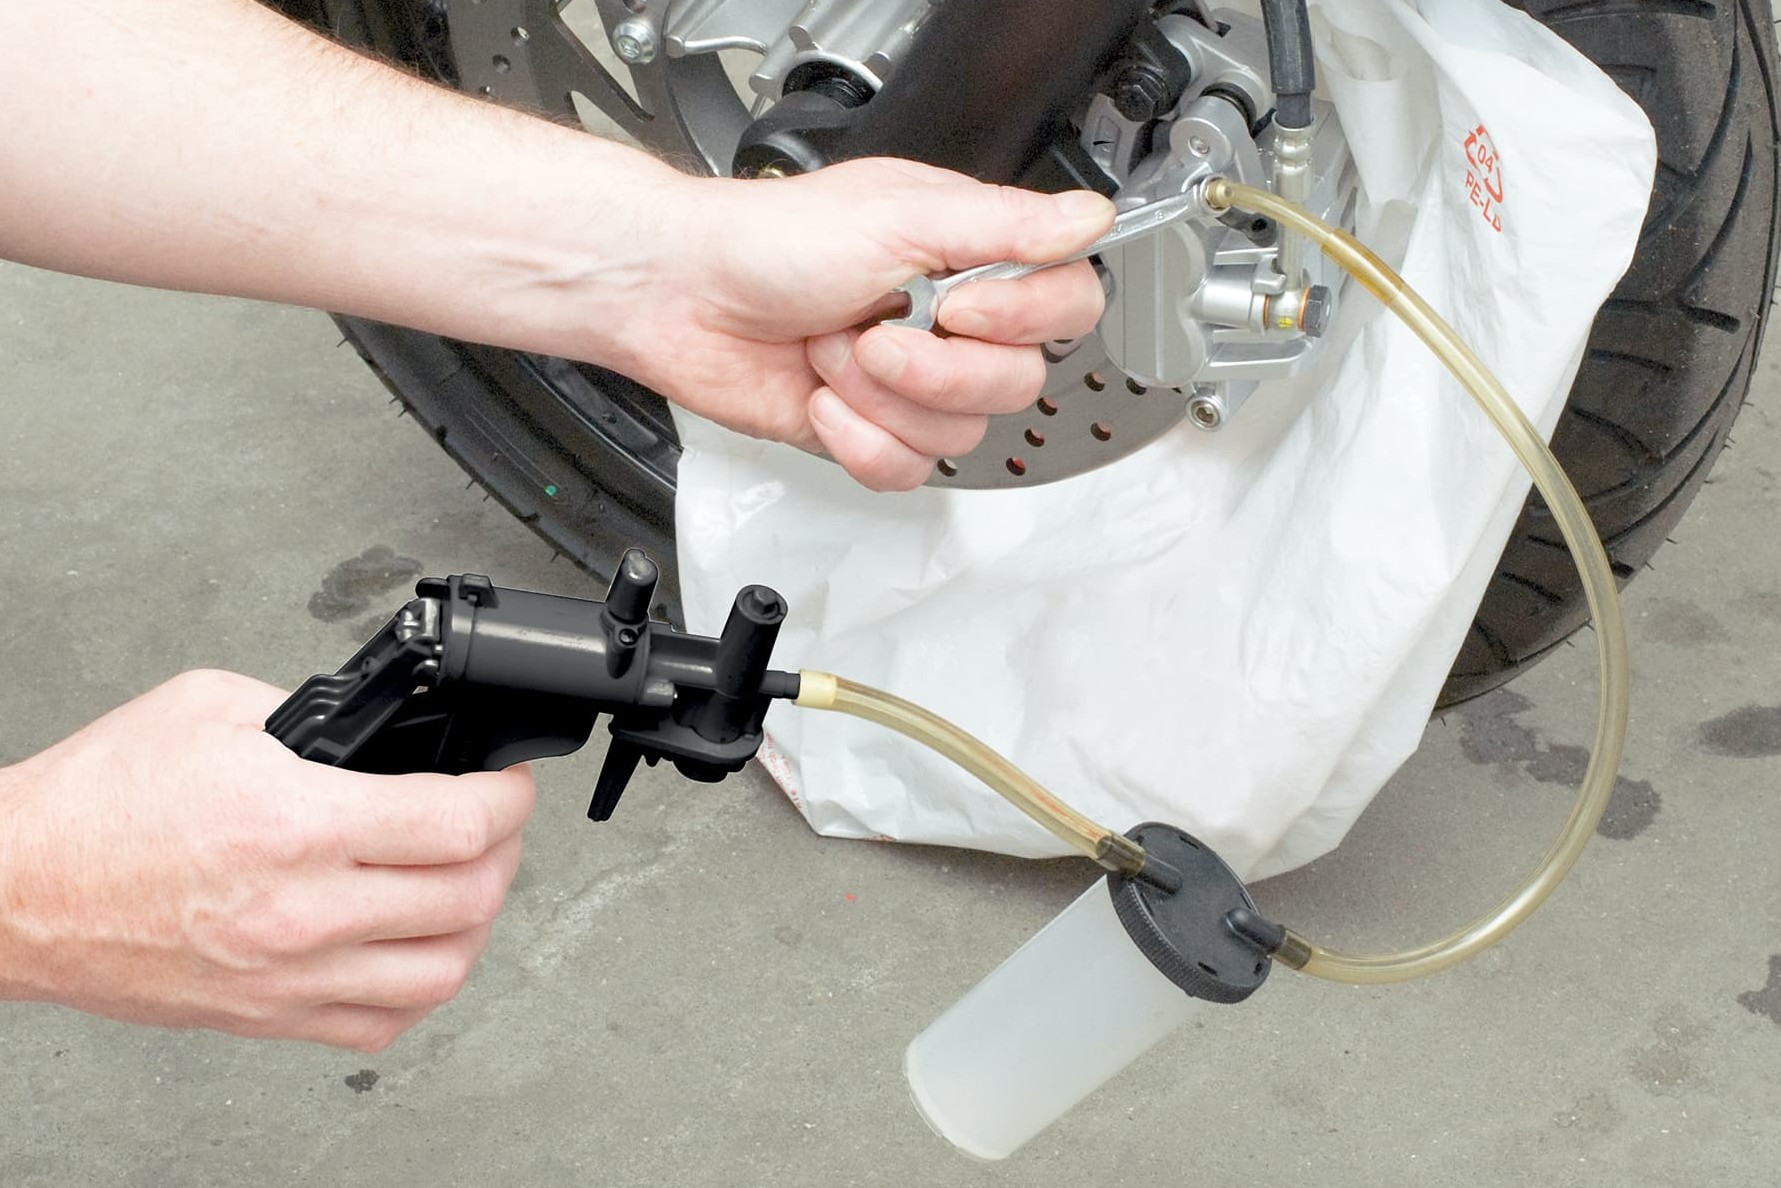
Draw the old brake fluid and possibly air out of the reservoir with the vacuum pump.
- The reservoir must be refilled with new fluid in good time before it is sucked empty (see Method 1, Step 6, Fig. 2).
- You should therefore always keep an eye on the fill level!
- Continue working with the vacuum pump until only new clean fluid without air bubbles flows through the transparent tube (see Method 1, Step 7, Fig. 1).
During the last stroke of the vacuum pump, close the bleeder valve on the brake caliper (see Method 1, Step 7, Fig. 2). Depending on the system, carry out the bleeding operation at the next bleeder valve of the brake system or, in the case of a double-disc brake, at the second brake caliper of the system, as previously described.
07 – Check
Now continue as also described in Method 1 from Step 8 onwards until the work is complete then check the pressure point and cleanliness of your bike.
Before bringing the motorcycle back on to the road, thoroughly check the function and effectiveness of the braking system once again.
The Louis Technical Centre
If you have a technical question about your motorbike, please contact our Technical Centre, where they have endless experience, reference books and contacts.
Please note!
These tips for DIY mechanics contain general recommendations that may not apply to all vehicles or all individual components. As local conditions may vary considerably, we are unable to guarantee the correctness of information in these tips for DIY mechanics.
Thank you for your understanding.


