Installing a case and rack system on a motorcycle
Sturdy side cases are the safest way to carry luggage on your motorcycle. We show you how to install the complete case system using Hepco & Becker components as an example.
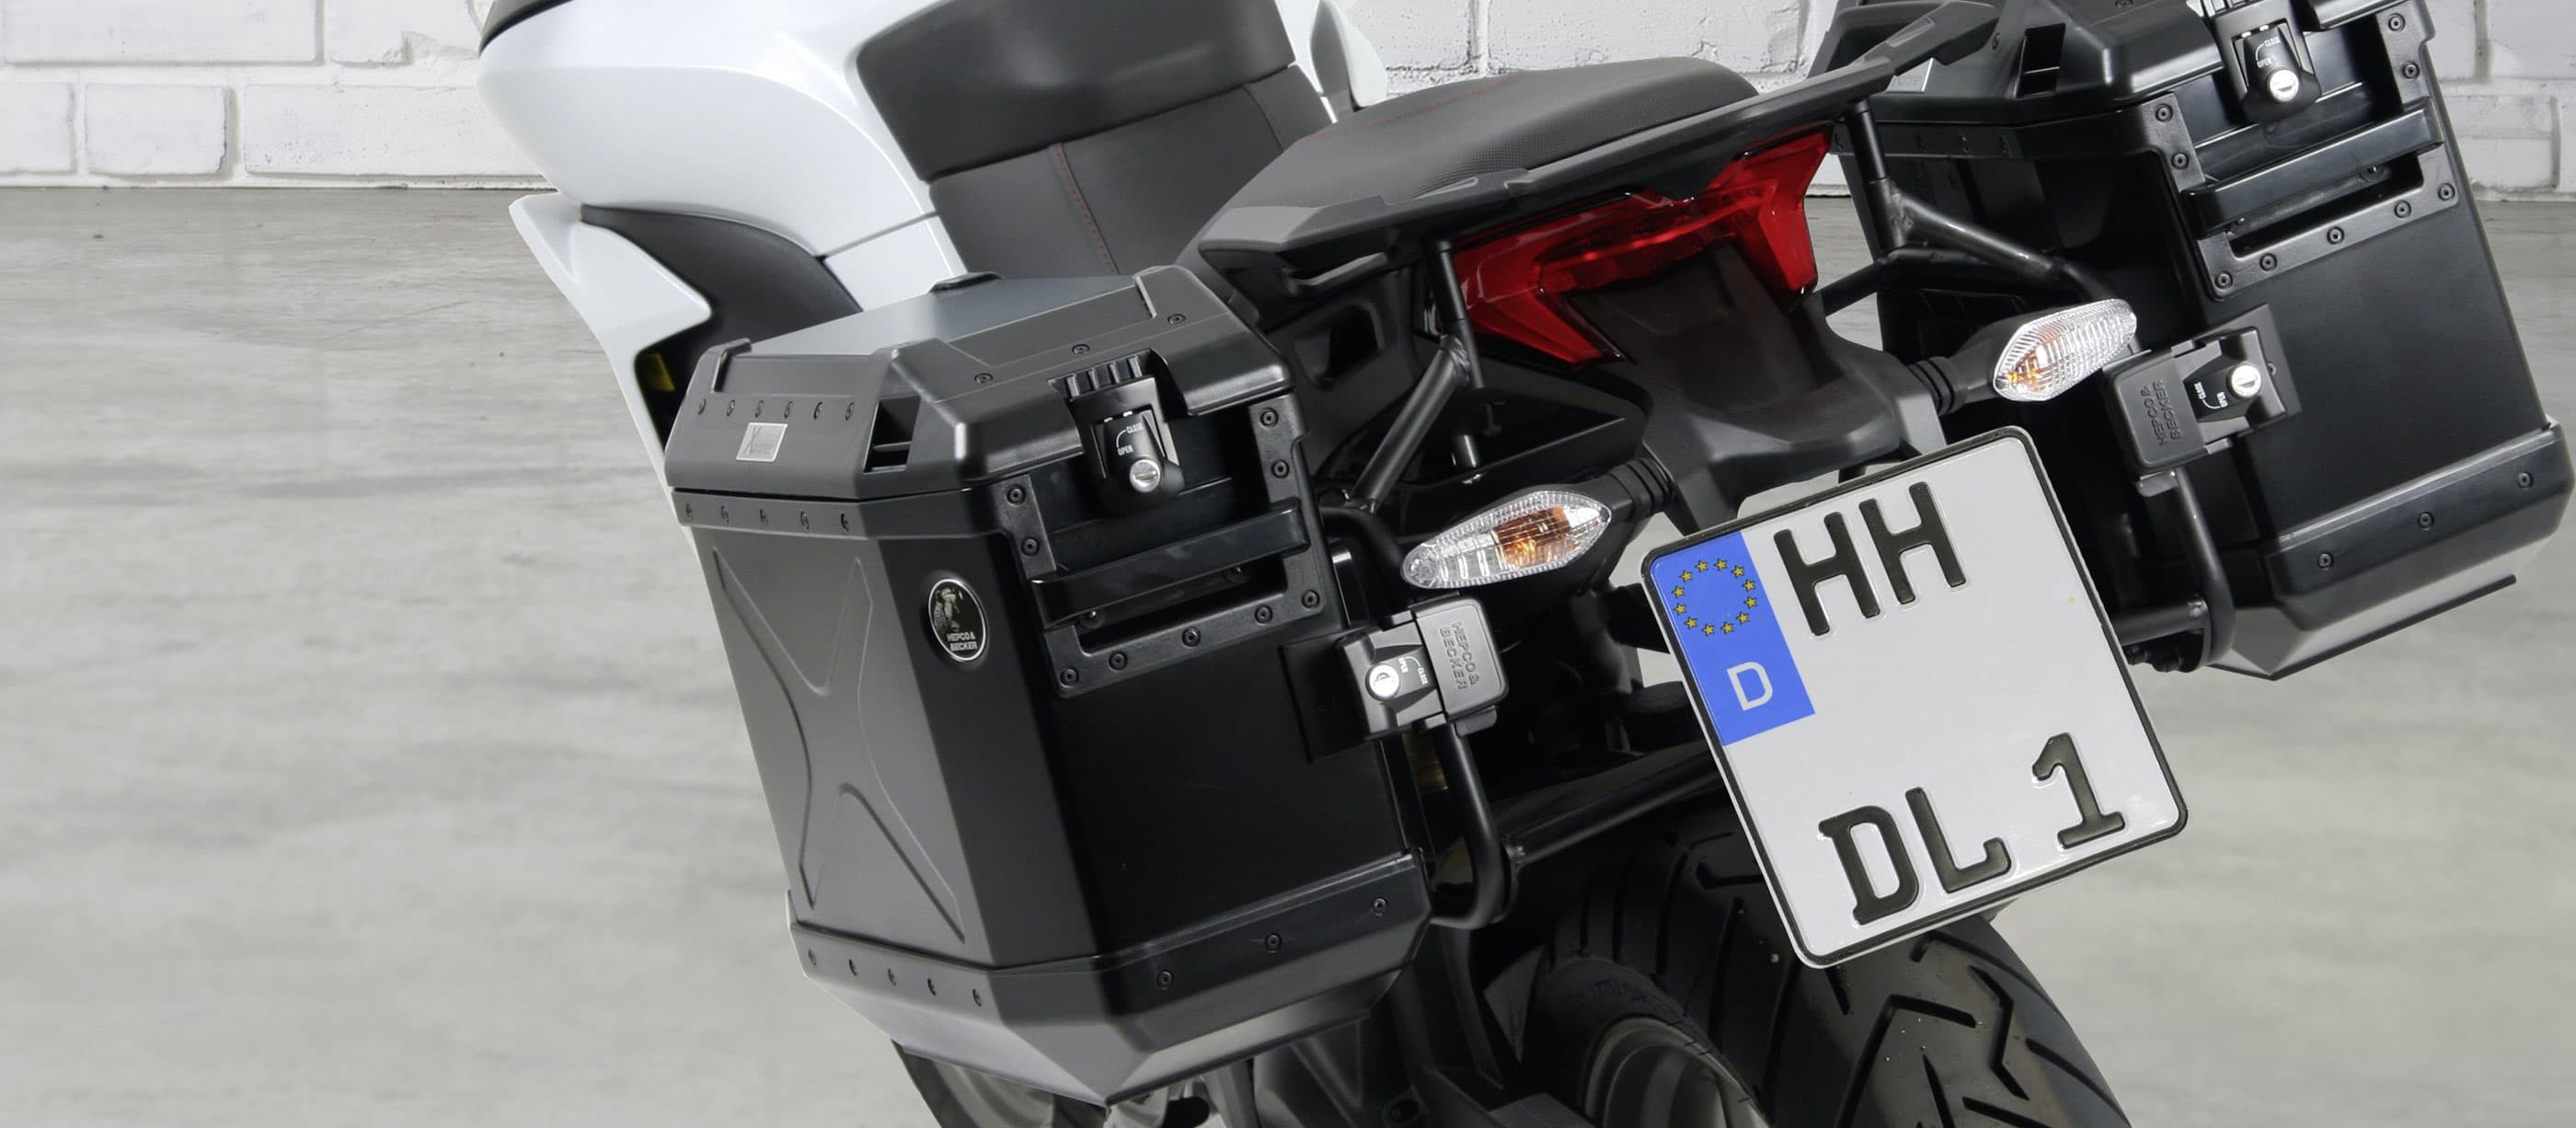
- Installing cases on a motorbike
- Install the Case and rack system – now let's get started
- 01 – Remove pillion footrests
- 02 – Top mount installed under the tail
- 03 – Bolt the rack to the the top securing point
- 04 – Then it’s the top rear securing point
- 05 – Fix bracket to footrest
- 06 – Install cross-connector to stabilise the luggage rack
- 07 – Check seat and tighten screws
- 08 – Install retaining clips for the cases
- The right way to install motorcycle cases
Important: To begin with, only install the luggage rack loosely and align it optimally with the bike. Use washers if there are any gaps. Once the complete carrier is fitted to the bike tension-free and as symmetrically as possible, you can tighten all the screw connections fully..
Installing cases on a motorbike
A set of cases adds greatly to the utility of a motorcycle - and your biking holiday will be even more enjoyable if you’re able to take your usual things and your favourite outfit with you. Especially if you're touring with your partner, side cases that allow the pillion passenger enough leg room are worth their weight in gold.
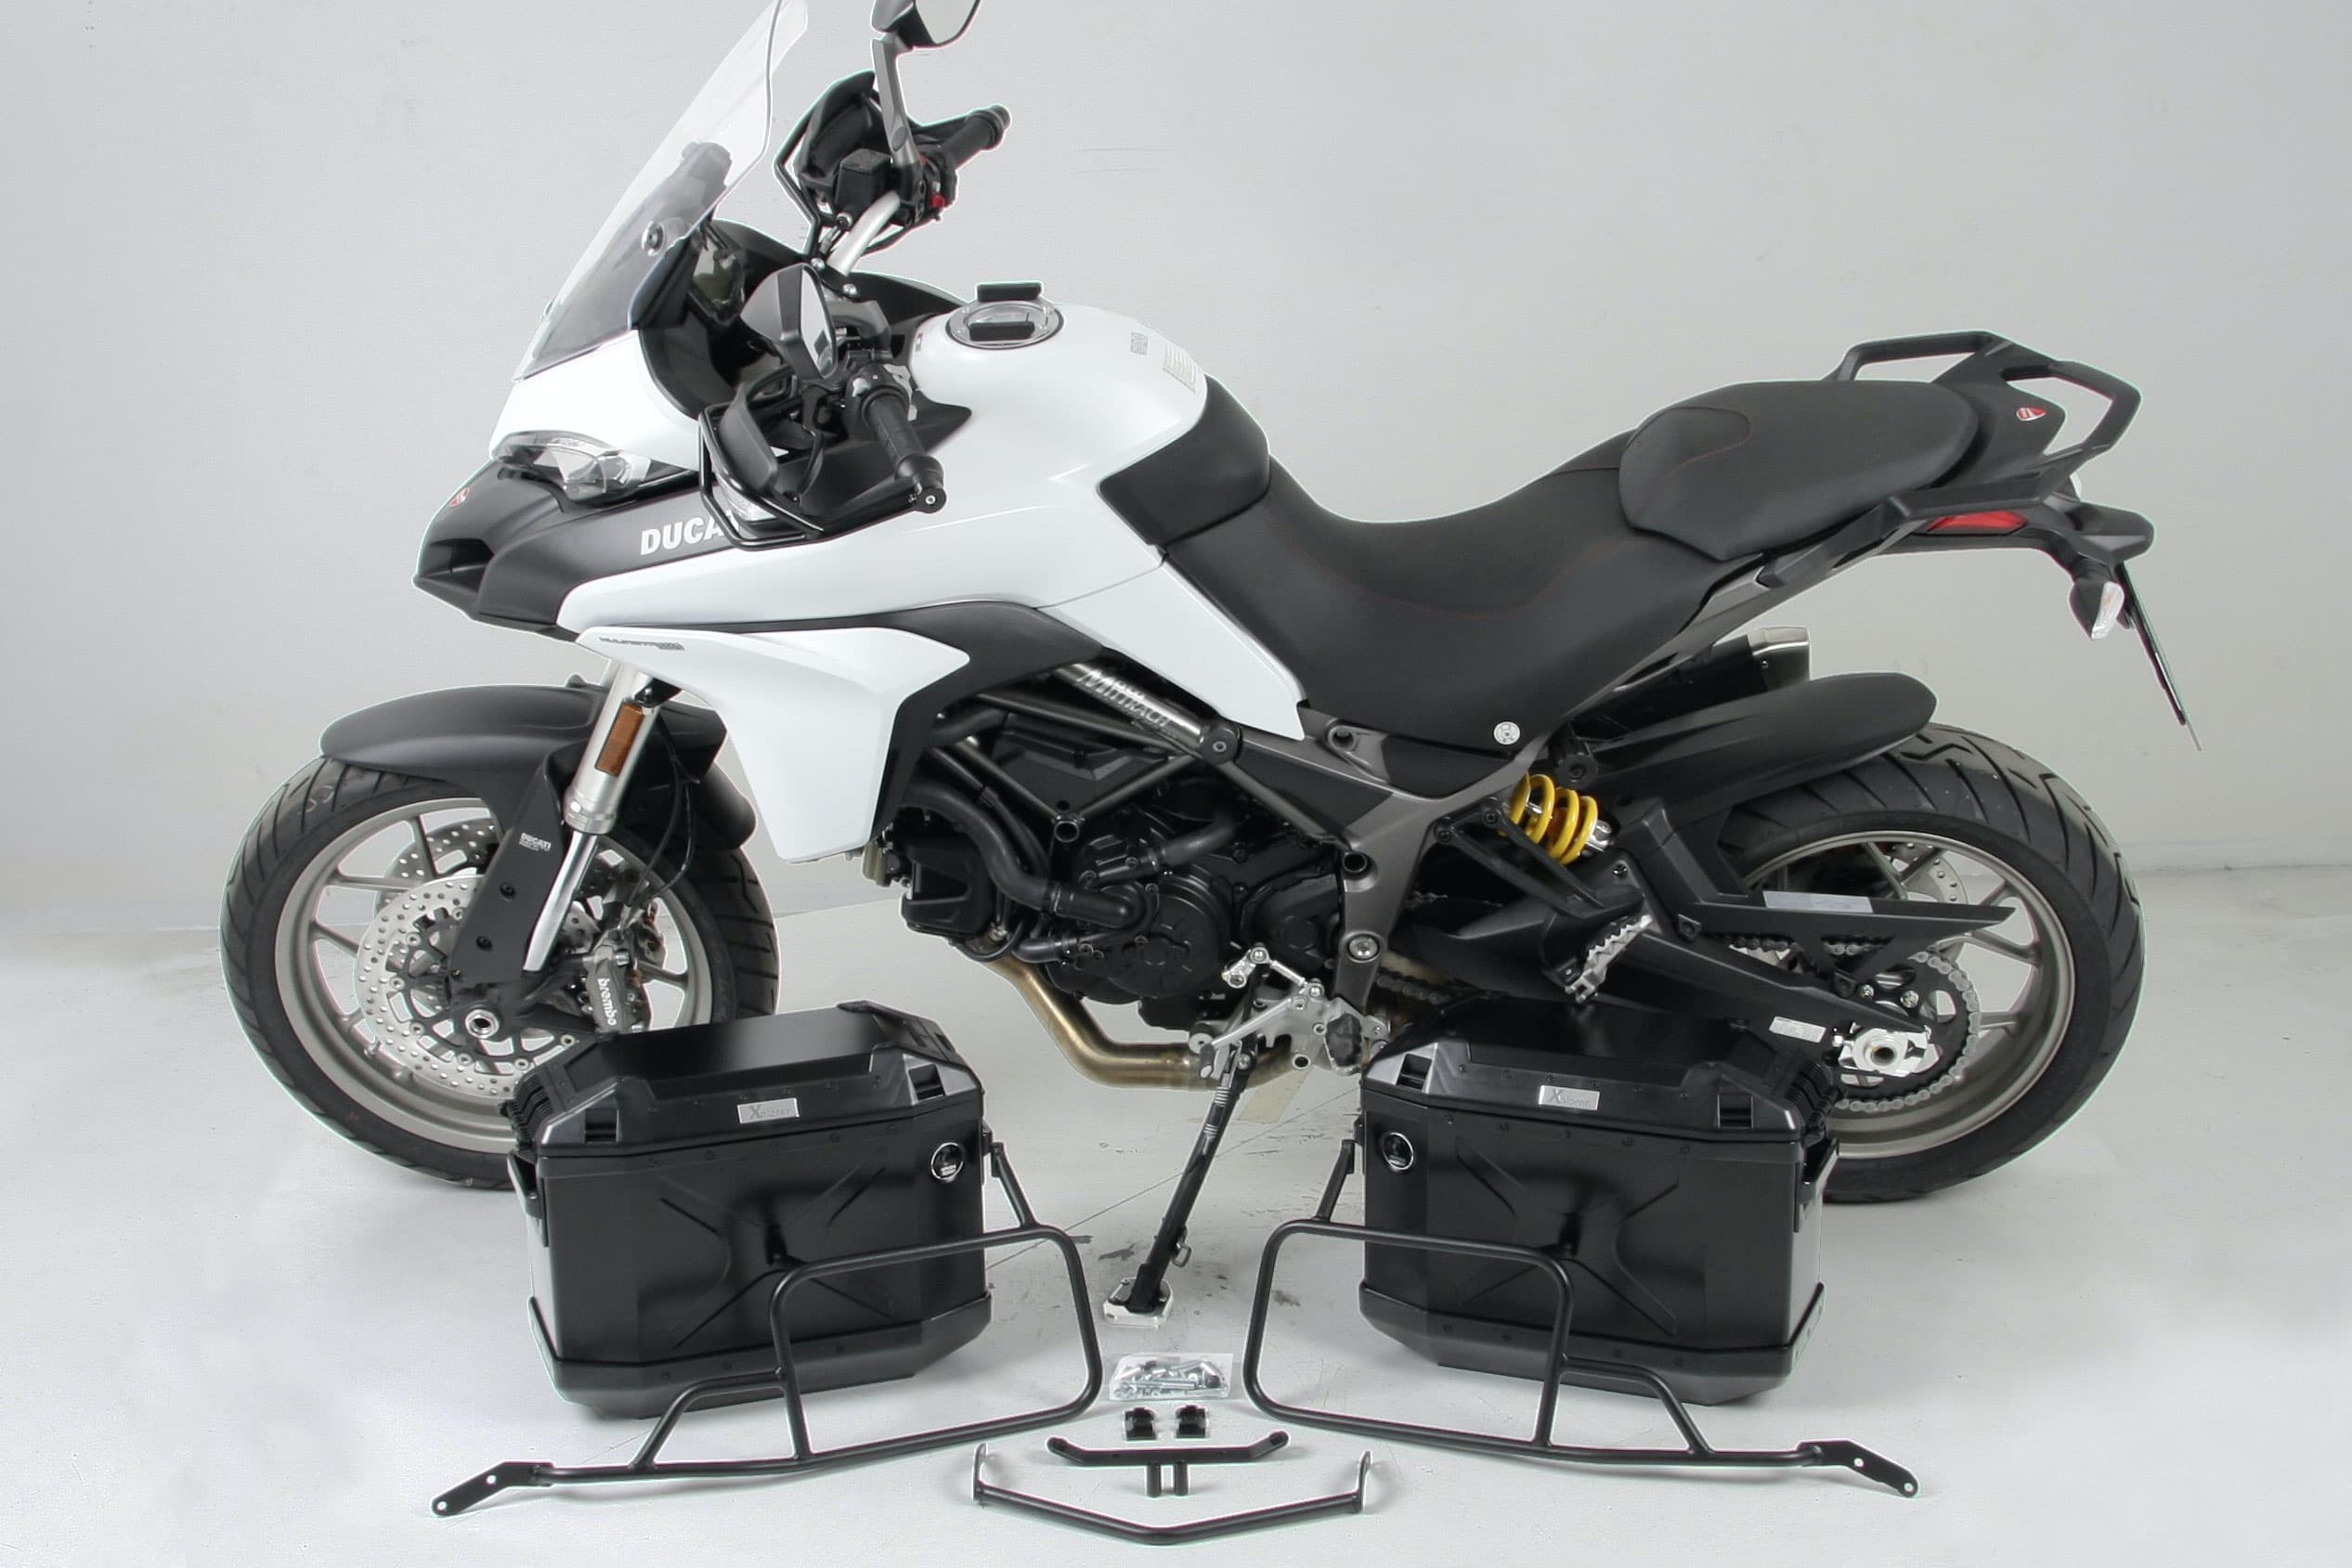
All this needs to be fitted
There are many different types of luggage to choose from. For tough off-road conditions (e.g. on a touring enduro), sturdy aluminium cases are the right choice. But for a road trip, conventional plastic cases do the job perfectly. Soft bags are a comparatively recent innovation. Essentially, they’re the modern version of the traditional saddlebag combined with securing to special rack systems – ideal for supersport and retro bikes, for example.
Before you start on installing the rack system, you need to find a suitable place for doing the job with plenty of space and a clean surface. A large sheet of cardboard, a piece of carpet or a blanket is useful for laying out all the components.
Jack up your bike using a paddock stand or the bike’s centre stand so that there is no risk of it toppling over see DIY tip Motorcycle Stand Basics. Read the installation instructions carefully before you start.
Here we use a Ducati Multistrada to show you how to install a Hepco & Becker “Lock It” Side Carrier.
Install the Case and rack system – now let's get started
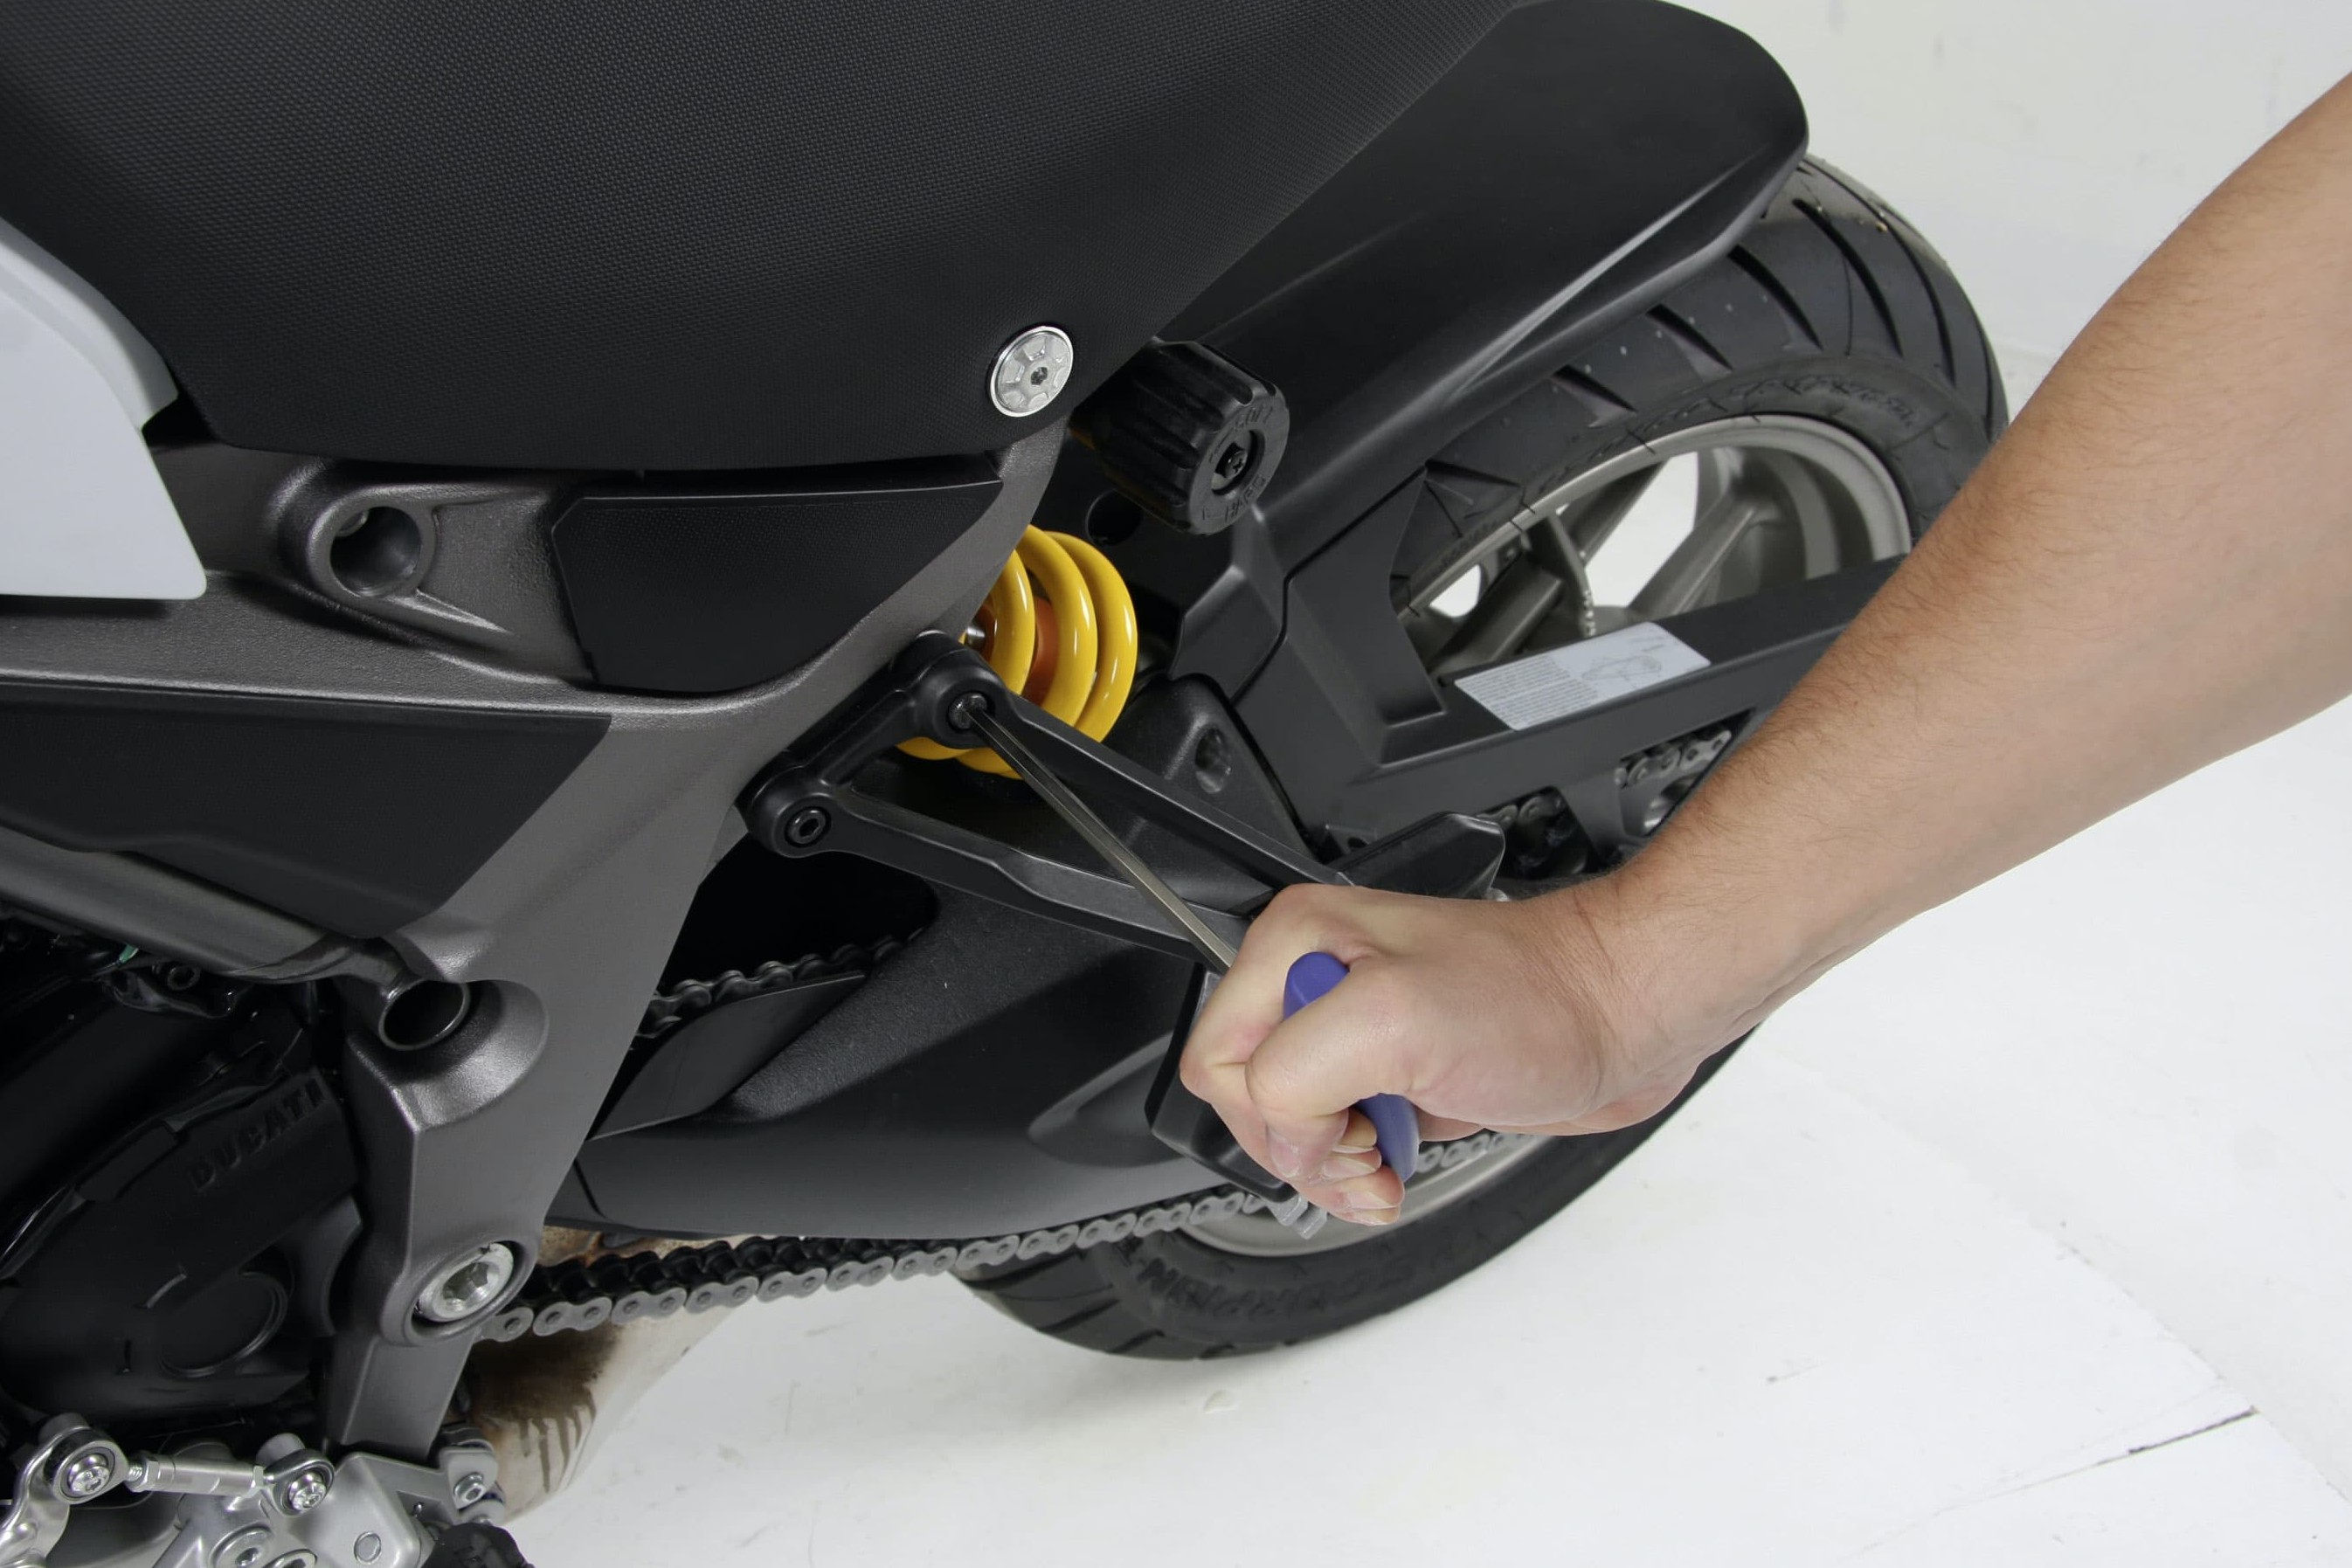
Step 1: Remove pillion footrests
01 – Remove pillion footrests
On our demonstration bike, the first step is to remove the pillion footrest brackets from the frame because these mounting points are required for the front side mountings of the luggage rack.
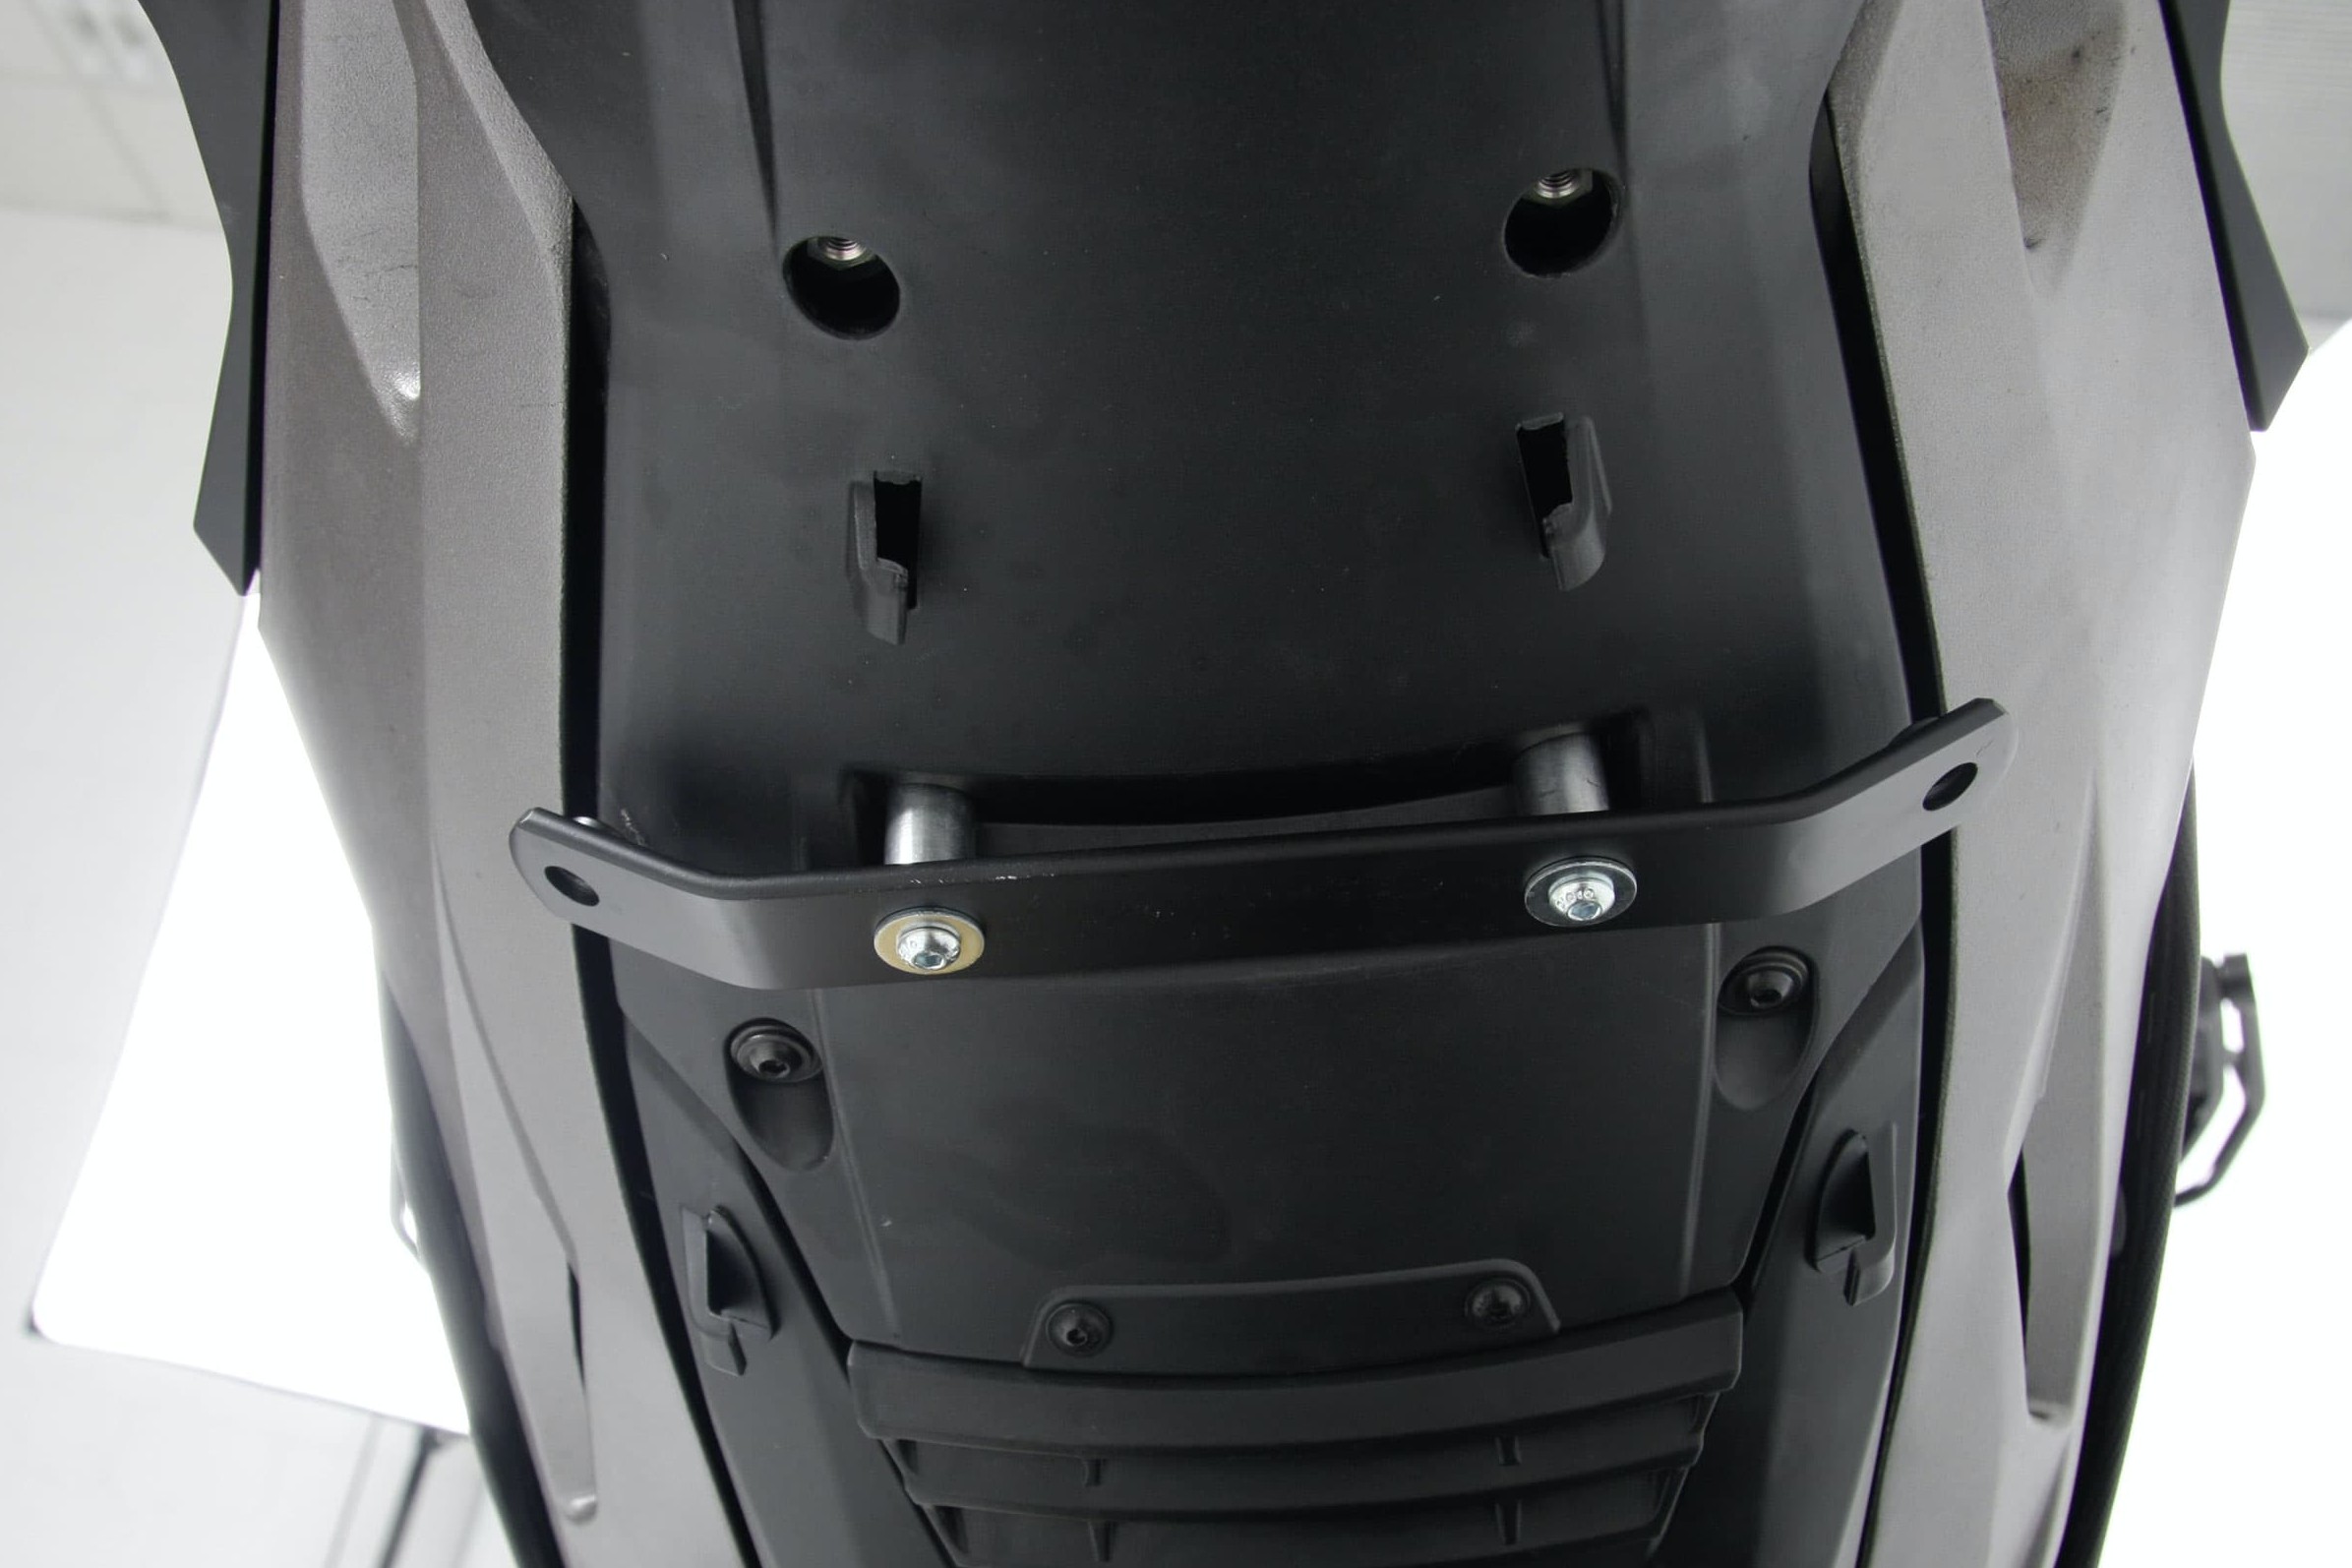
Step 2: Top mount installed under the tail
02 – Top mount installed under the tail
For the top mount, we use a bracket which, on the Ducati Multistrada, we can simply install under the tail with two spacer sleeves and bolts. On many other bikes, you first have to remove the seat and partially dismantle the rear end in order to make the securing points for the luggage rack on the left and right. On the Ducati, we also don’t need to make any changes to the lighting – unlike some bikes, on which the turn signals have to be repositioned to make space for the cases.
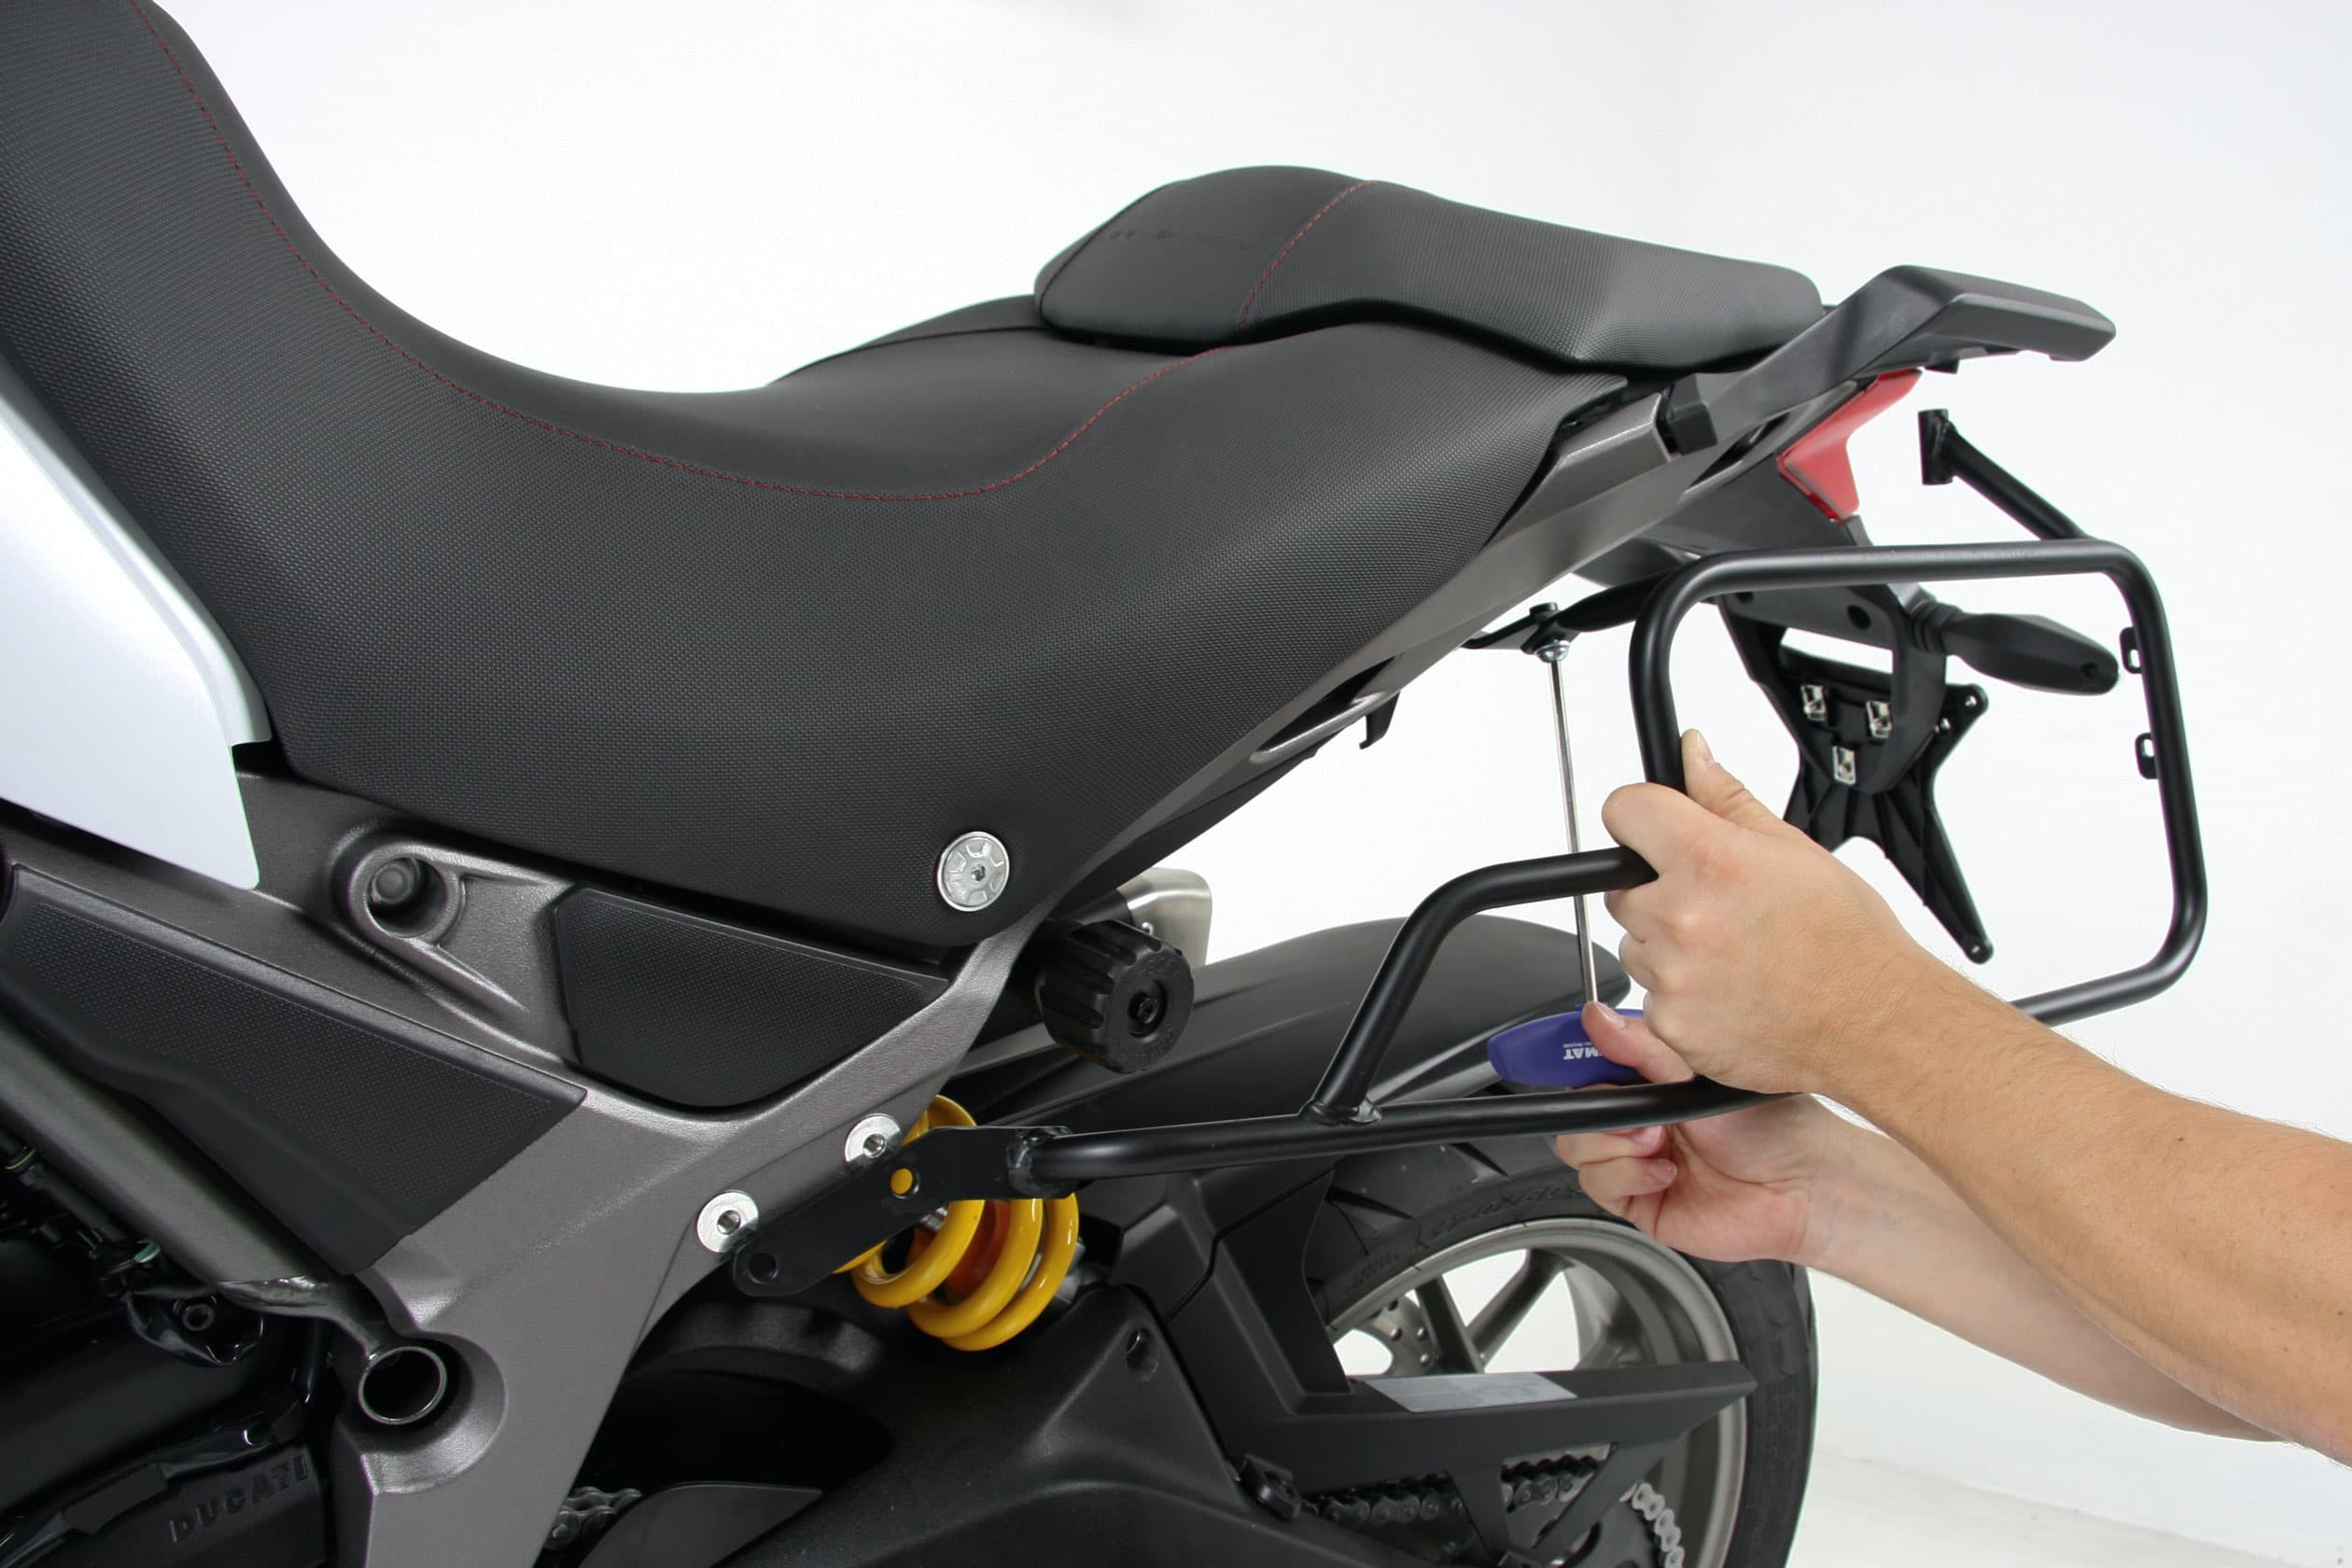
Step 3: Bolt the rack to the the top securing point
03 – Bolt the rack to the the top securing point
Now one half of the rack can be put in position on each side and firstly secured at the top securing point on the bracket that we have just bolted on.
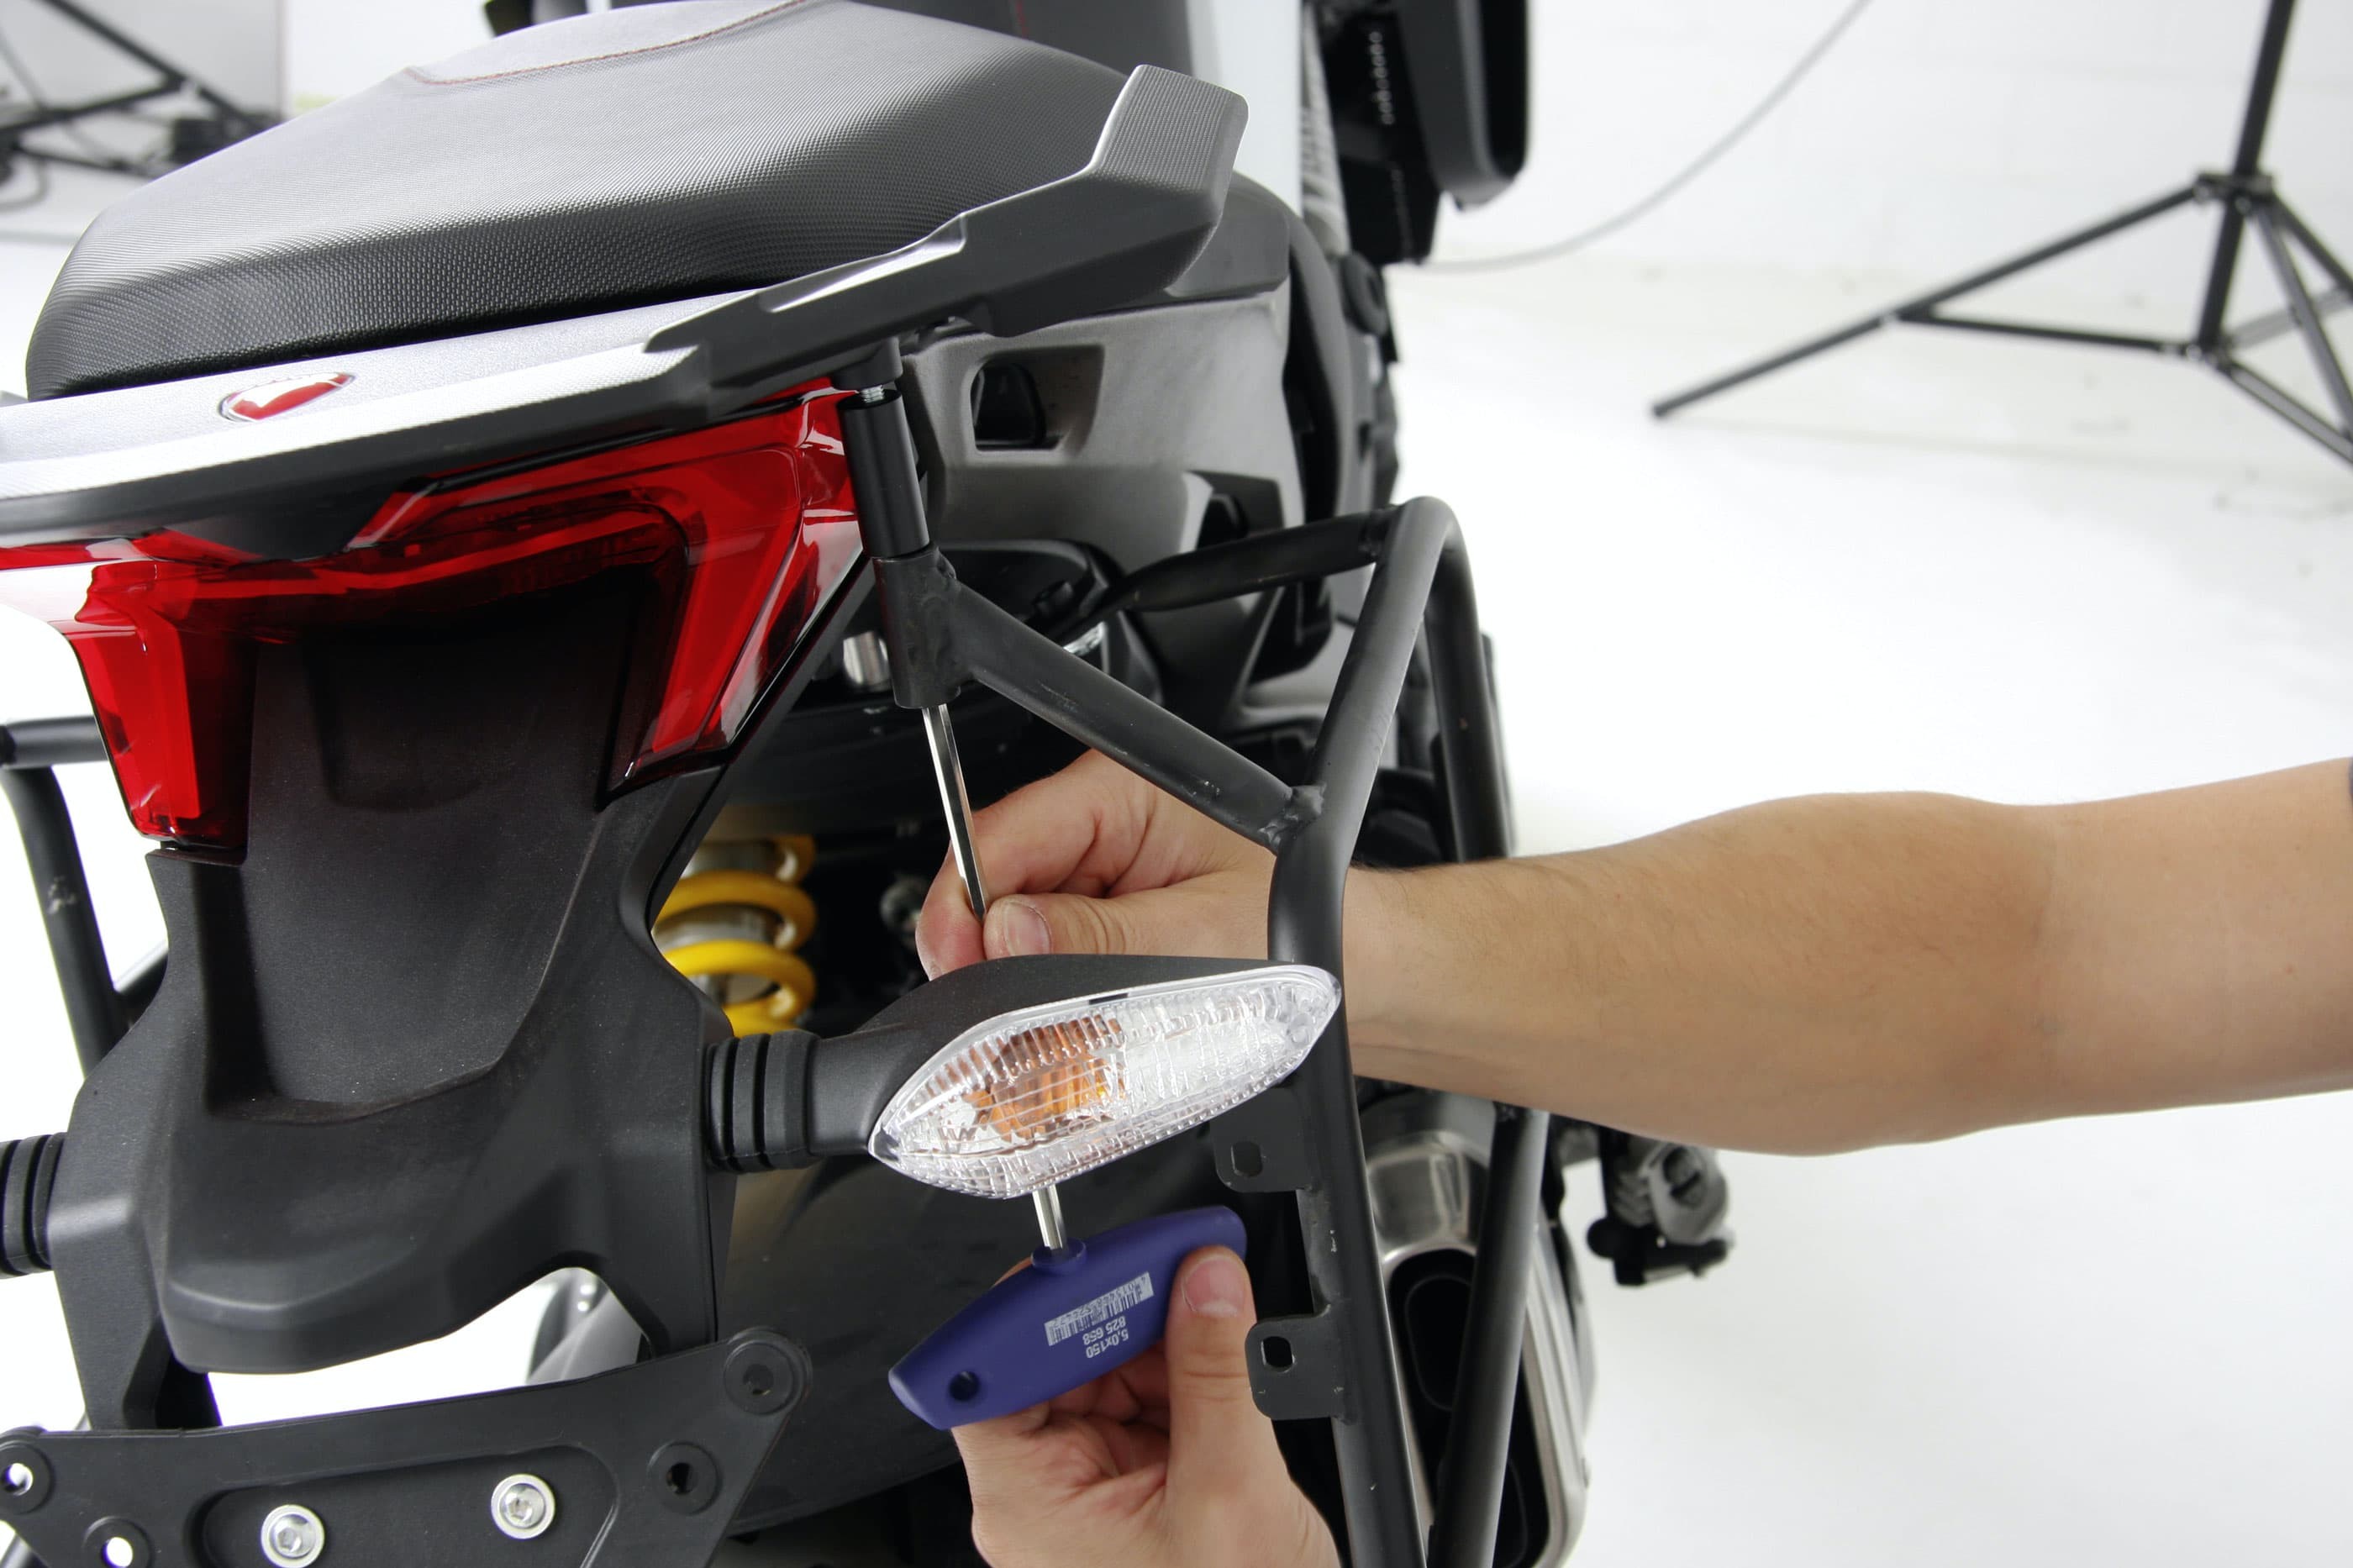
Step 4: Then it’s the top rear securing point
04 – Then it’s the top rear securing point
The next step is to secure the rack at the top rear securing point on the bike itself, again using a spacer.
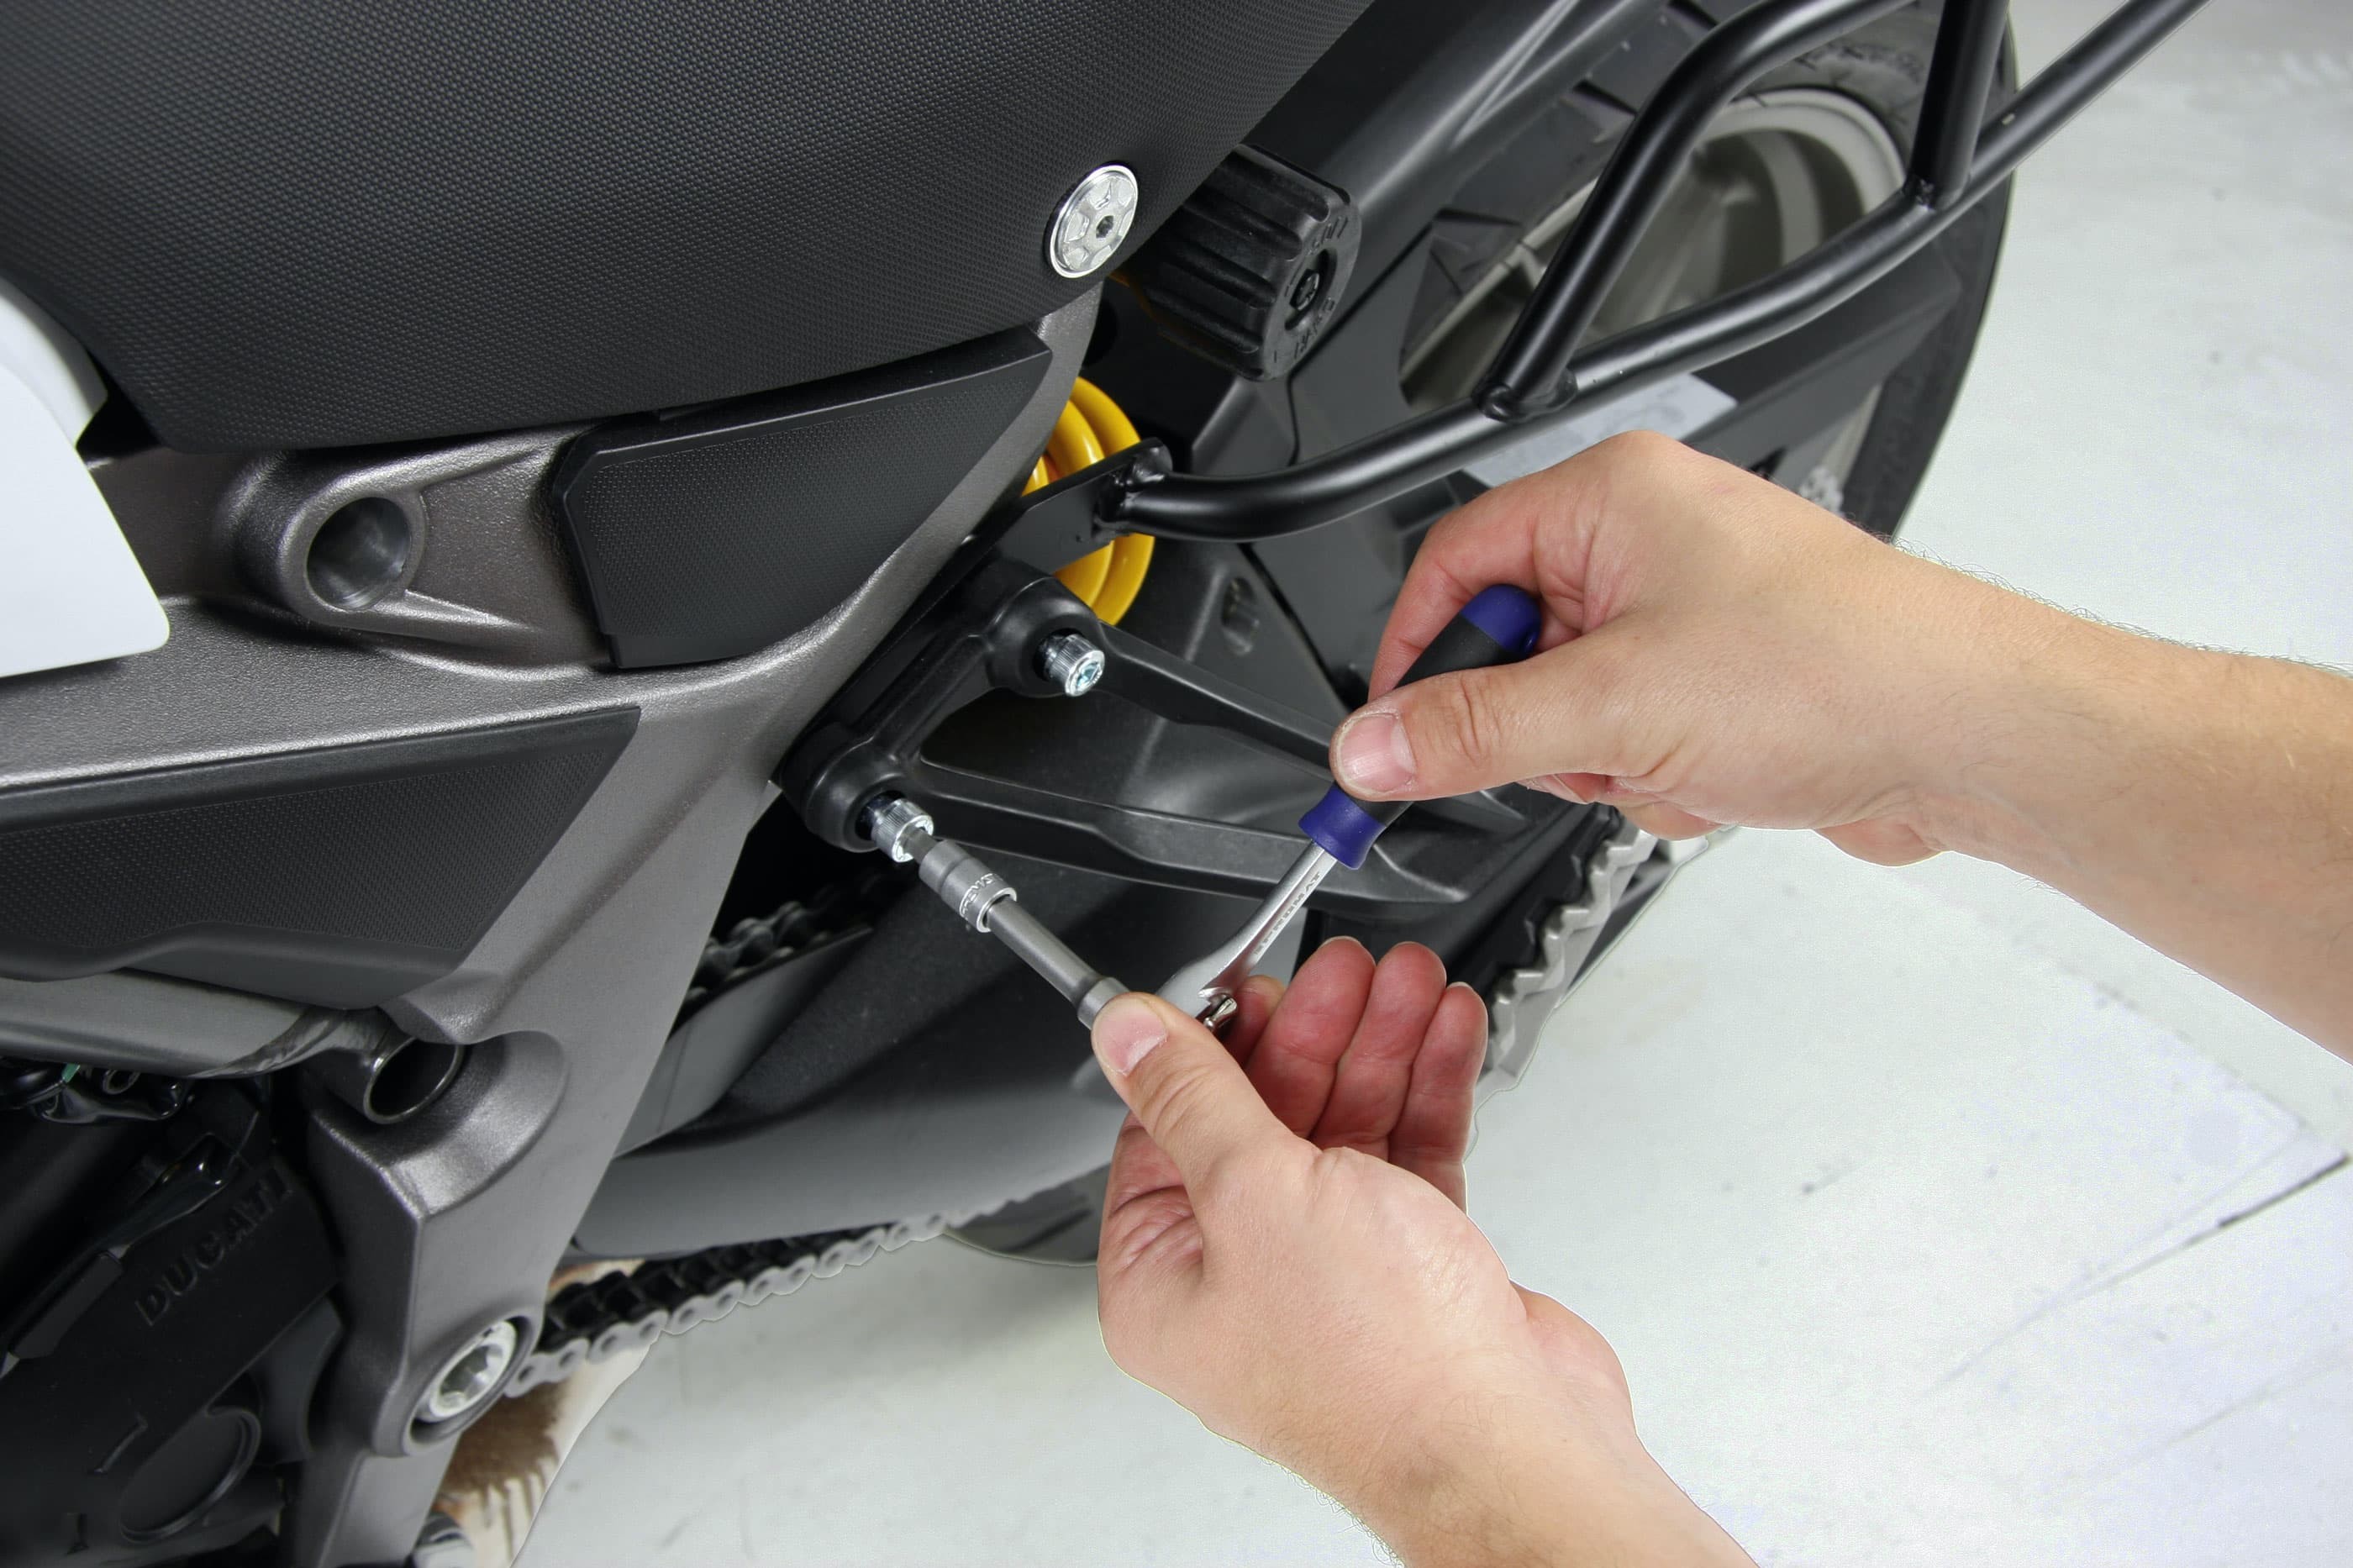
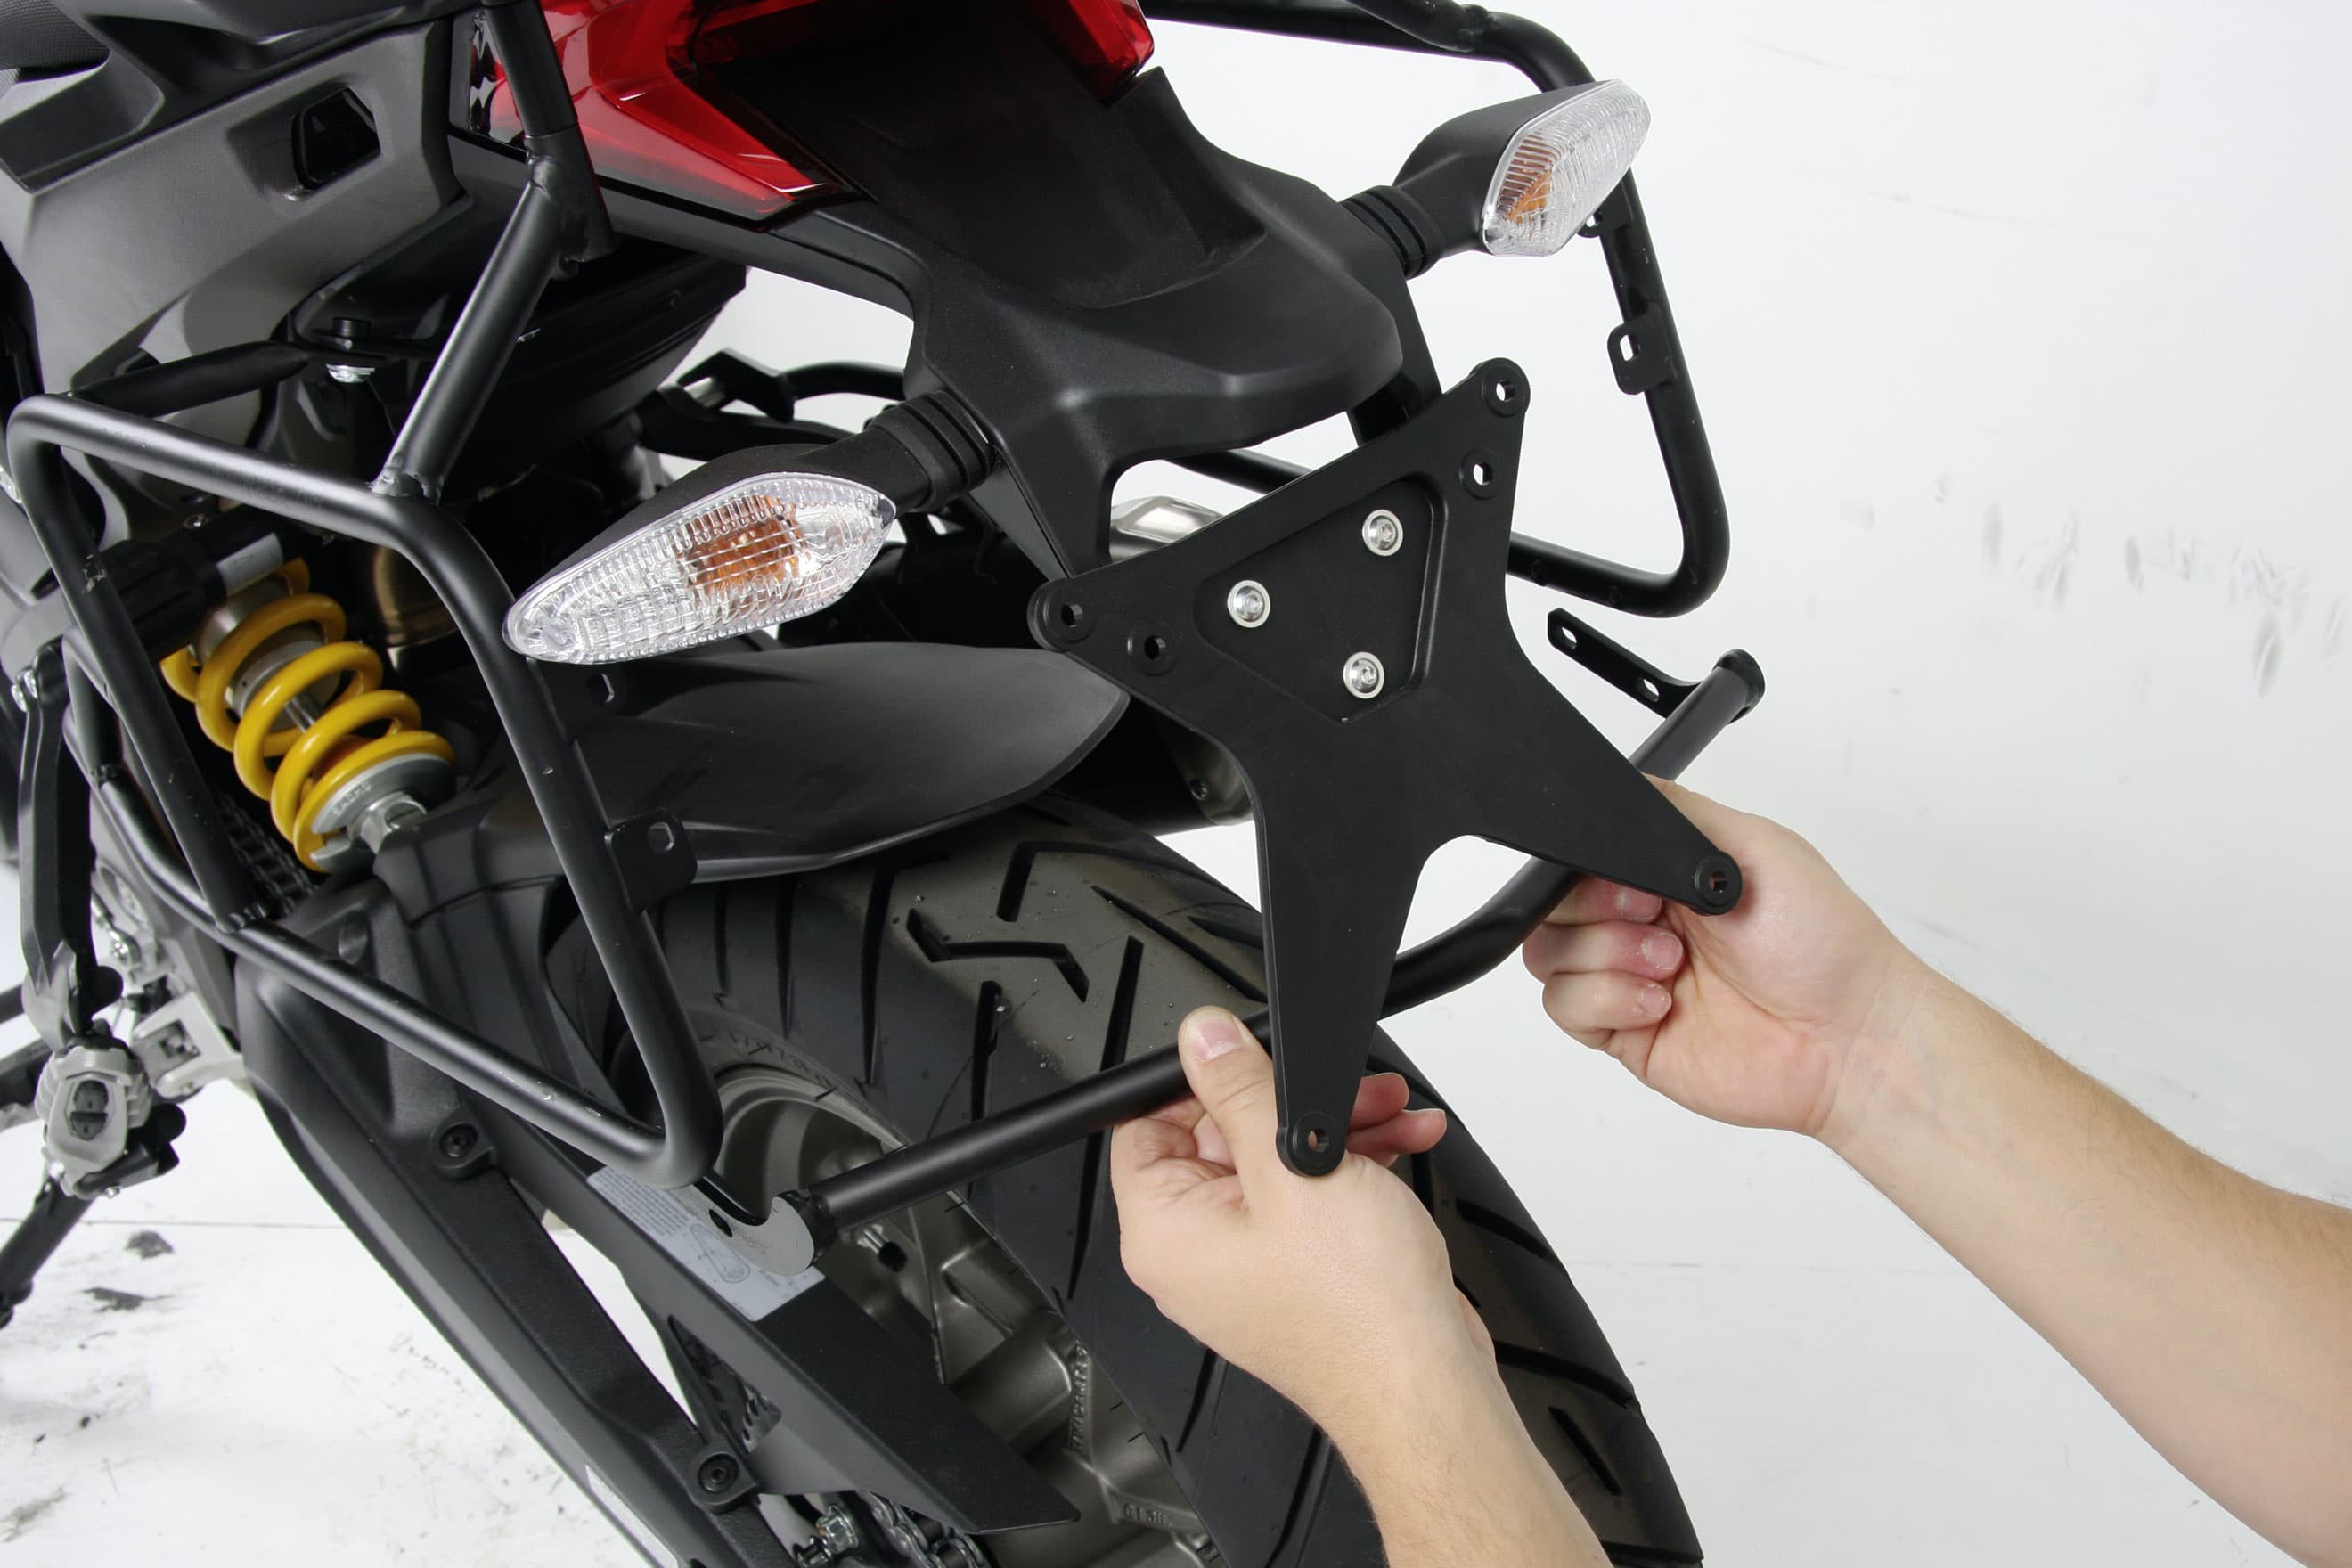
Step 5, Fig. 1: Fix the arm for the mounting point under the footrest bracket
05 – Fix bracket to footrest
The arm for the mounting point can now be fixed in place under the footrest bracket.
On the left, the arm is installed first, then the footrest bracket is attached using long bolts. On the right, the footrest bracket is installed on the frame first, followed by the arm, using two spacer sleeves.
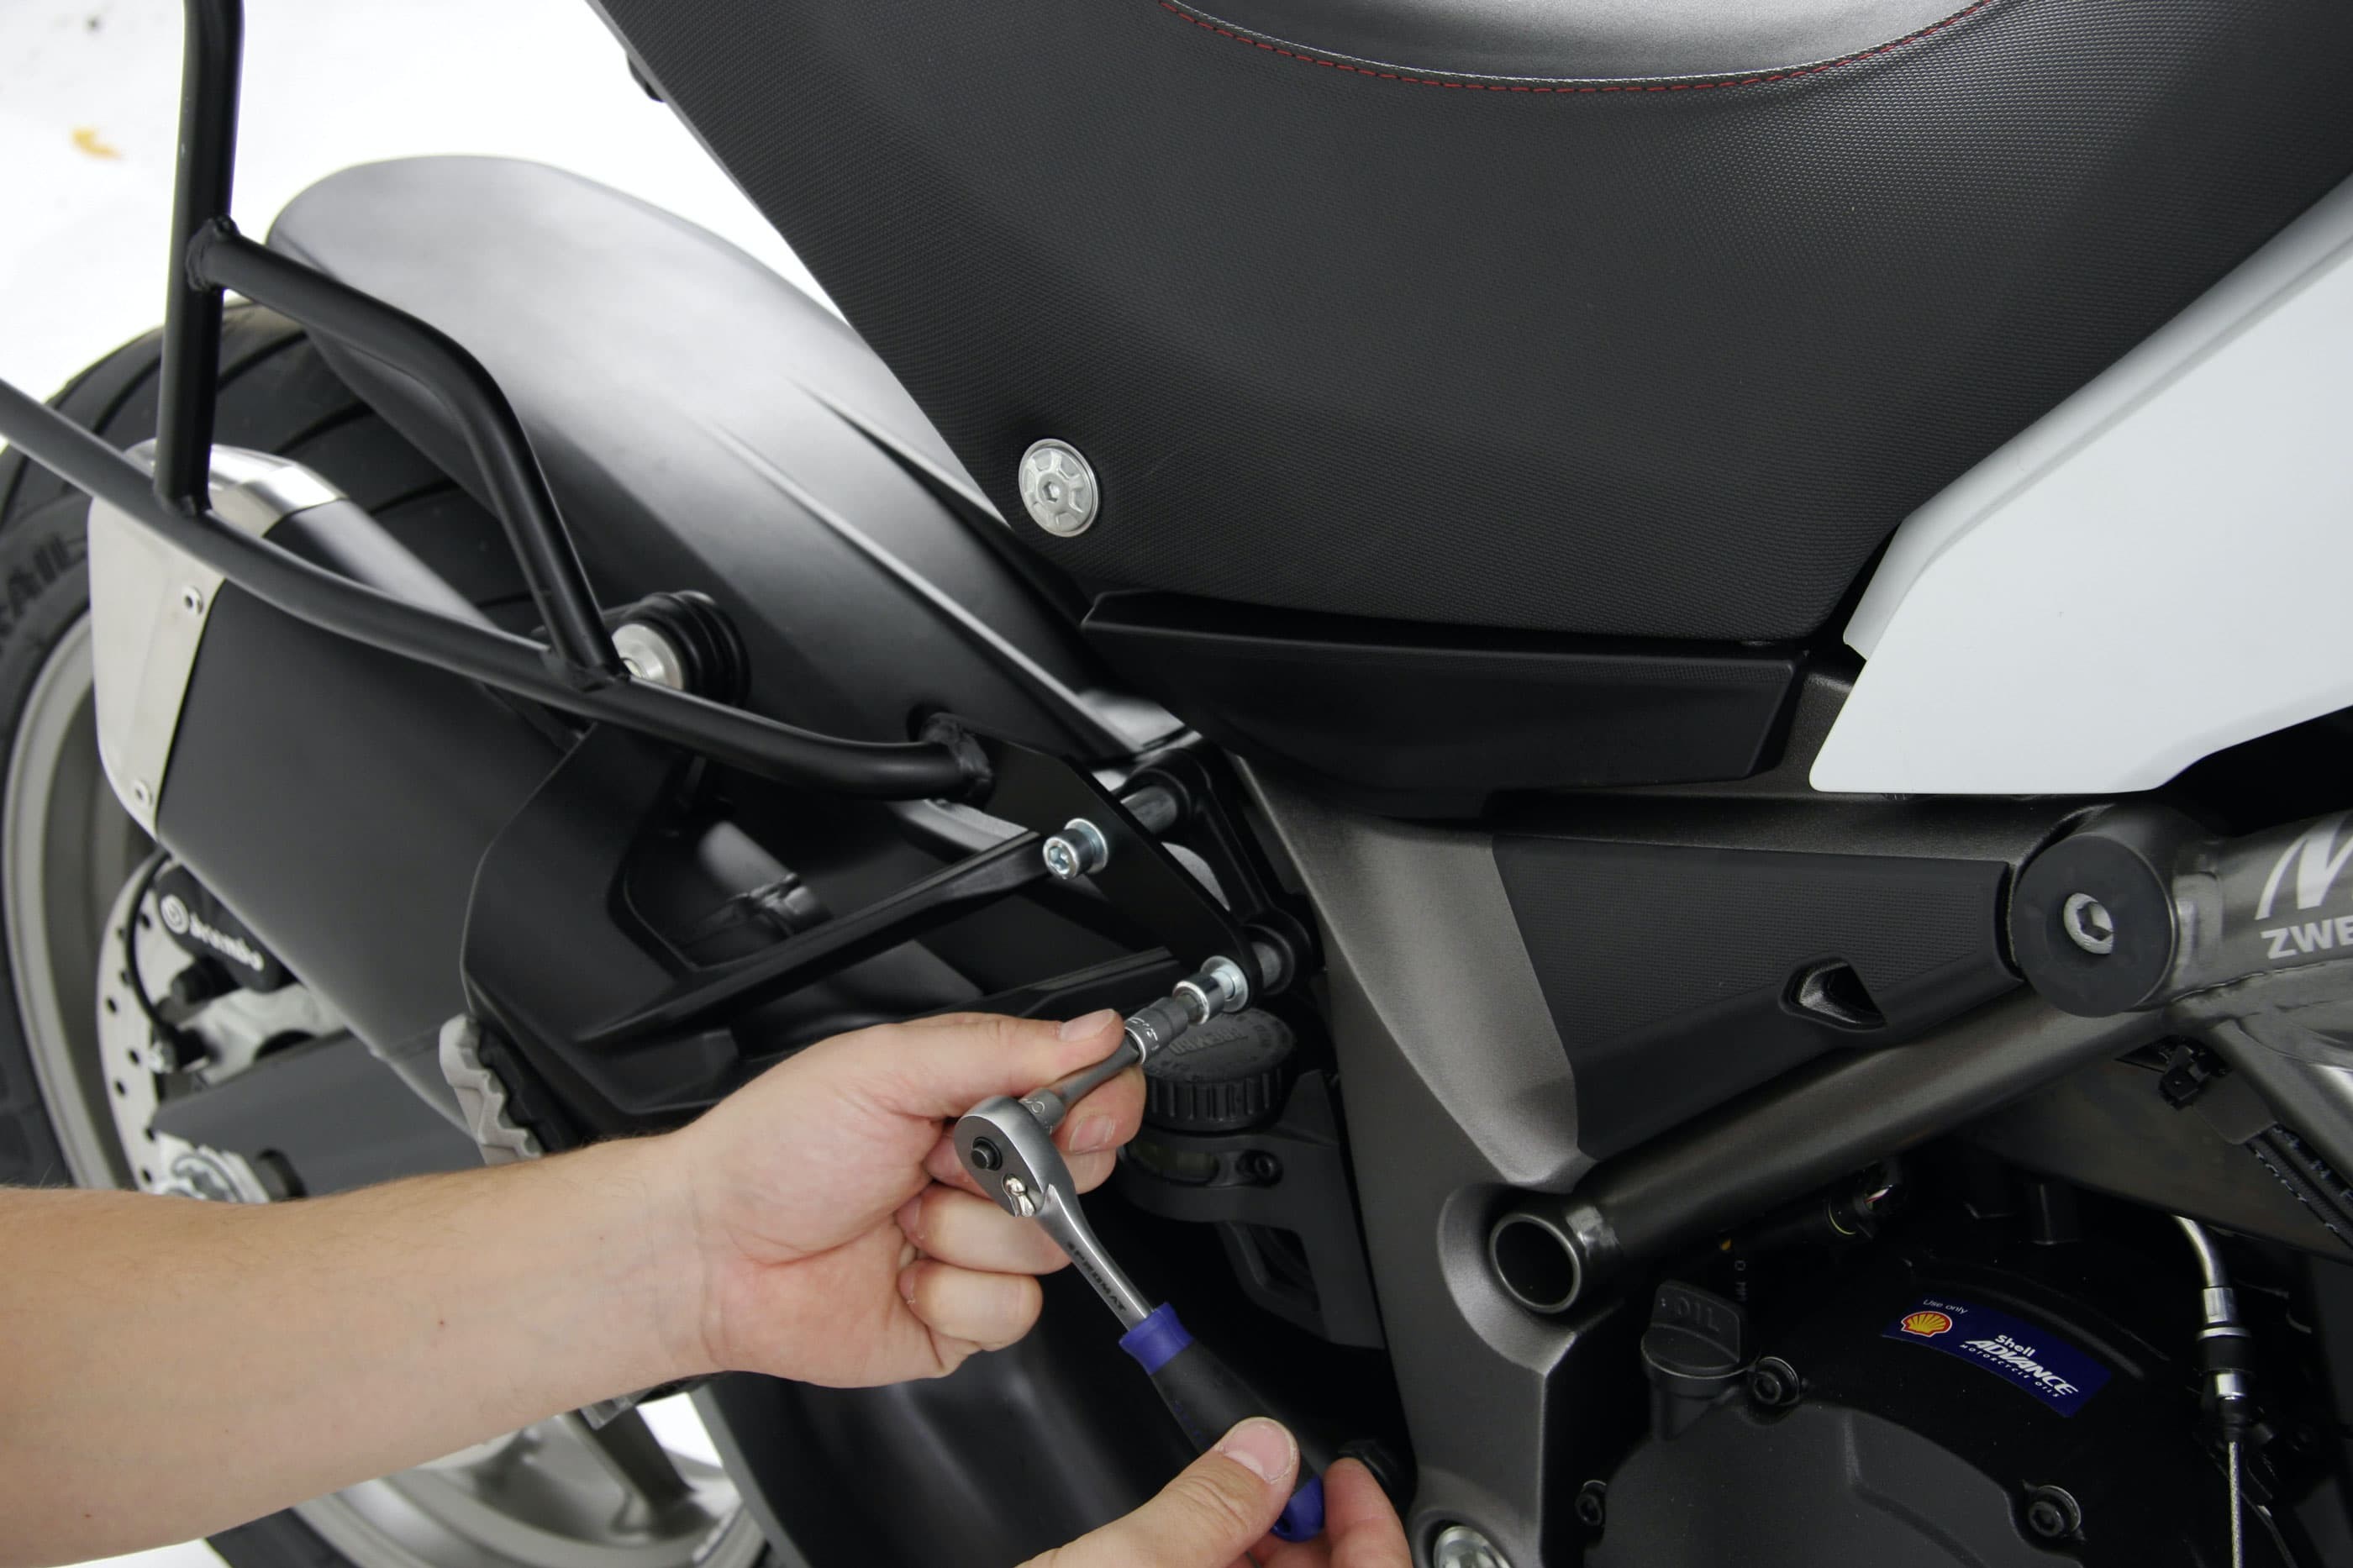
Step 5, Fig. 2: Install the arm with two spacer sleeves
Step 6: Install cross-connector to stabilise the luggage rack
06 – Install cross-connector to stabilise the luggage rack
At the rear, the luggage rack is stabilised with a cross-connector (located behind the mudguard). This cross-connector is secured between the right and left racks with two bolts at each end.
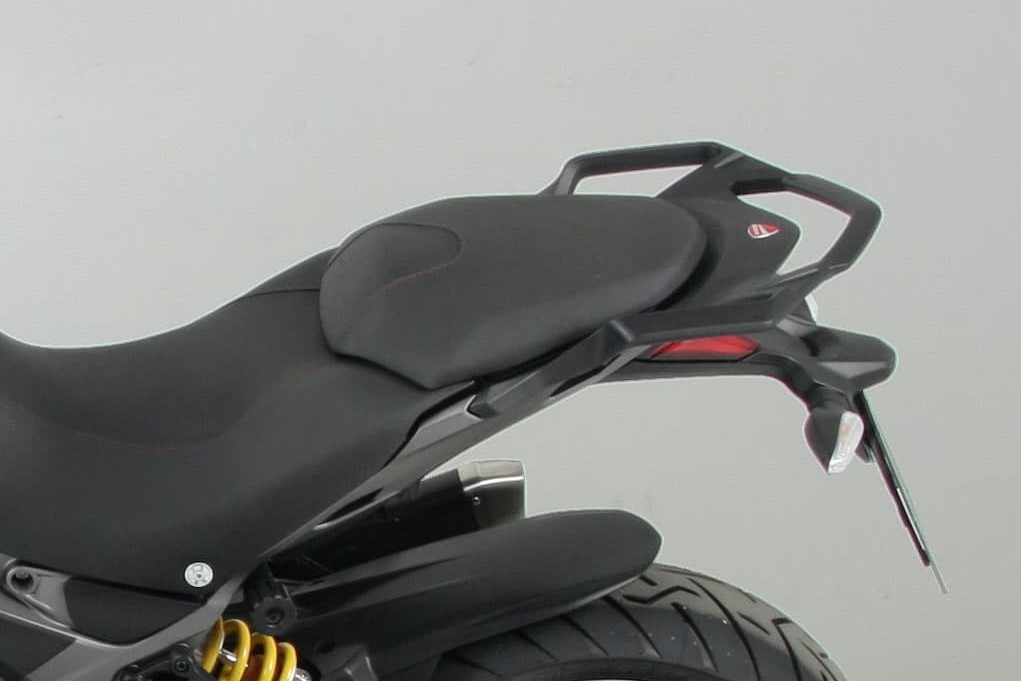
Step 7: Check seat and tighten screws
07 – Check seat and tighten screws
Now we check that the loosely mounted luggage rack is free of tension and aligned as symmetrically as possible with the motorbike. No two motorbikes are identical, so if there is any tension or any gaps at the mounting points, you should attempt to determine where the problem is by jiggling the rack, and then install spacers accordingly.
In exceptional cases, it may be necessary to slightly lengthen a bolt hole on the rack using a metal file, or to reduce any gap by carefully bending the arm a little. These measures are always better than simply using force to bolt the parts together because if the rack is under tension, it may develop cracks later! Once you’ve aligned everything optimally, you can tighten all the bolts fully.
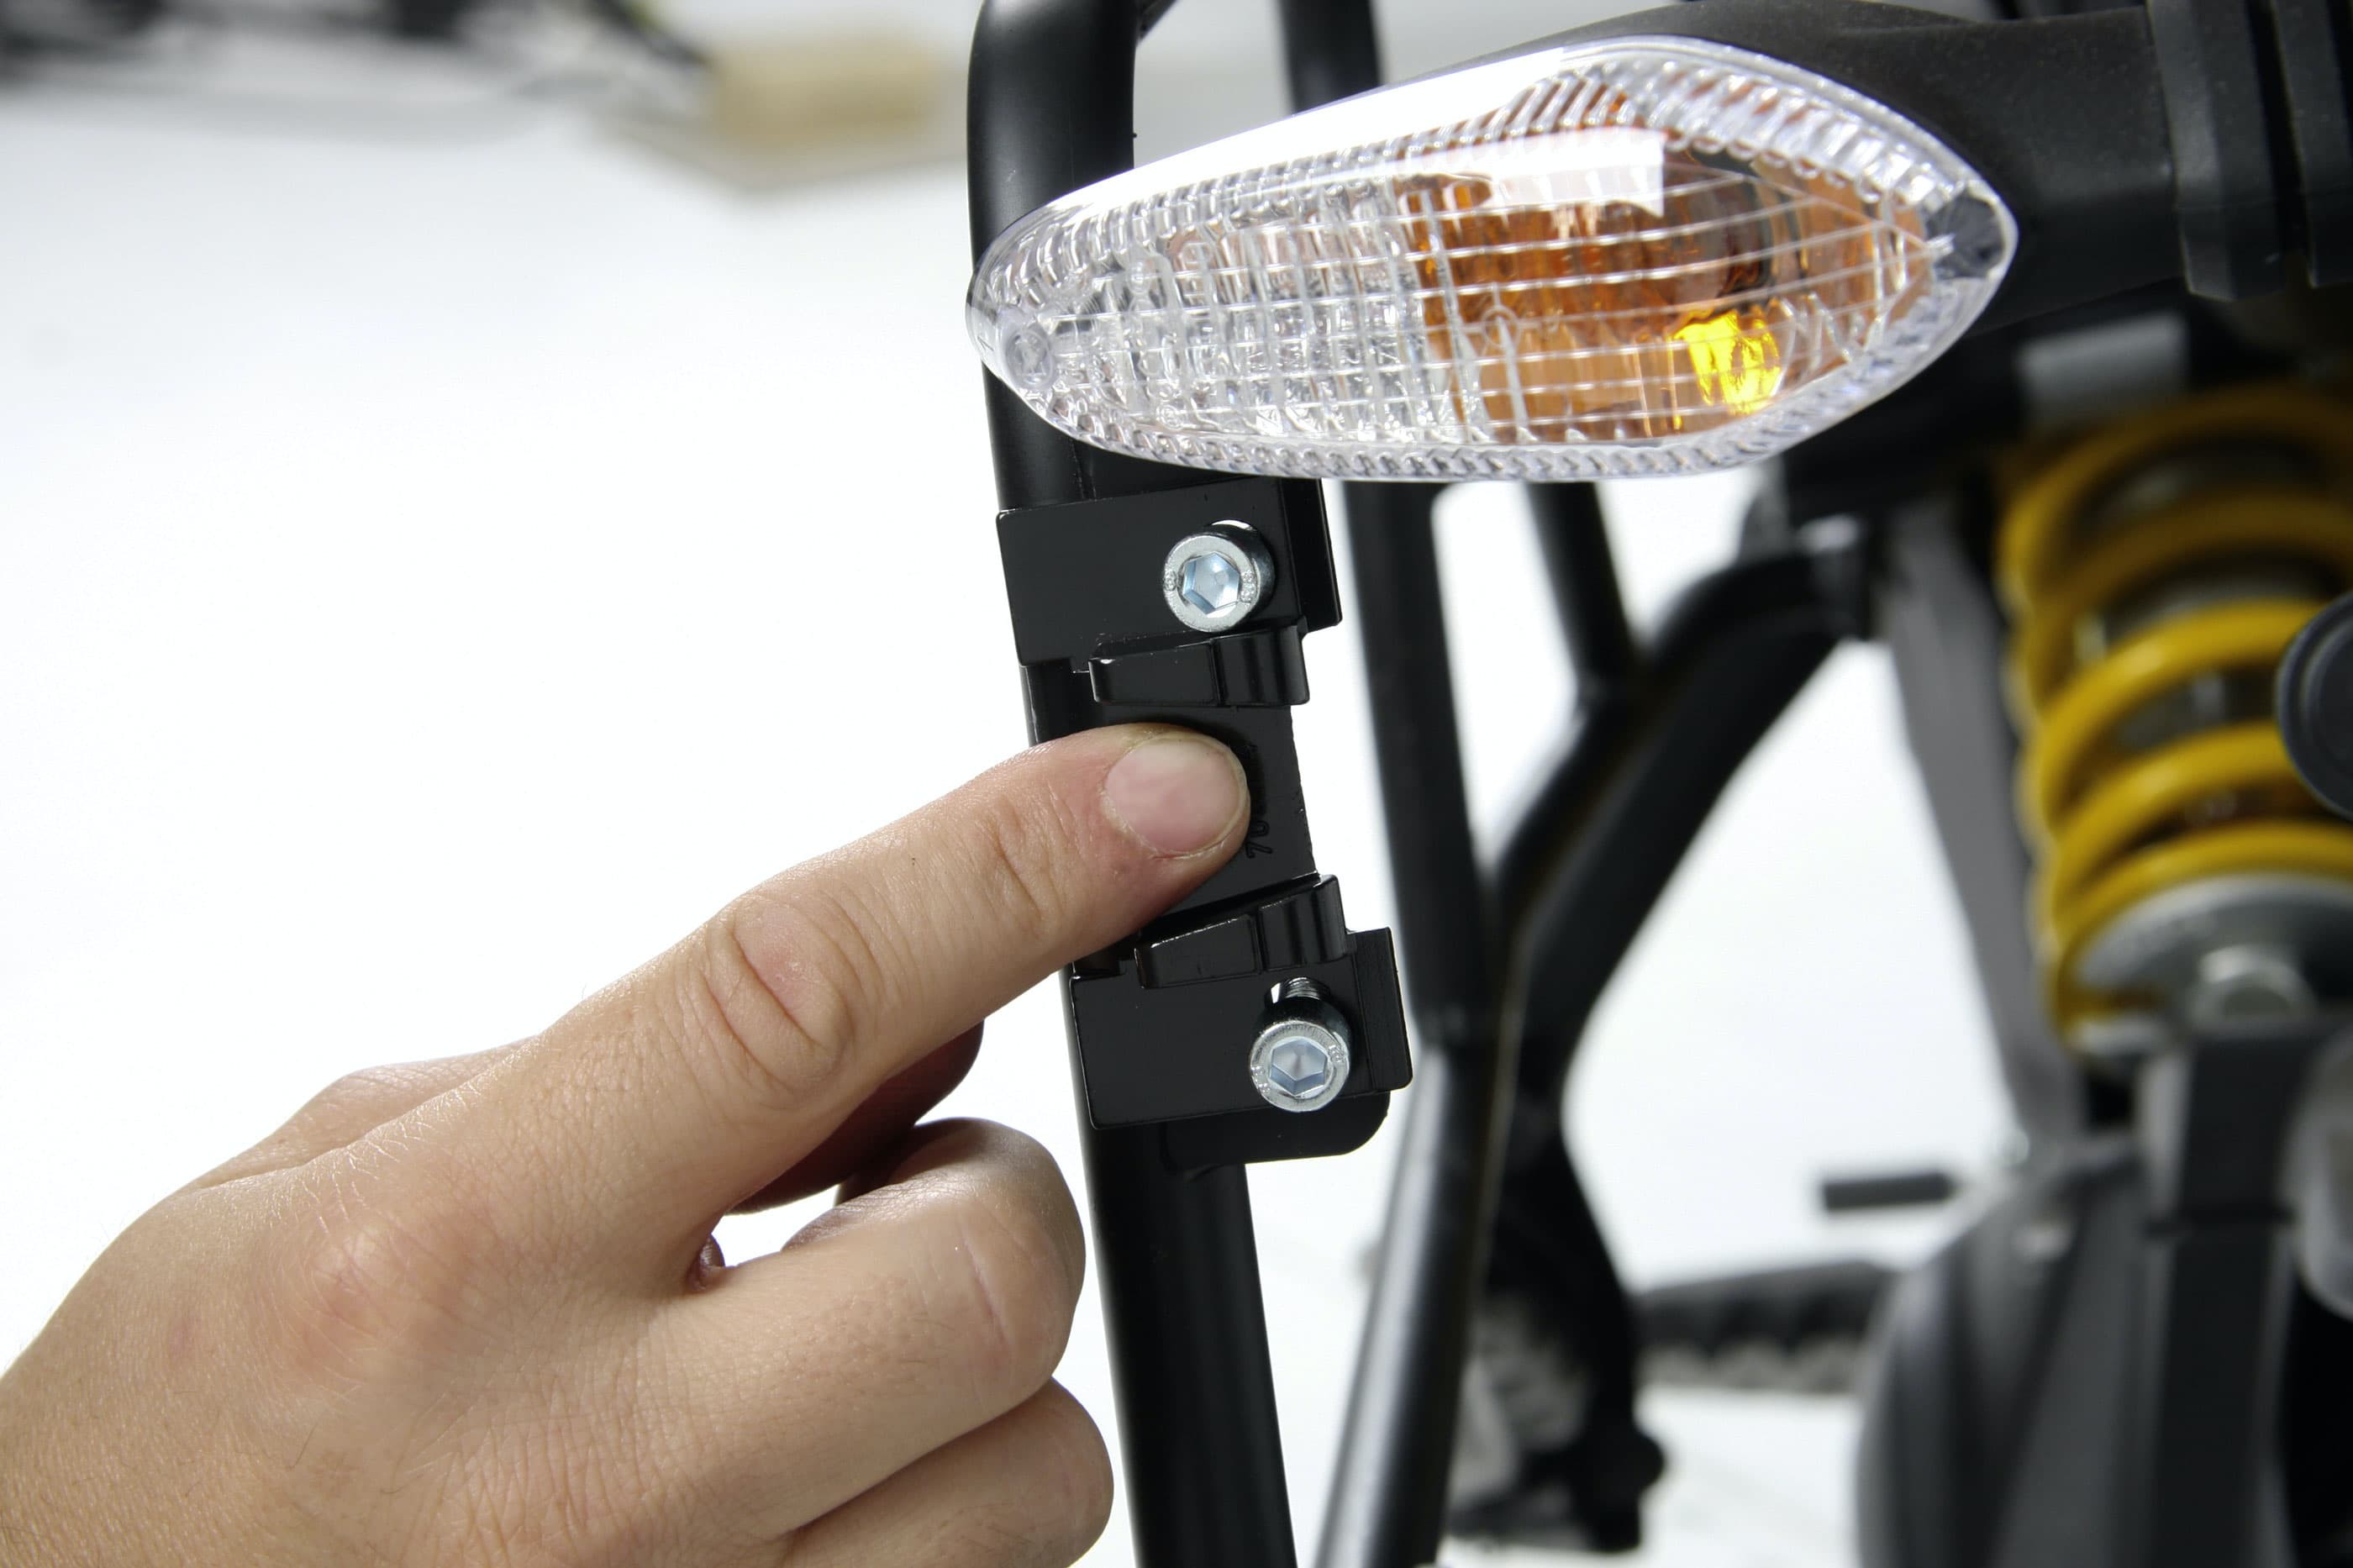
Step 8, Fig. 1: Install retaining clips for the cases
08 – Install retaining clips for the cases
Before the case can be attached to the rack, you need to install the retaining clips on the rack. Hepco & Becker side cases come with these retaining clips.
Important: If you change motorbike, don't forget to remove the retaining clips again (if you want to be able to use your cases on your new motorbike, that is). Clips may not be supplied with the new racks for your next motorbike, so you would have to order them specially.
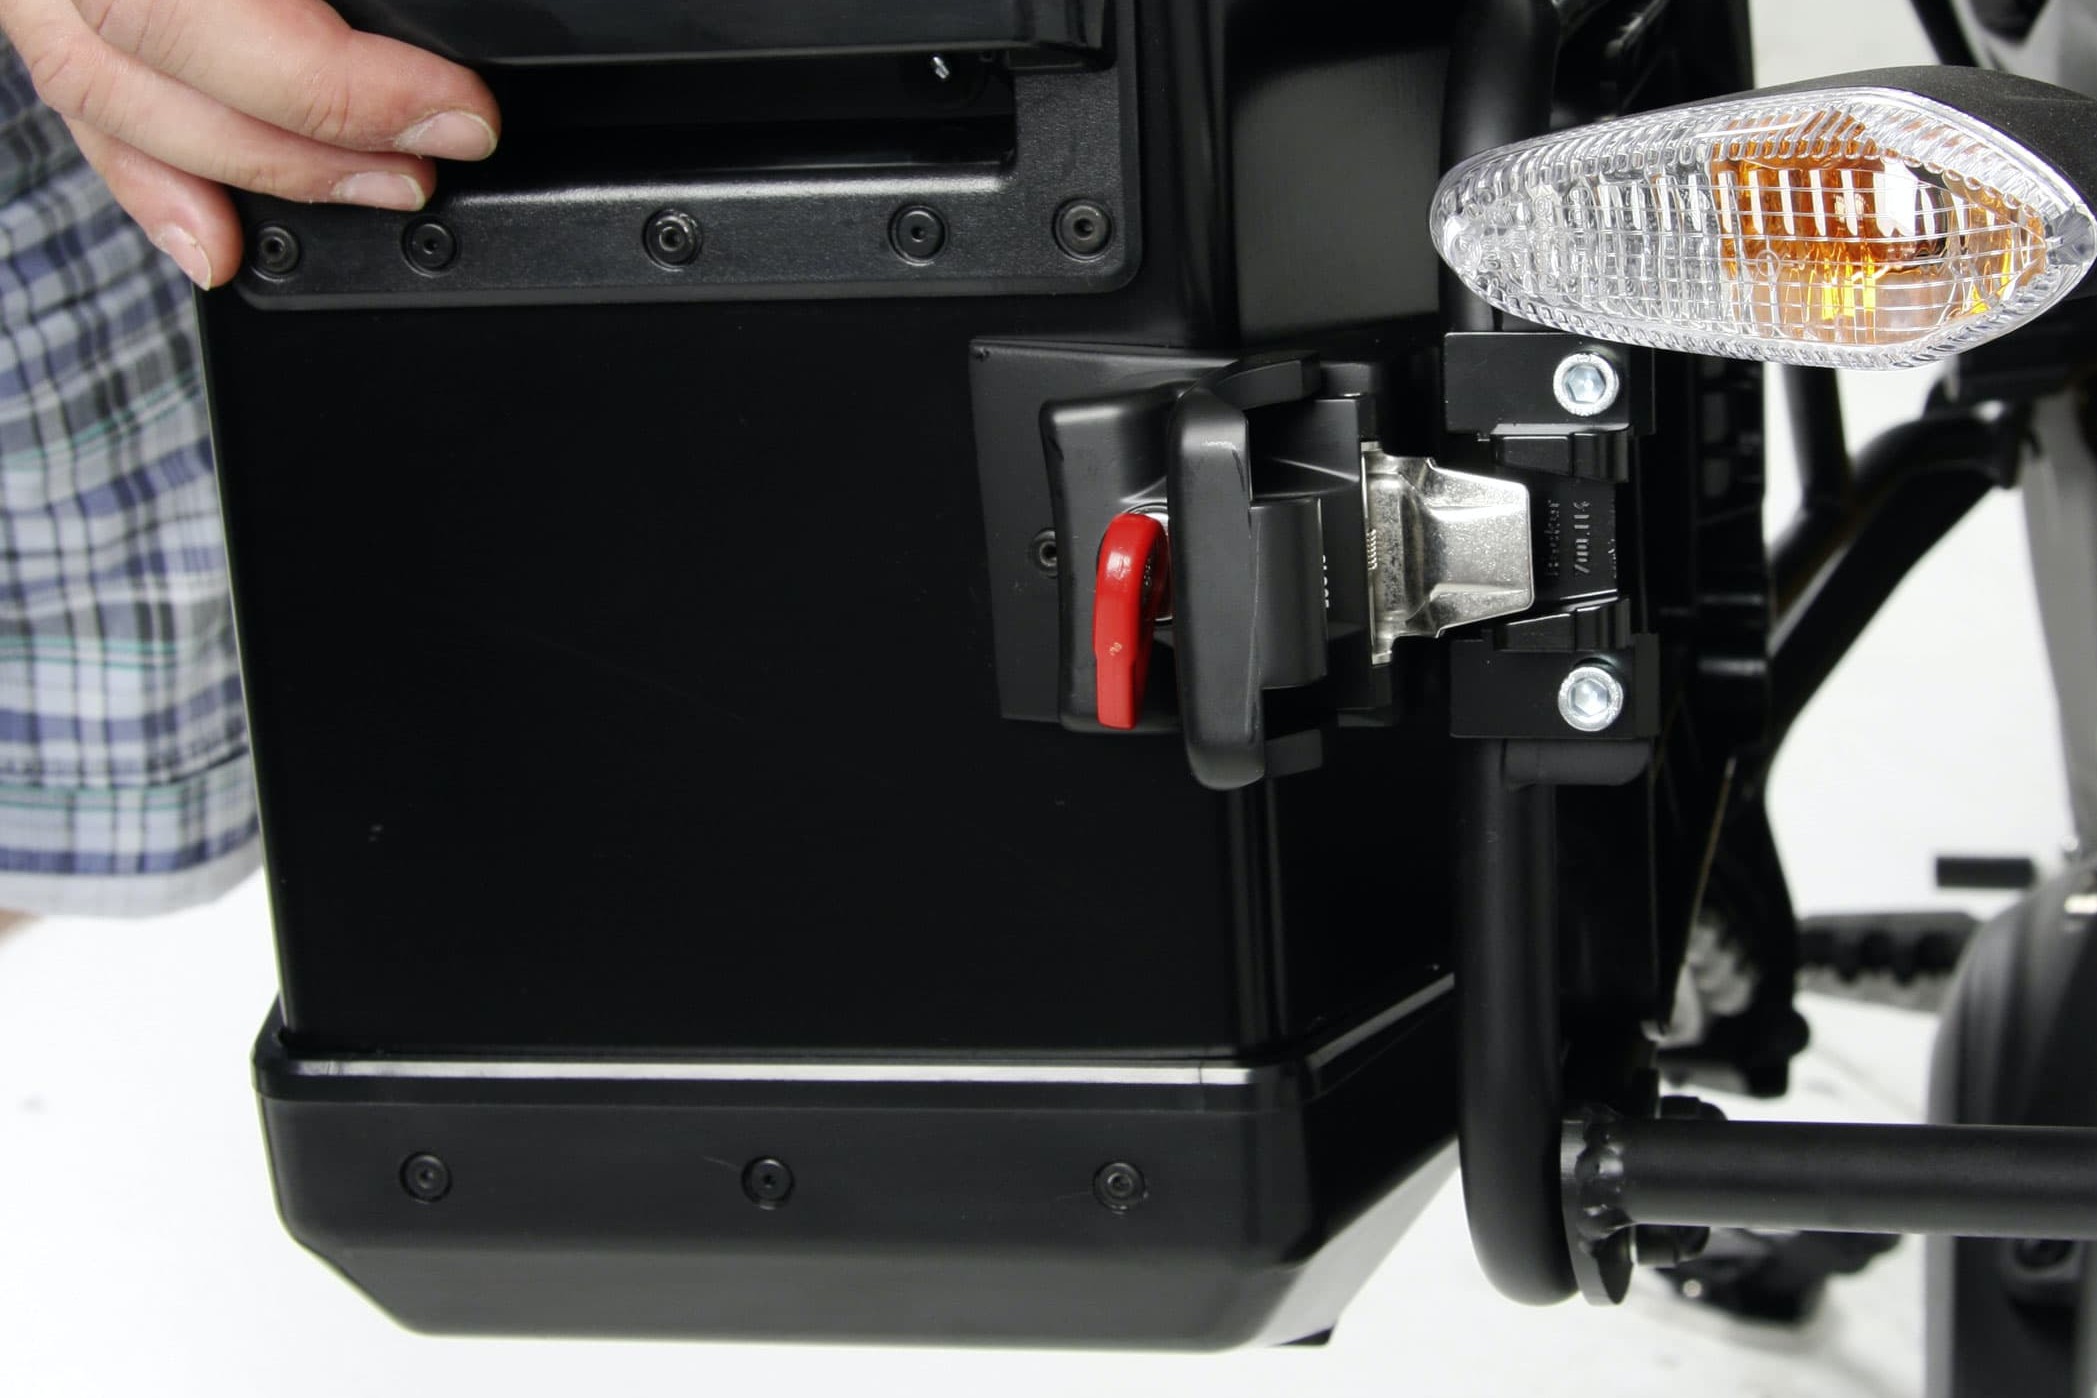
Step 8, Fig. 2: Attach the cases to the retaining clips and check that they are properly seated
Now make sure that the case fits accurately on the mount, and test the locking mechanism. You can do this by attaching the case on one side and pressing the other side into the locking mechanism. If you have any problem snapping the case into place, undo the case mounts again and re-align them until they work properly. If the key will not turn in the lock, or only with difficulty, this may be an indication that the mechanism is not yet correctly aligned.
The right way to install motorcycle cases
- After you install your cases, there must be adequate clearance between case and exhaust – especially if you have an aftermarket silencer on your motorcycle. It is essential to check this!
- You should also make sure that the cases will not hit against any part of the bike, even if you ride over a pothole in the road. Check this by compressing the suspension as far as possible several times with the motorbike stationary. It’s best to have someone to assist you with this.
- Check that the permissible gross vehicle weight (look in your registration document) is not exceeded. Distribute the weight evenly between the two cases. When you pack your cases, put heavy items at the bottom and towards the front. If you also install a top box, it should only be used for light luggage.
- Lock the cases themselves and the mounts before you set off. Some touring bikers take the precaution of additionally securing their cases to the rack with lashing straps – especially if they will be riding over poorly maintained roads and tracks.
- Cases may affect how your motorcycle handles, and they also make it wider. So you should ride slowly until you get used to how your bike now feels, and avoid narrow spaces (e.g. filtering/lane splitting). Always observe the maximum speed specified by the case manufacturer (usually 130 km/h or 80 mph). If you exceed the maximum speed, this may have a dangerous effect on bike control (buffeting).
The Louis Technical Centre
If you have a technical question about your motorbike, please contact our Technical Centre, where they have endless experience, reference books and contacts.
Please note!
These tips for DIY mechanics contain general recommendations that may not apply to all vehicles or all individual components. As local conditions may vary considerably, we are unable to guarantee the correctness of information in these tips for DIY mechanics.
Thank you for your understanding.
