- Home
- Magazine
- All about bikes
- Tips for DIY mechanicss
- Chassis Tuning
Motorcycle chassis tuning
A successful chassis set-up can turn a very average motorcycle into a customised fun machine at modest expense.
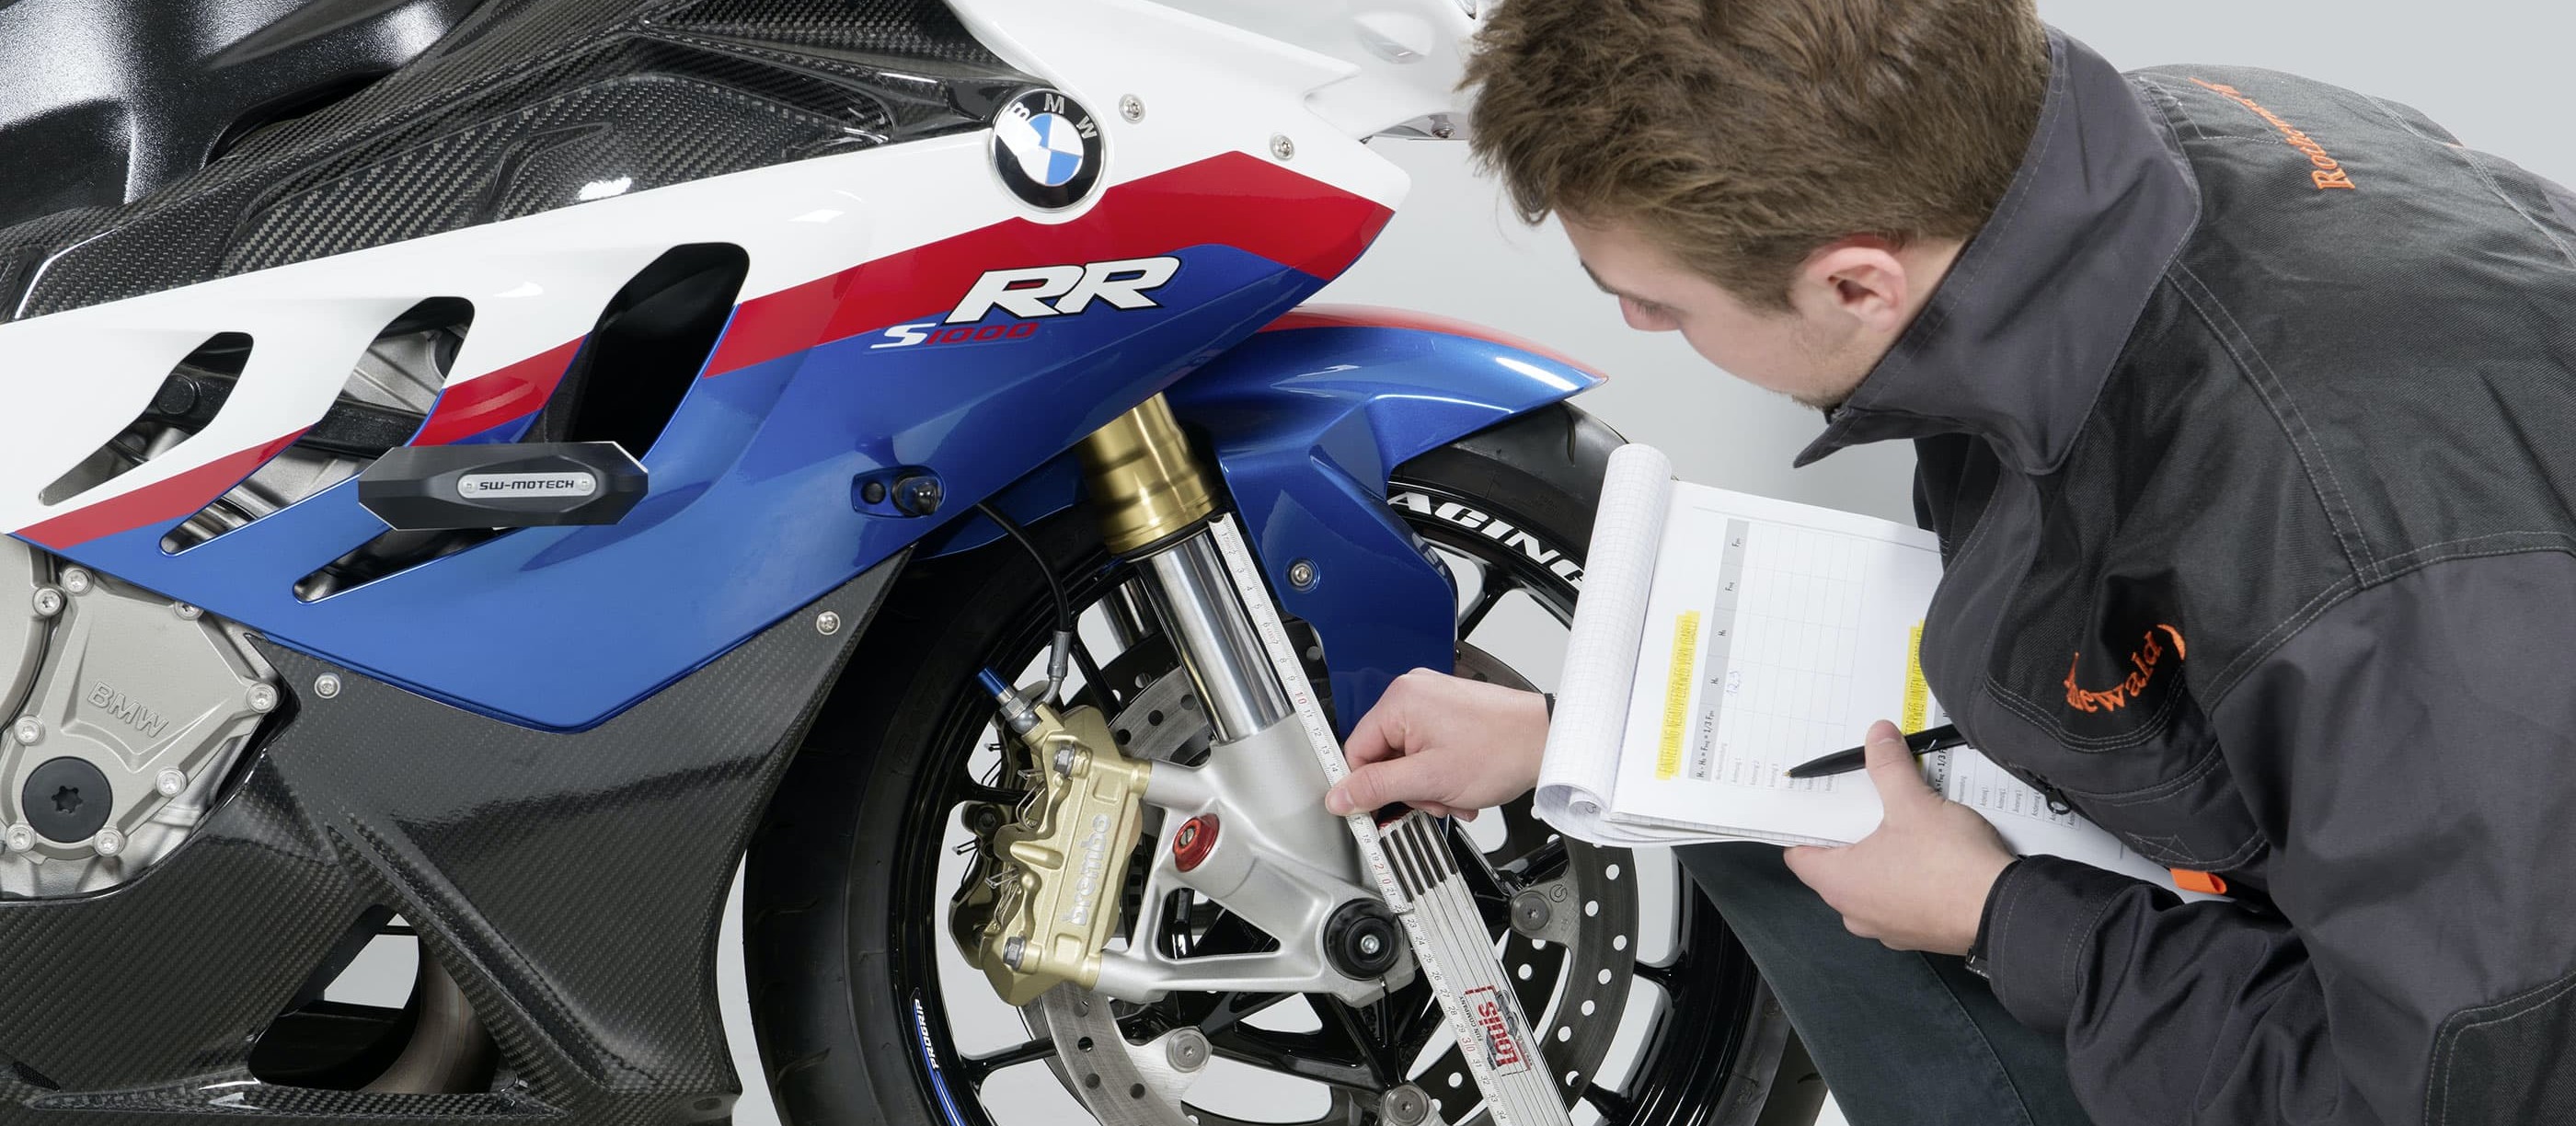
- Adjusting the chassis on the motorcycle
- Chassis geometry
- Suspension tuning
- Adjusting the chassis and suspension – now let's get started
- 01 – The right balance: Sag
- Chassis geometry
- 02 – Adjusting the preload
- 03 – Varying the chassis geometry
- Adjusting the damping
- Download table
- 04 – Front rebound damping
- 05 – Shock rebound damping
- 06 – Compression damping and fine tuning
- Chassis conversion
How you go about rectifying a leaking fork is explained in the DIY tip Fork seals. Now, a question to finish with: How old is the oil in your shocks? Rather like engine oil, fork oil is subject to wear, so it should be changed at least every four years.
Adjusting the chassis on the motorcycle
In our experience, many motorcycle riders have never given any thought to their bike's suspension set-up. That's a pity because you can make your machine a lot more fun to ride, and much safer, with a chassis that's tuned to suit your personal riding style. It's also the reason that almost all motorcycles are designed with more or less adjustment options. Putting these to good use doesn't take any great mechanical skill or special tools. All you need to do is follow the steps described below and be willing to try out different things.
We'll start with a couple of comments.
- The suspension set-up is not the only factor that affects how your motorcycle handles and feels. Before you start adjusting your suspension, first check that your tyre pressure is correct and the tread hasn't completely worn down. Both of these things can falsify the outcome of any adjustments you make. You should also check that the wheel, steering head and swingarm bearings have not got any play. And, of course, if your fork tubes are covered in an oily film and your shocks are leaking, then they're in need of repair rather than adjustment.
- The most important tools for doing any work on your bike chassis is a notepad and pencil! Be sure to make a note of your bike's existing set-up, which will usually be the factory set-up, and write down every single modification that you make to it. This is the only way to keep a check, make meaningful comparisons, and quickly return things to how they were if you're not satisfied with a change that you've made. You could also take photos with your smartphone to help with documenting everything you do. The other tools that you should have at the ready include: a folding rule or sturdy tape measure, screwdriver and open-end wrench for the forks, hook wrench for the shock absorber and, of course, the owner's manual for your motorcycle.
- If you can find someone to assist you, a second pair of hands makes many jobs a lot easier.
- Do like the professionals at the race track! Always proceed step by step and do a test ride after each modification you make. Remember: Experience comes from riding your bike!
Chassis geometry
The chassis geometry influences how your motorcycle feels when you ride it. The most important parameters are the wheelbase, rake and trail (see diagram: Chassis geometry).
- Wheelbase means the distance between the front and rear axles. In broad terms, you can say that the shorter the wheelbase, the more nimble the motorcycle, whereas a longer wheelbase gives greater stability.
- Rake means the angle between the steering tube and the vertical, as shown in the diagram. The rake and the fork offset together determine the trail.
- Trail means the distance between the point at which a line drawn through the steering axis meets the ground and the point where the front tyre is in contact with the ground. The shorter the trail, the twitchier the bike, whereas a longer trail makes the bike more stable and slower-steering.
The relationship between these parameters is always a compromise. If you optimise the set-up to give a more agile ride, you will have to sacrifice a degree of stability, and vice versa. And don't forget that the extra weight of a pillion passenger will alter the rake and trail – the chassis should be adapted to the weight carried.
Suspension tuning
The springs carry the weight of a motorcycle (and its rider) and absorb impacts from bumps in the road. The main purpose of tuning the suspension is to optimise the motorcycle for the load comprising rider and luggage. If you've ever taken a pillion passenger on your machine, you'll know that the extra weight over the rear wheel makes its suspension sag, and the whole bike feels sluggish and difficult to handle. By adjusting the preload, you do NOT make the springs harder or softer. Rather, the effect is to raise or lower the motorcycle. In this way, you can influence the geometry, and therefore the handling, in addition to adapting the suspension to suit the load carried. For all adjustments, it's best to take the factory setting as your starting point. You can find this in your owner's manual. The manual will also tell you what adjustment options the manufacturer has provided. At least the rear preload should be variable on all bikes.
Adjusting the chassis and suspension – now let's get started
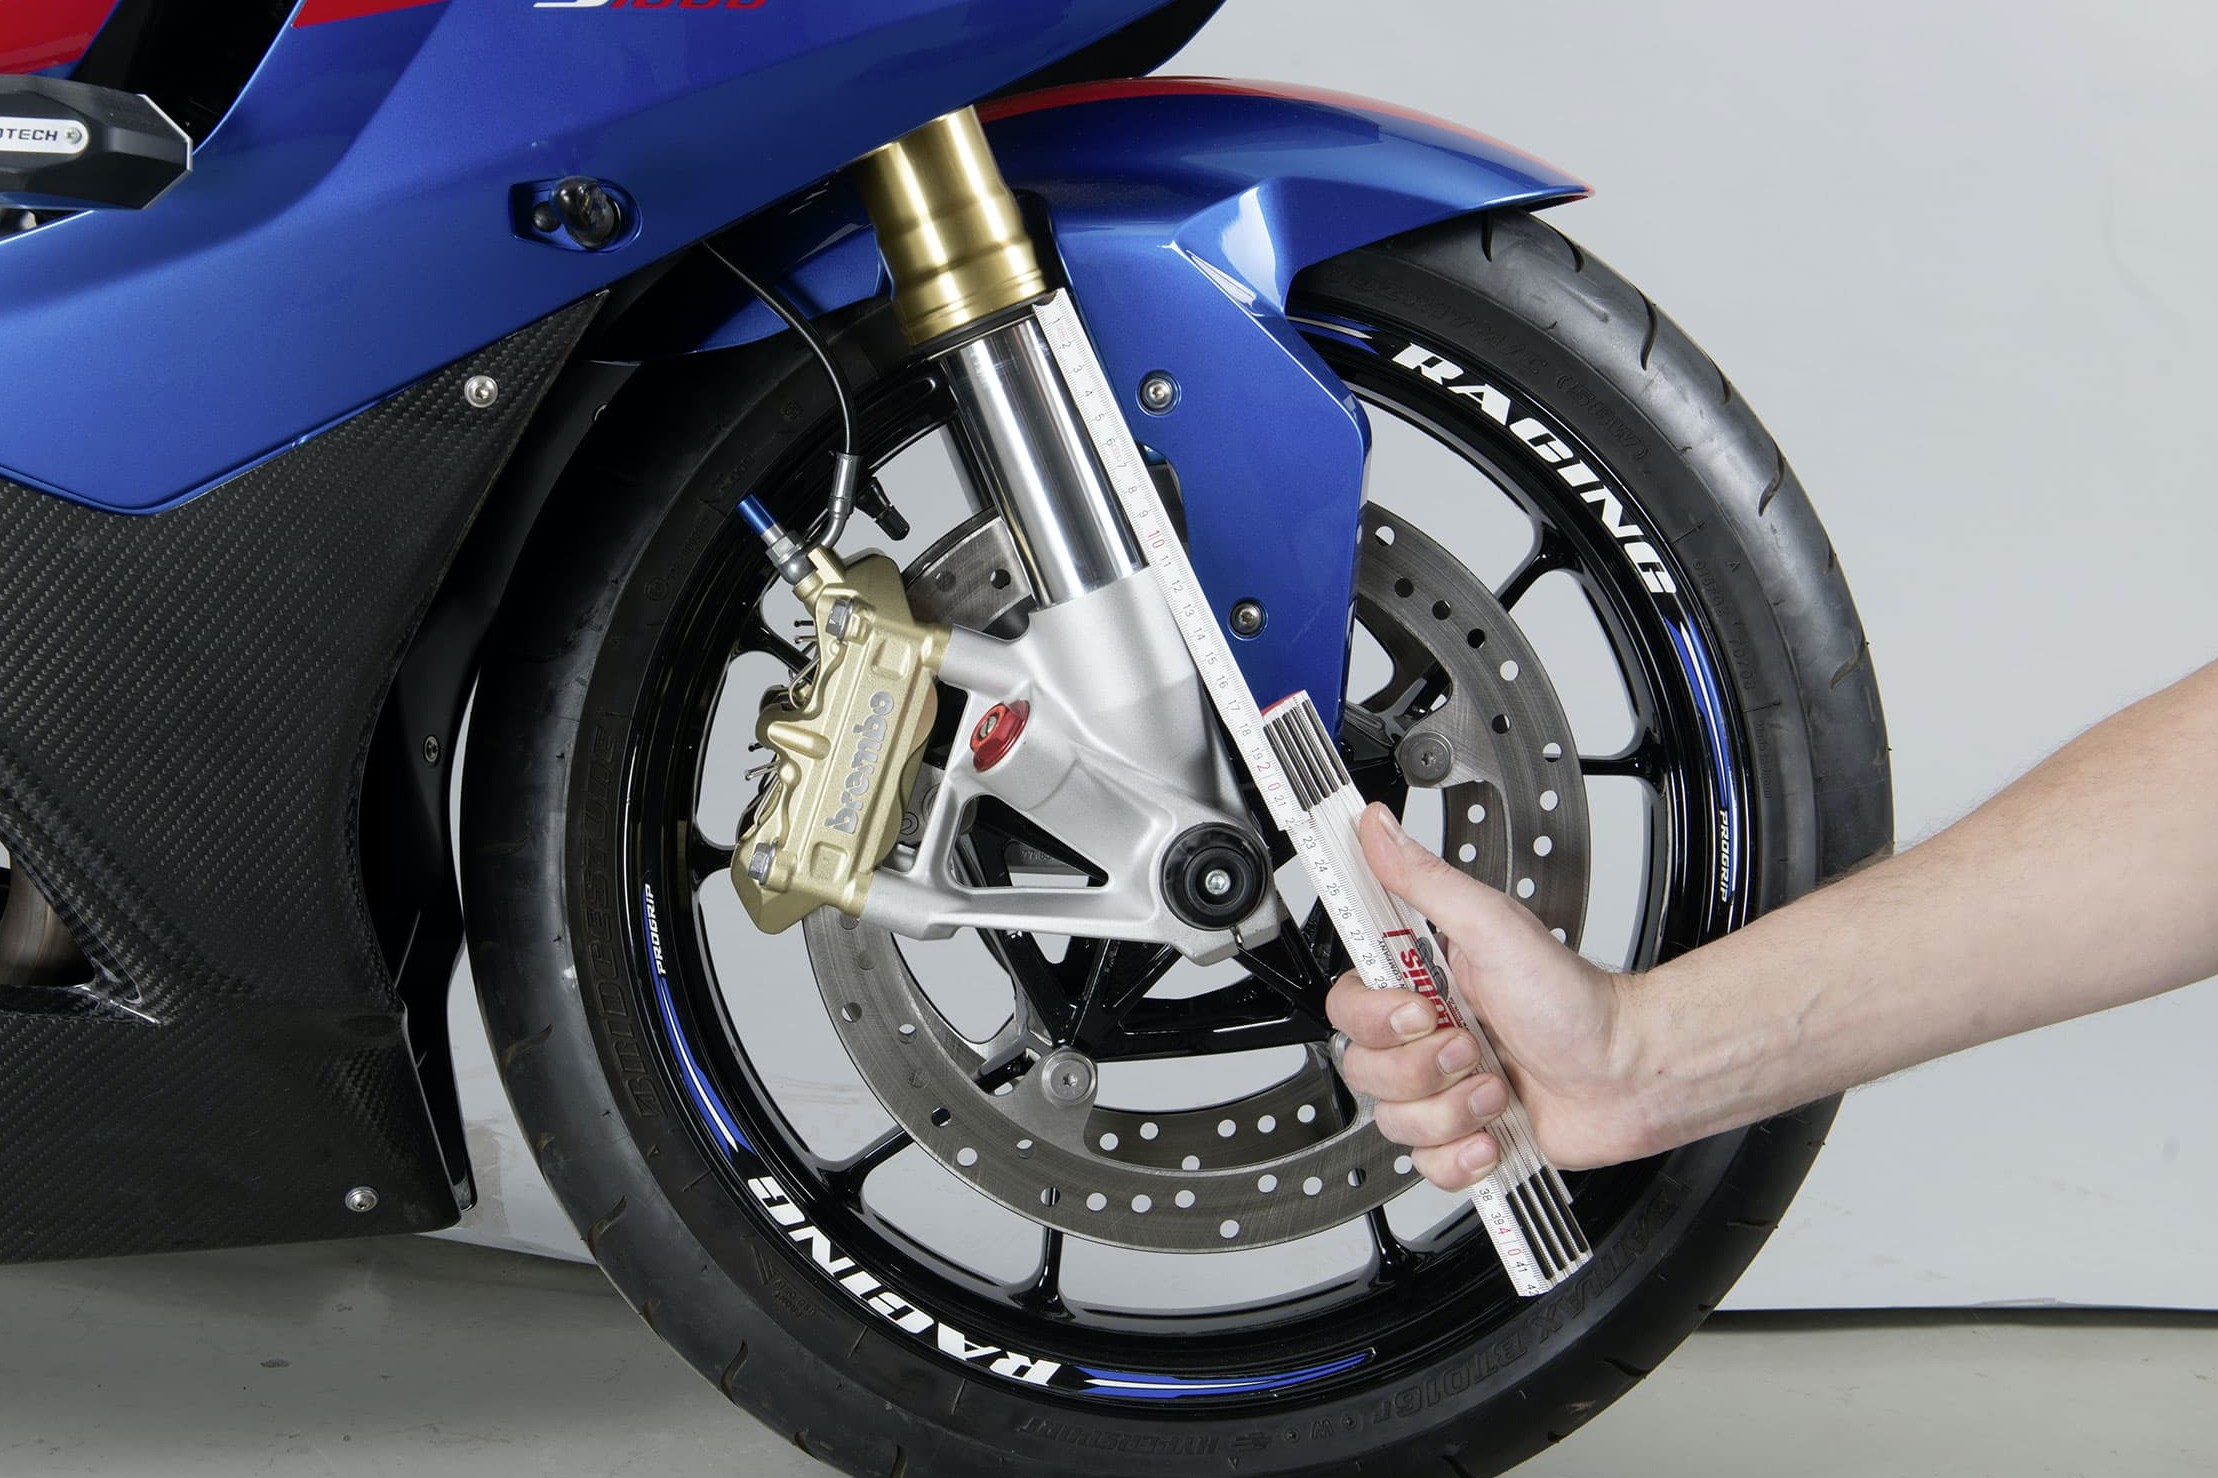
Step 1, Fig. 1: Measure the front fork sag
01 – The right balance: Sag
Even when stationary, the weight of your motorcycle and load compresses the springs. This is essential to enable the suspension to always maintain ground contact. The degree to which the springs compress is called sag. To measure sag, you need to measure the distance between the bottom triple tree and the dust cap on the fork slider, or between the foot of the fork and the dust cap on upside-down (USD) forks. Take this measurement at the front of your bike twice, once with the suspension fully extended, i.e. unladen (Hu), e.g. by putting the bike on its centre stand, and the second time, preferably on a level surface, with rider and any luggage or pillion passenger, i.e. laden (Hl). It's best to get someone to assist you with taking the measurement on the loaded motorcycle.
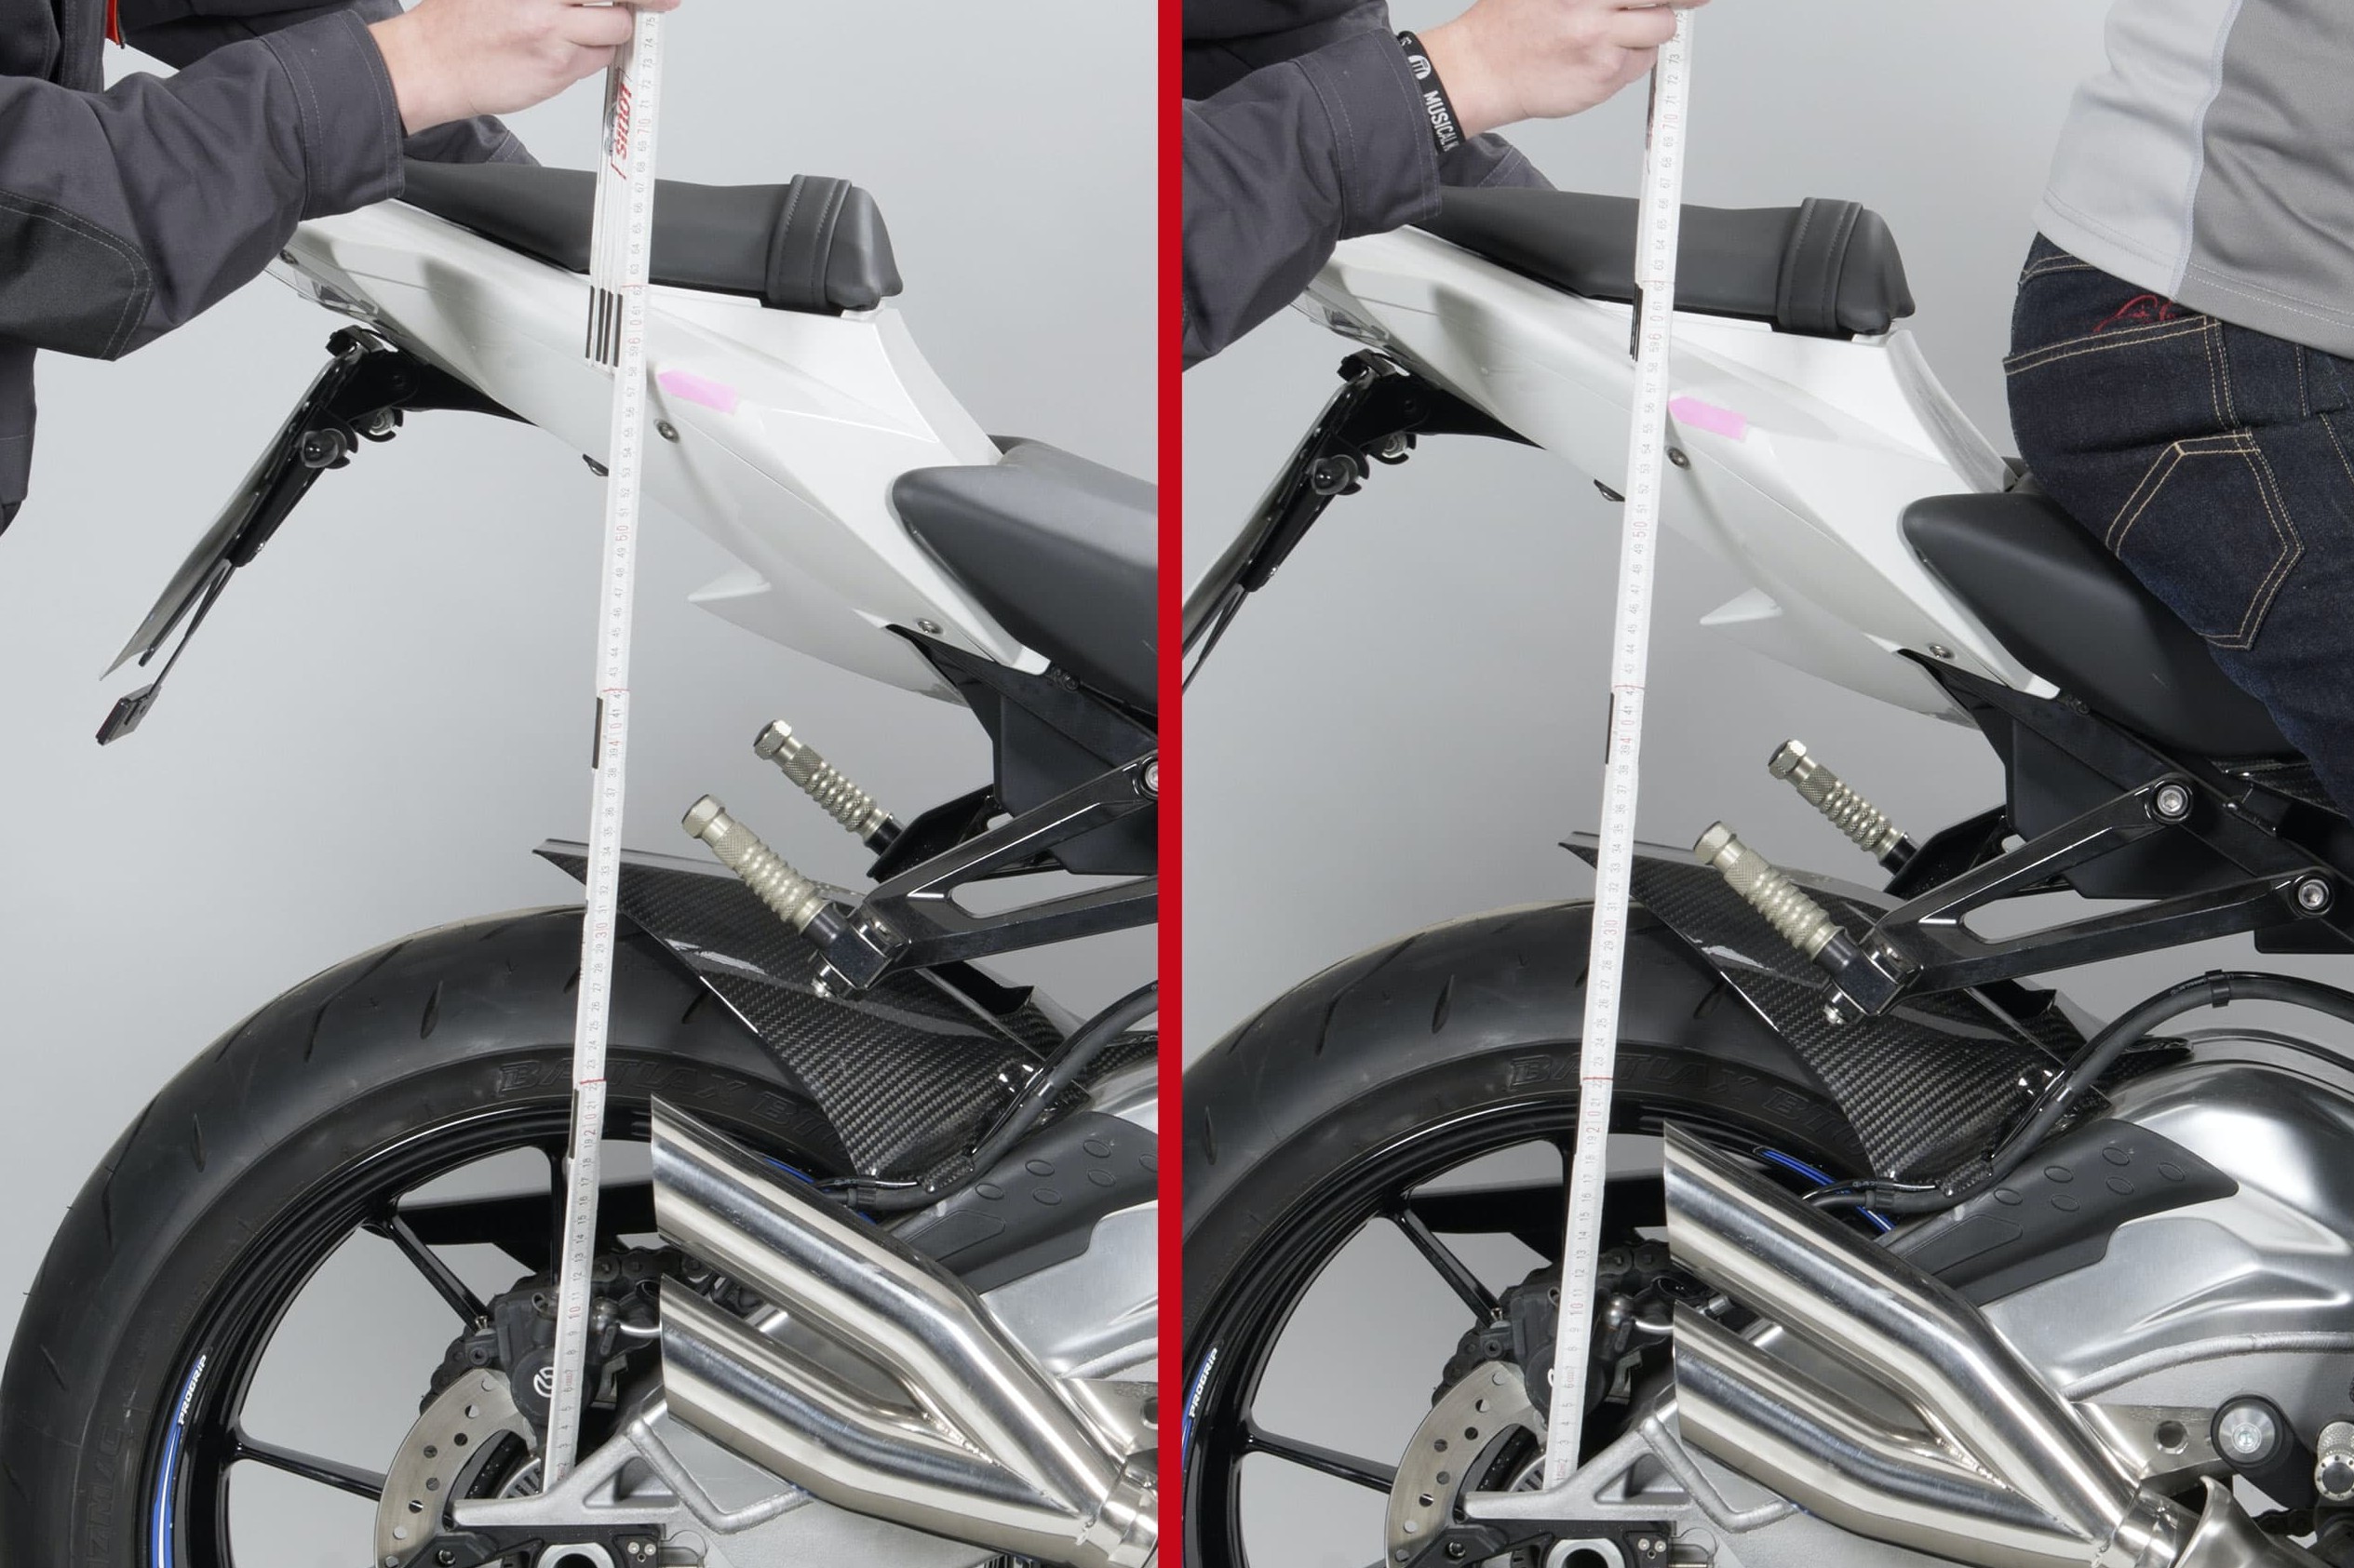
Step 1, Fig. 2: Now measure the rear sag; laden and unladen
For the rear sag, you measure from the wheel axle to a fixed point on the tail of the motorcycle, vertically above. Here too, measure once with no load (wheel off the ground) and once fully laden. The difference between each pair of measurements gives the sag. It should be around a third of the total travel when the bike is laden (Ttot). The total suspension travel is given in the technical data in your owner's manual.
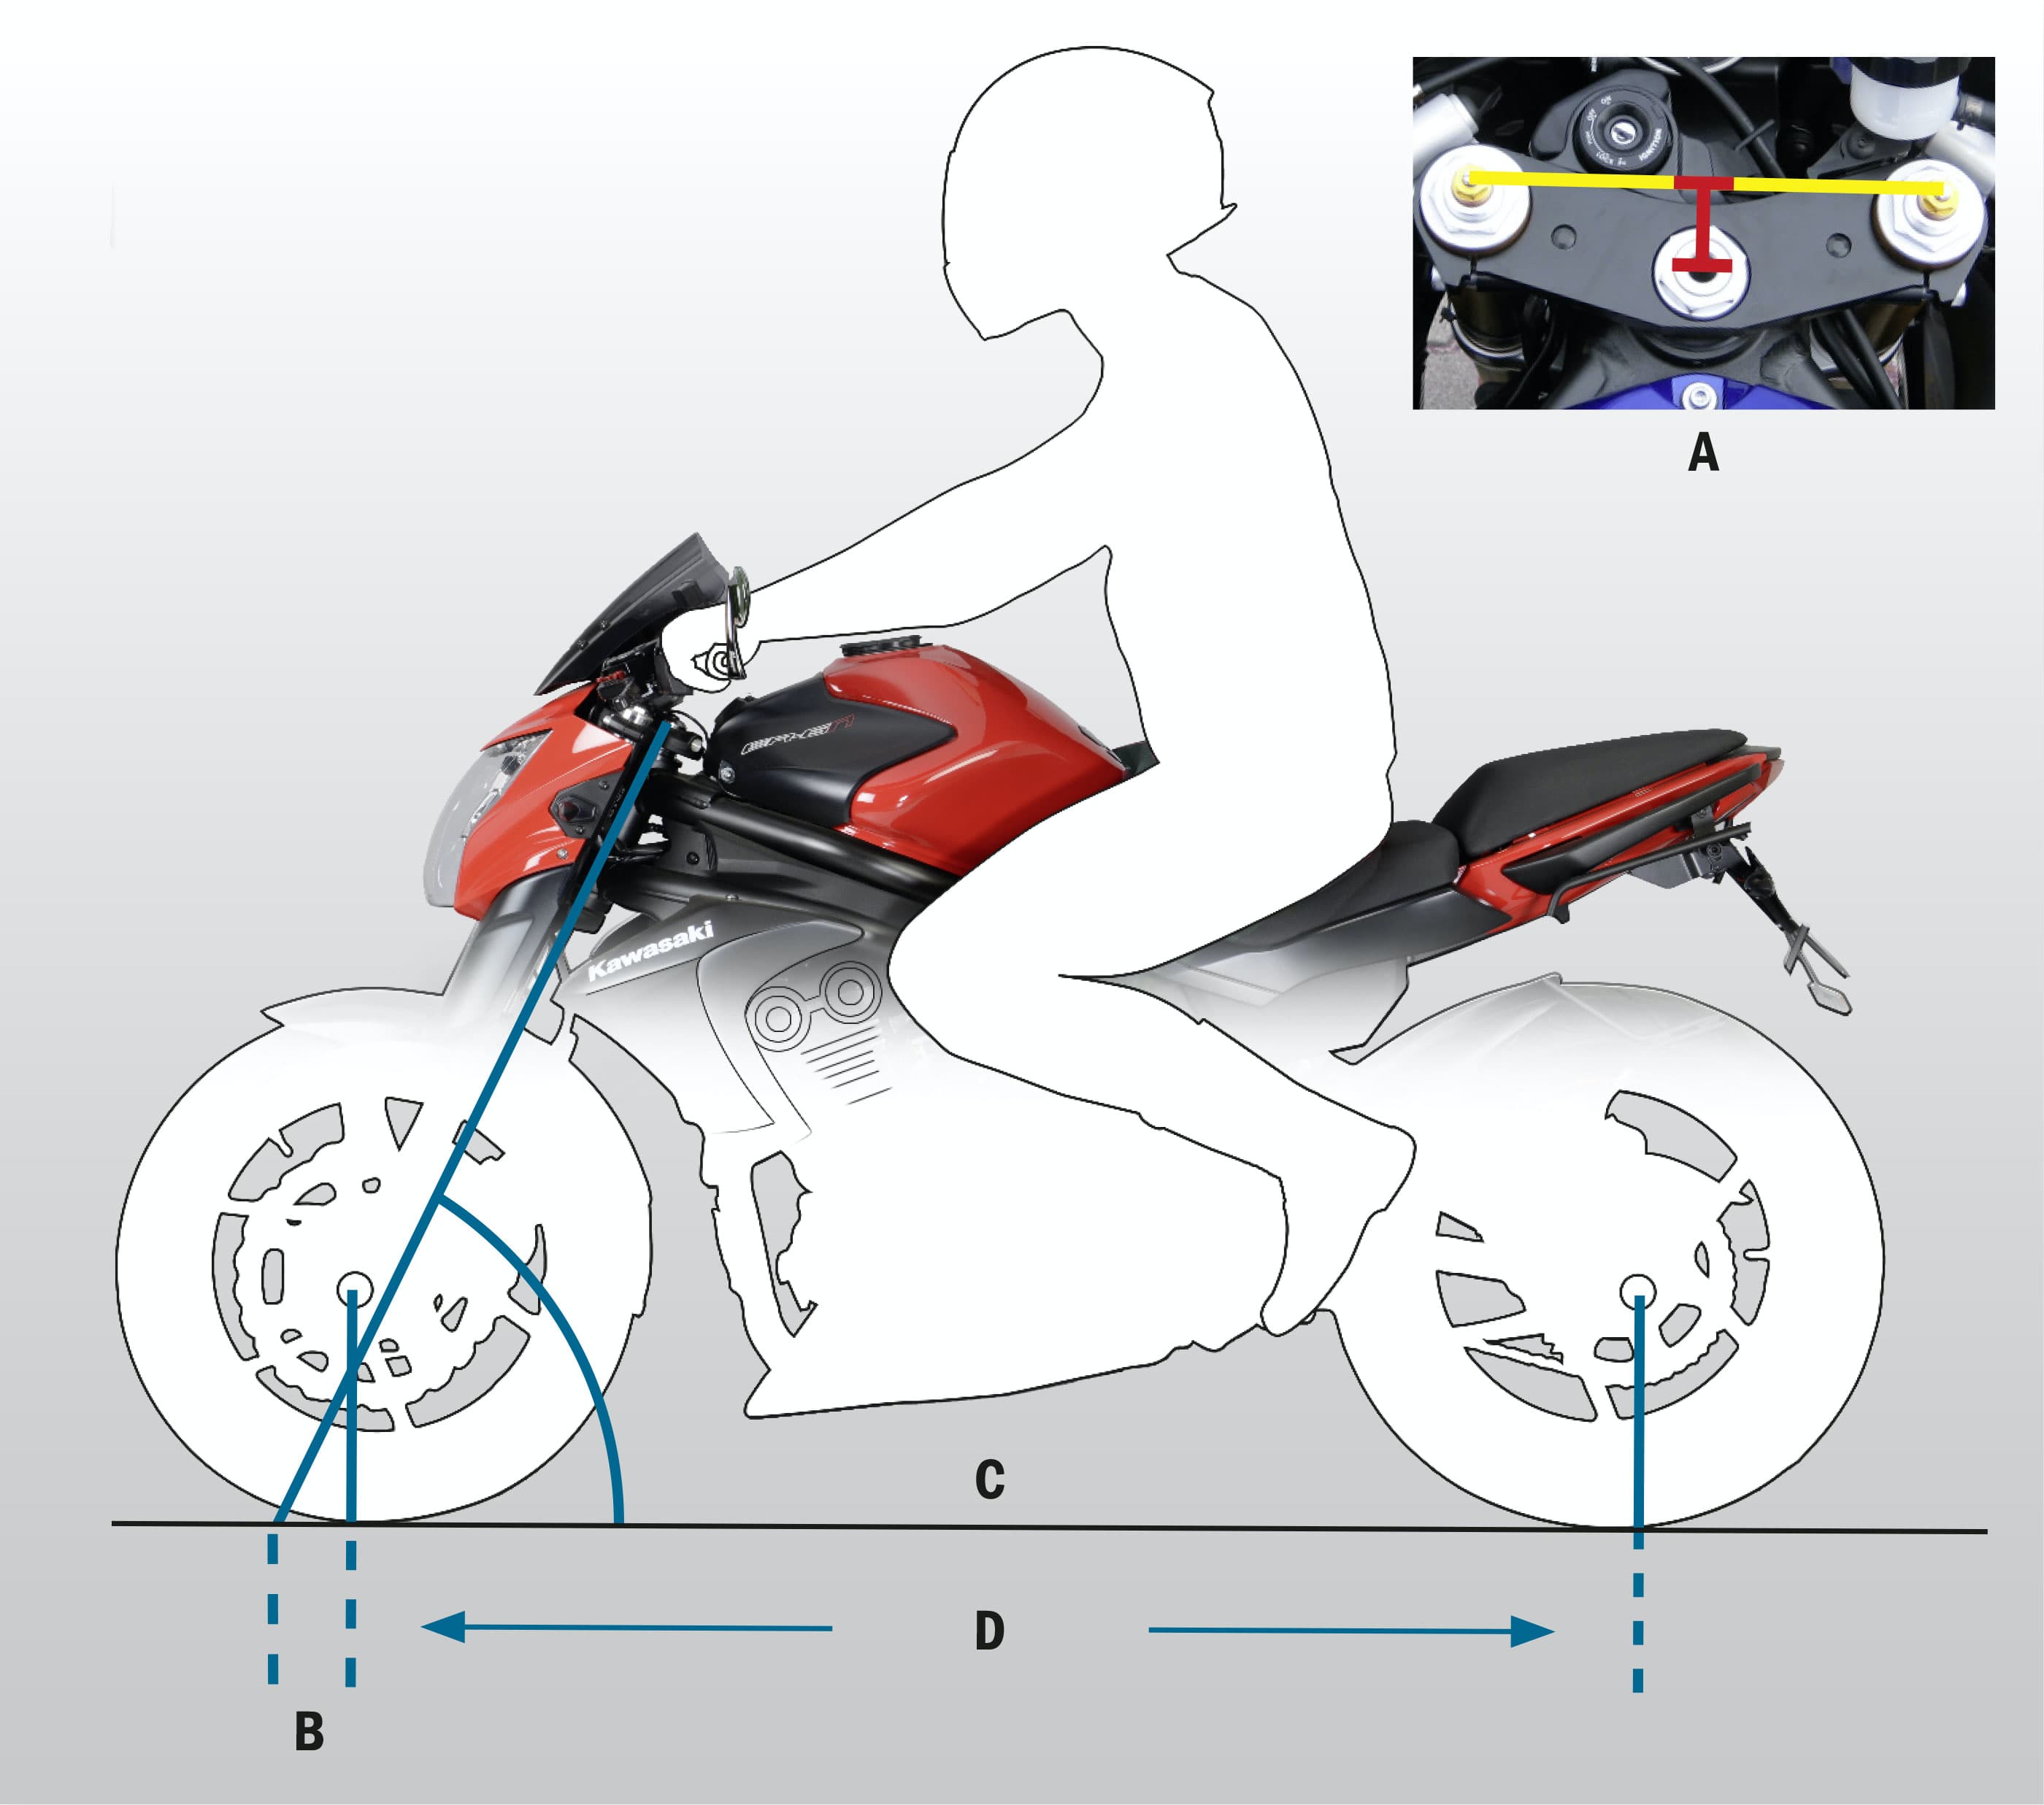
Chassis geometry
Chassis geometry
A: Fork offset
B: Trail
C: Rake
D: Wheelbase
Download the PDF file, print it out and enter the measurements in one of the tables:
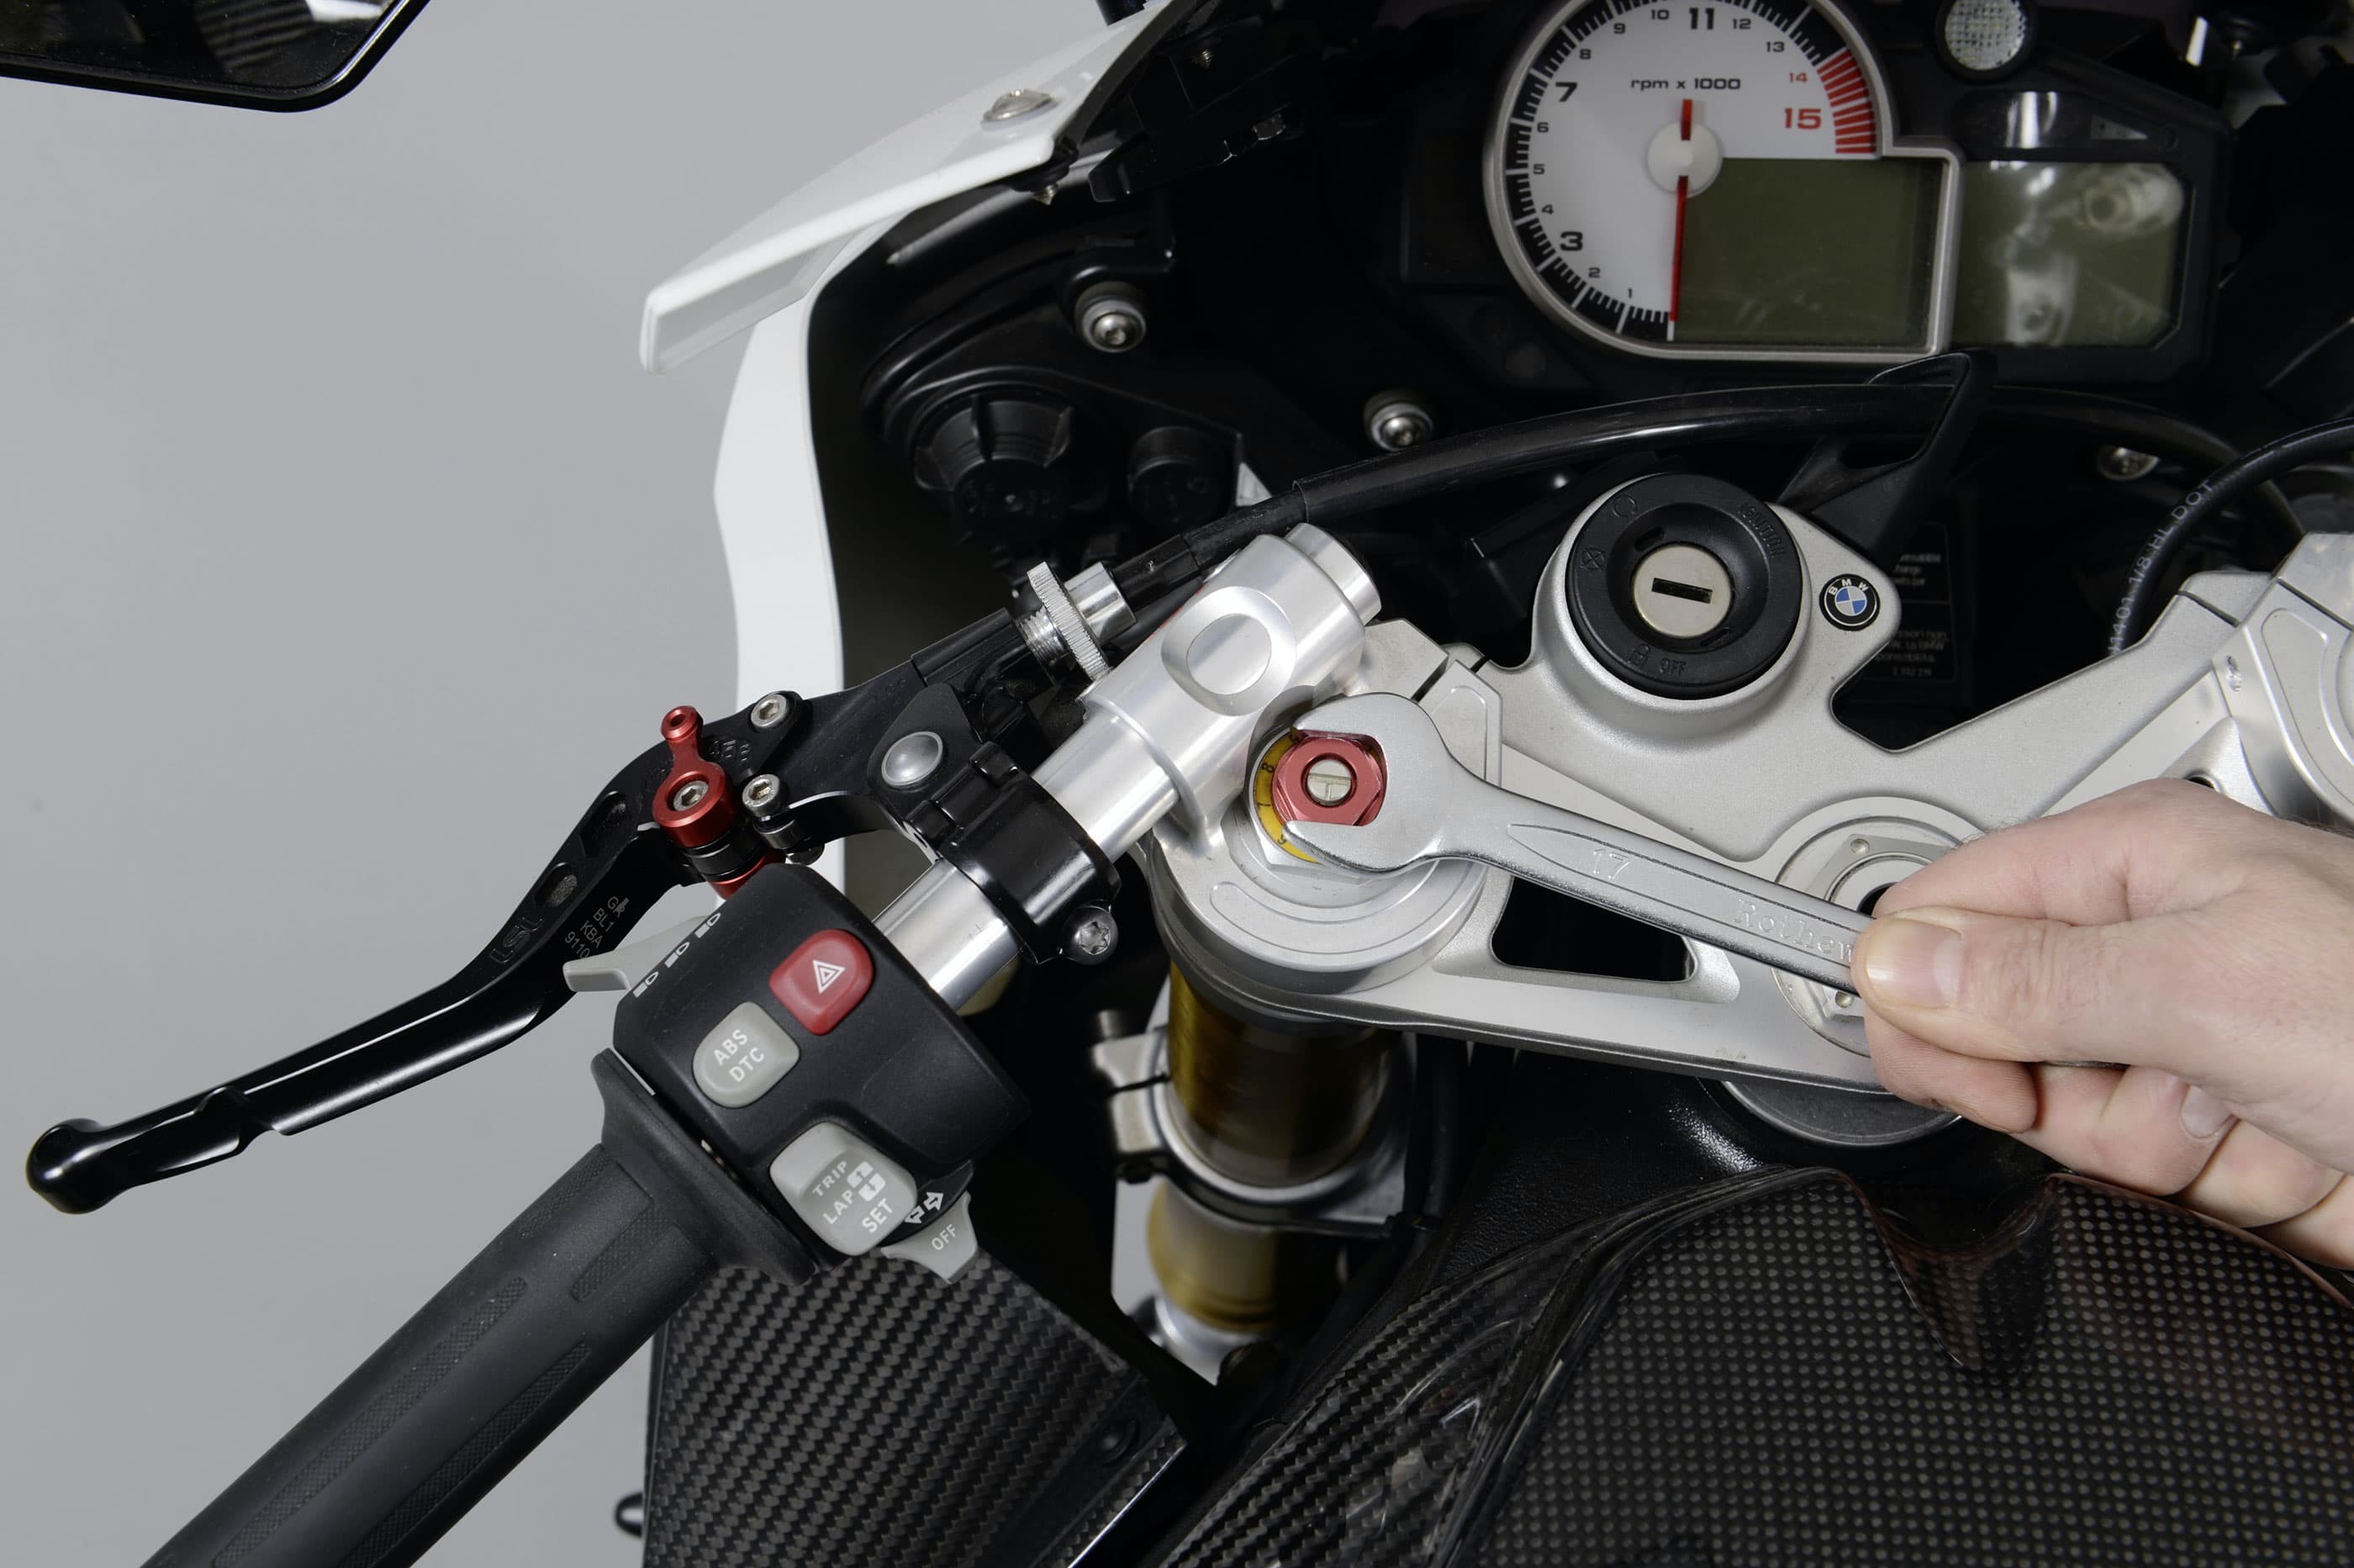
Step 2, Fig. 1: Adjust fork preload by means of the threaded spindles with hex head
02 – Adjusting the preload
Once you have taken the measurements described above, you're ready to start the test phase. Follow the instructions in the owner's manual and note down all the changes you make in your table. Usually the preload is adjustable by means of threaded spindles on both sides, which you screw in or out using an open-end wrench. Be sure to adjust equally on both forks.
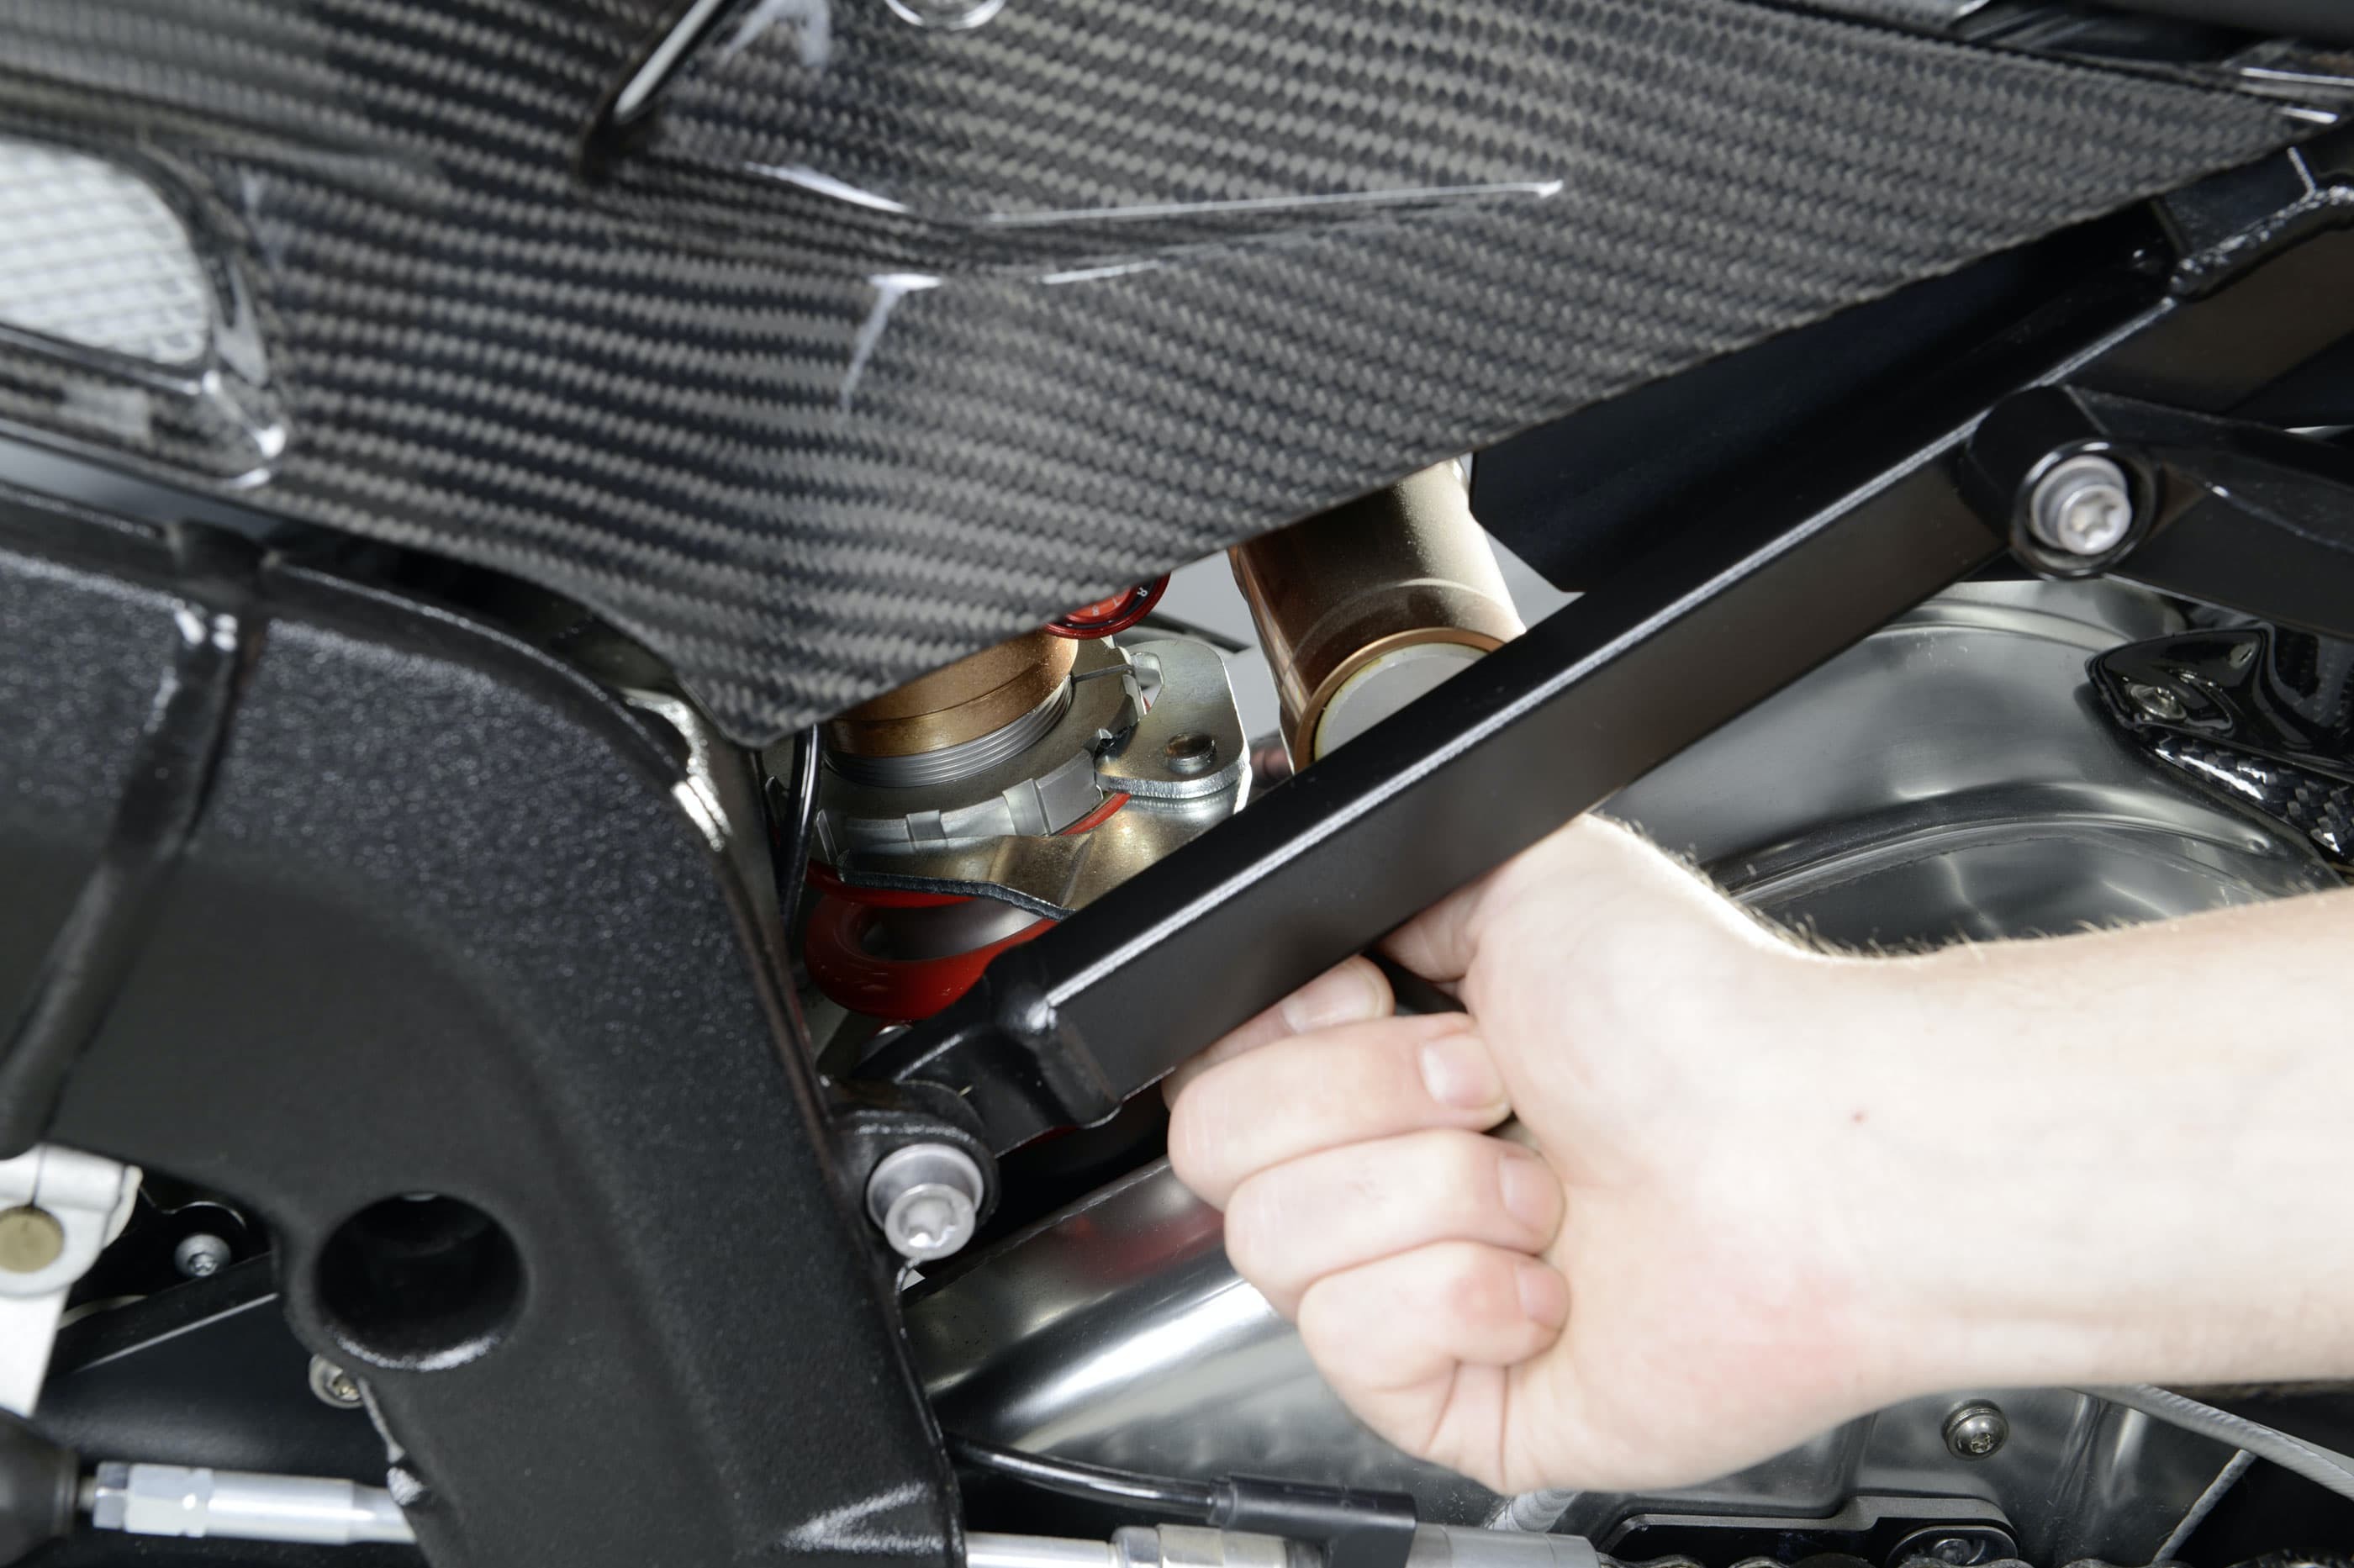
Step 2, Fig. 2: Adjust shock preload using a hook wrench
On the shock, the preload is set either by a ratchet mechanism or by a slotted round nut with lock nut. Both are moved using a hook wrench, which is usually included in the tool kit that comes with the bike. Here again, if your bike has twin shocks, it's important to always adjust them both evenly.
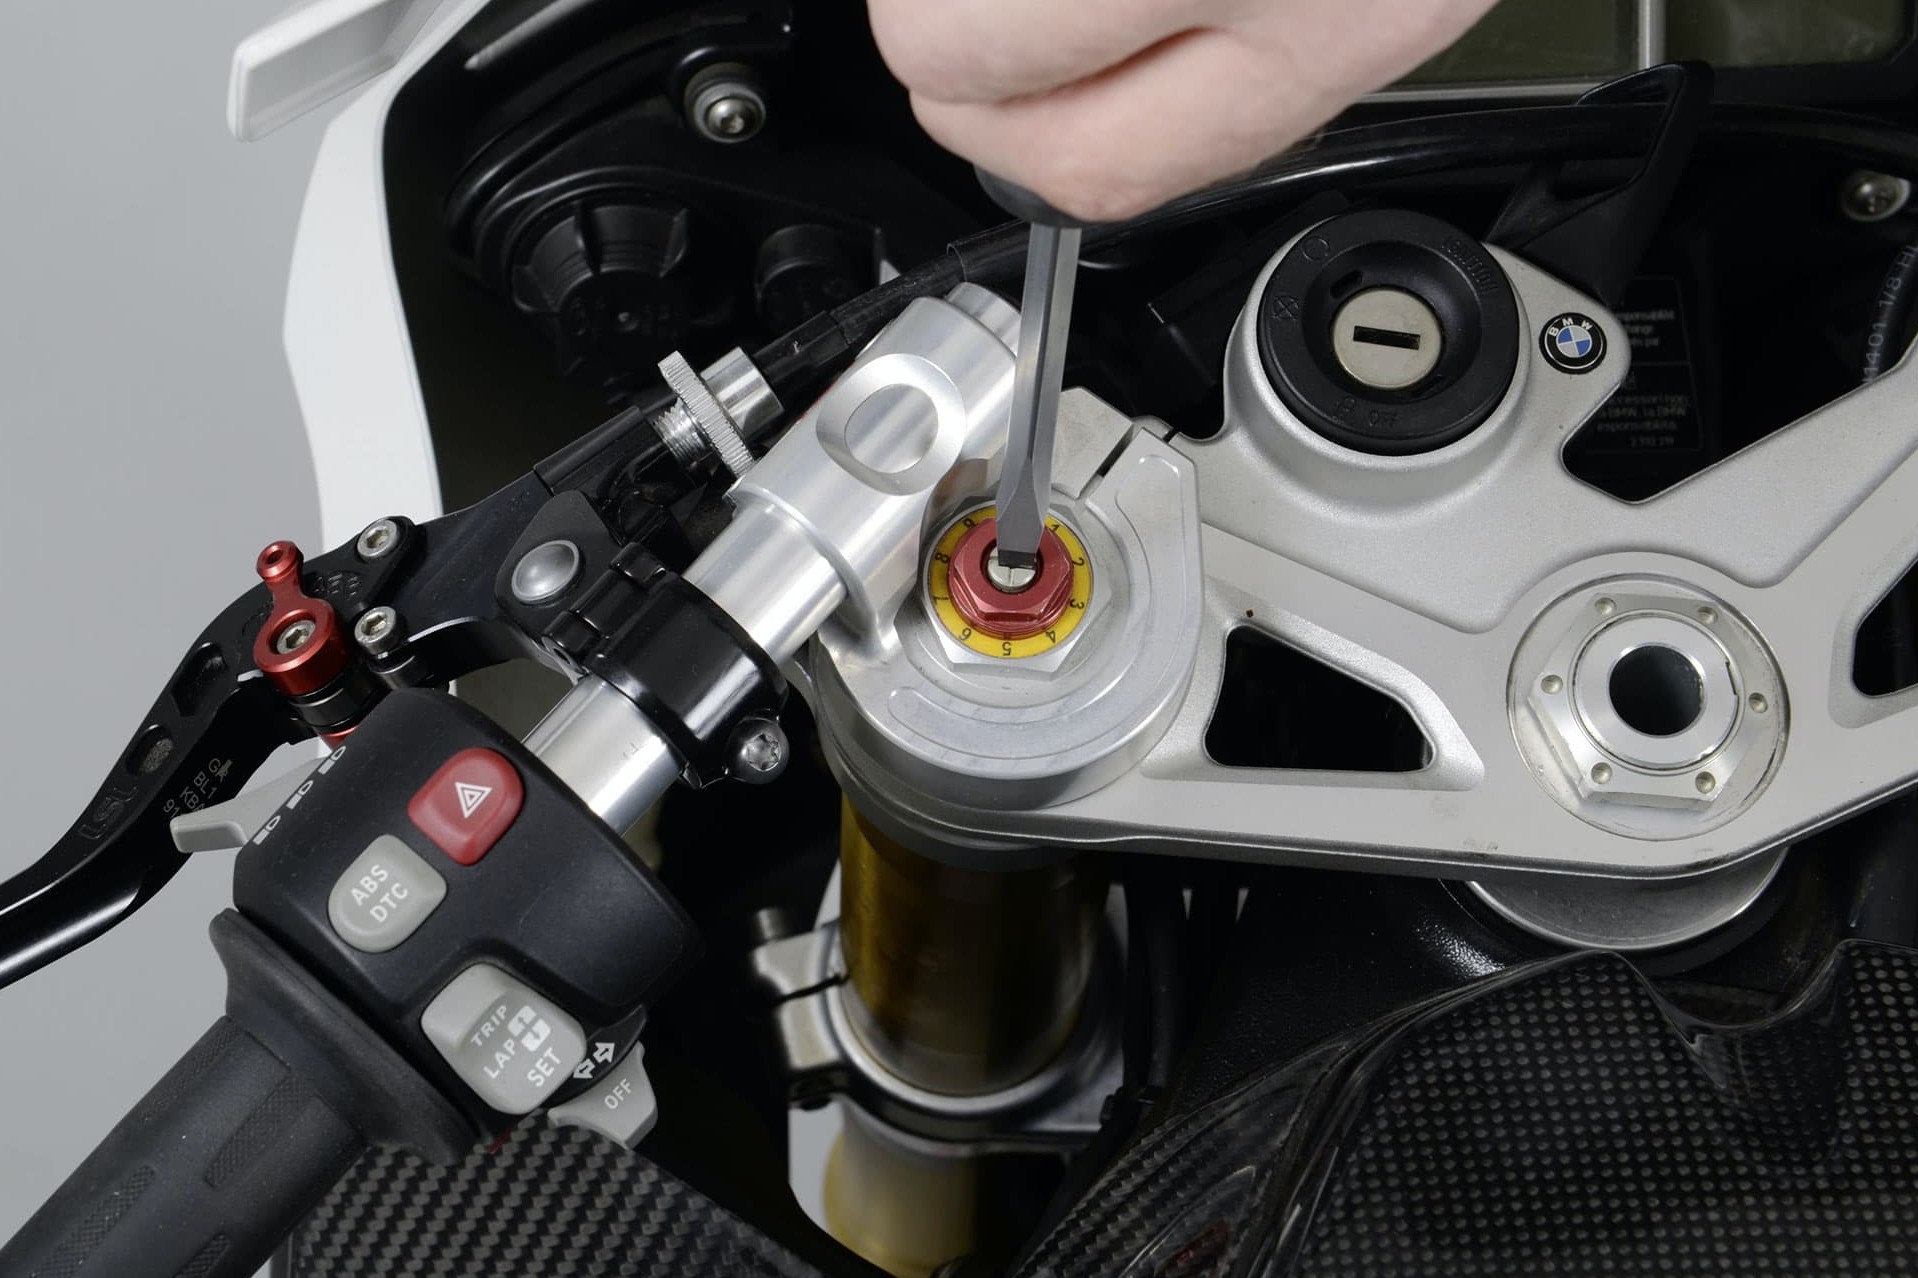
Step 3: Rebound adjuster at the top of the fork
03 – Varying the chassis geometry
The next job is to find the setting that suits your riding style and your favourite biking routes so as to achieve the right compromise between stability and responsive handling. What this means for you is that you need to alter the set-up multiple times, noting down the changes and doing a test ride each time. It's advisable to make opposing adjustments at the front and rear: lower at the front – higher at the rear, and vice versa. That way the overall centre of gravity stays at the same level and does not additionally influence how your bike handles. You will certainly be able to notice the effect that your adjustments have on handling. Each 10 mm up or down can transform a responsive motorcycle into something quite skittish, or make a stable machine really hard work to ride.
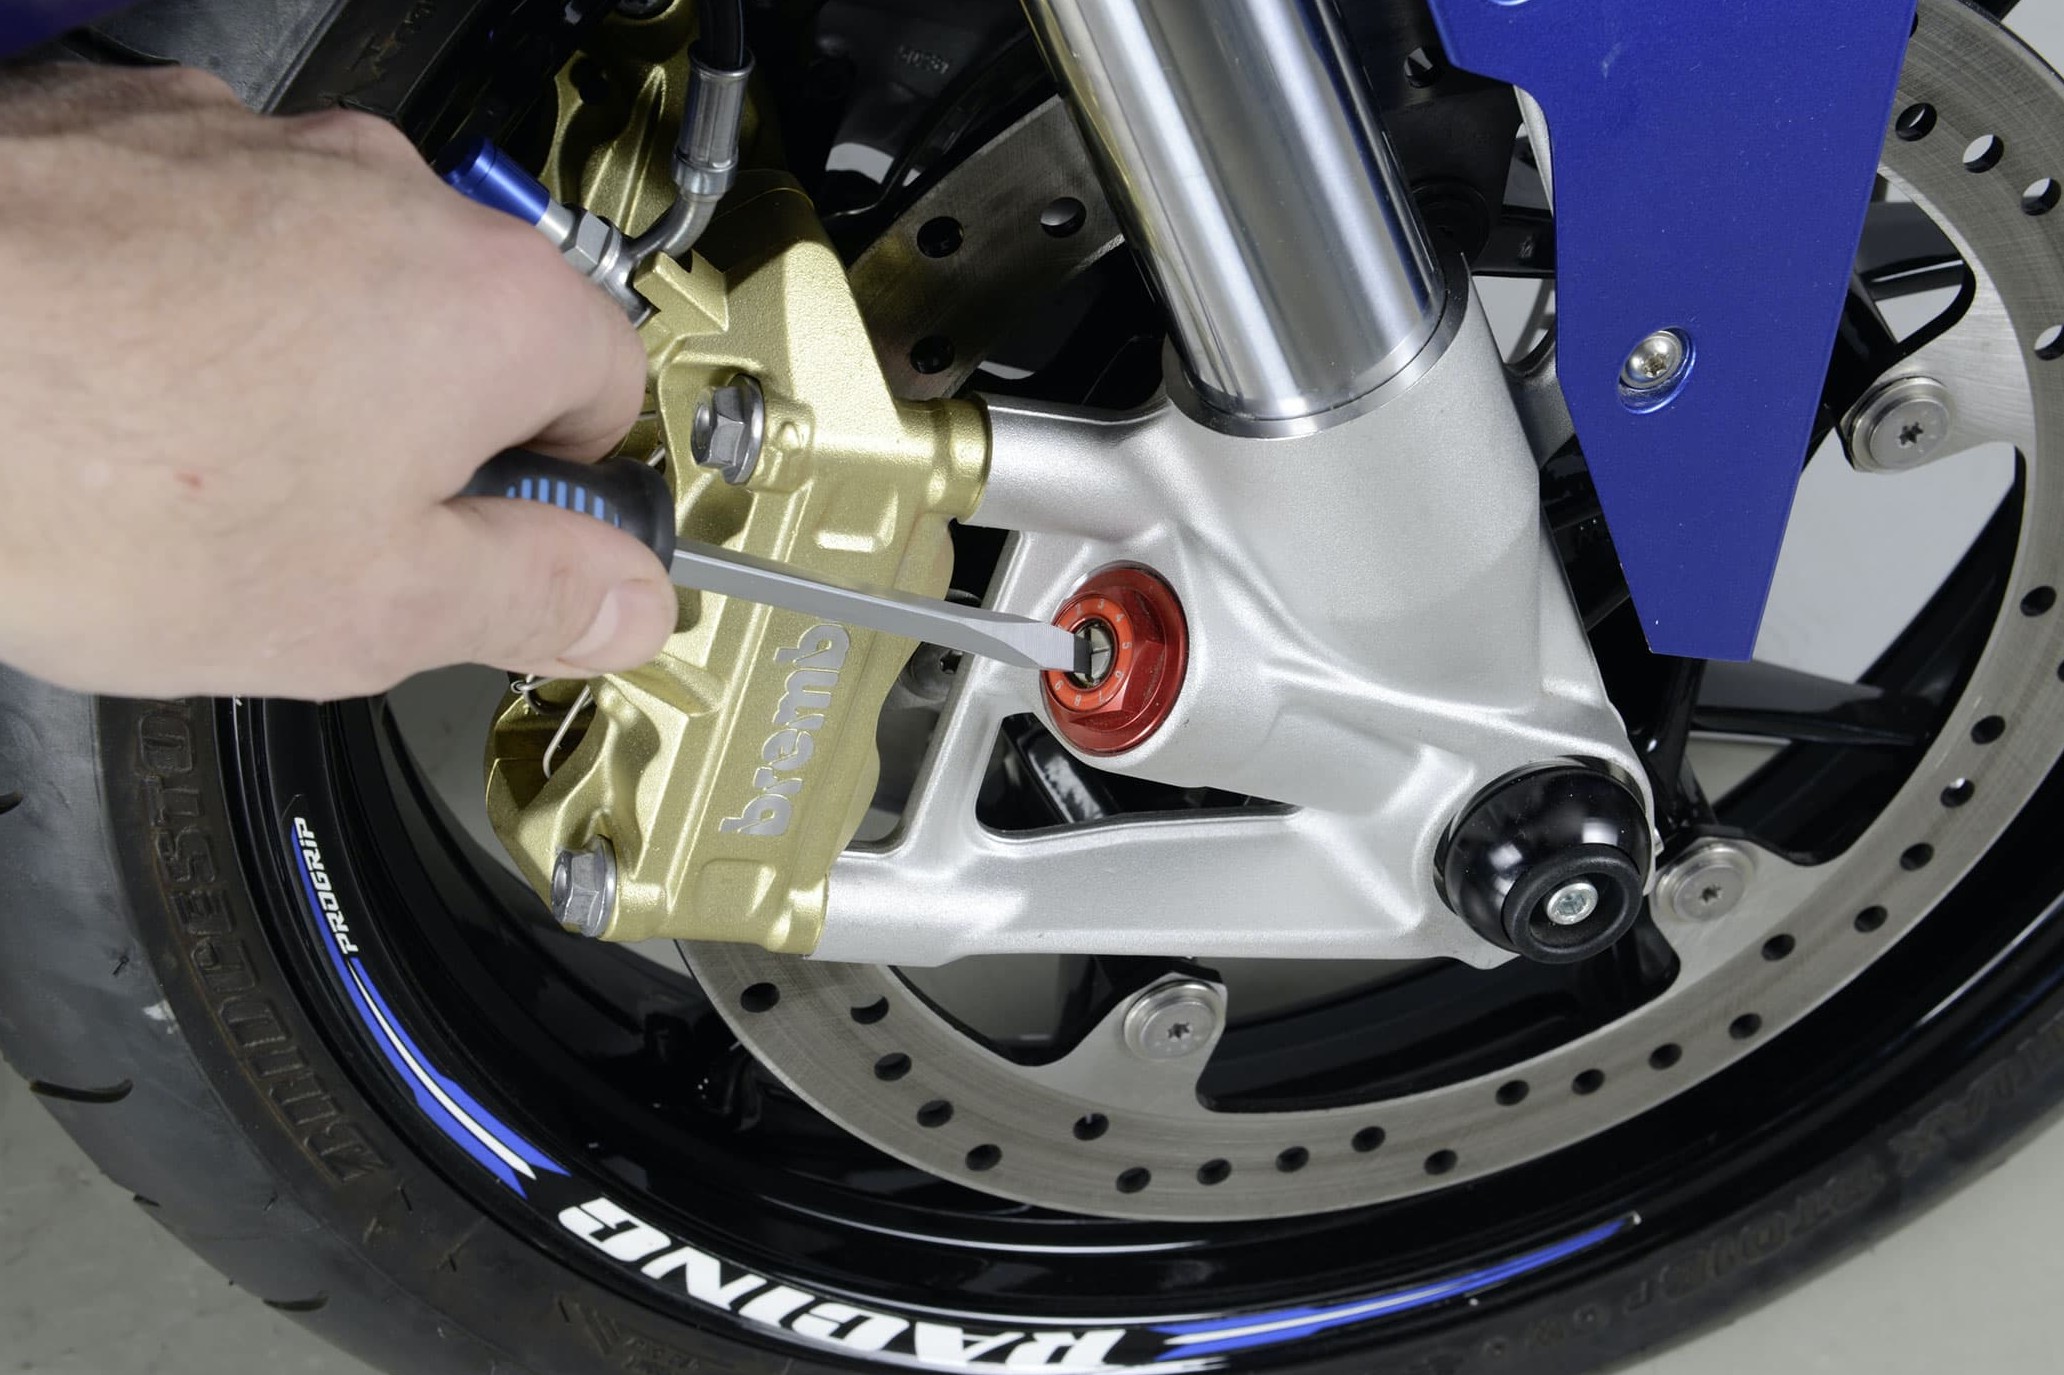
Compression adjuster at the bottom of the fork
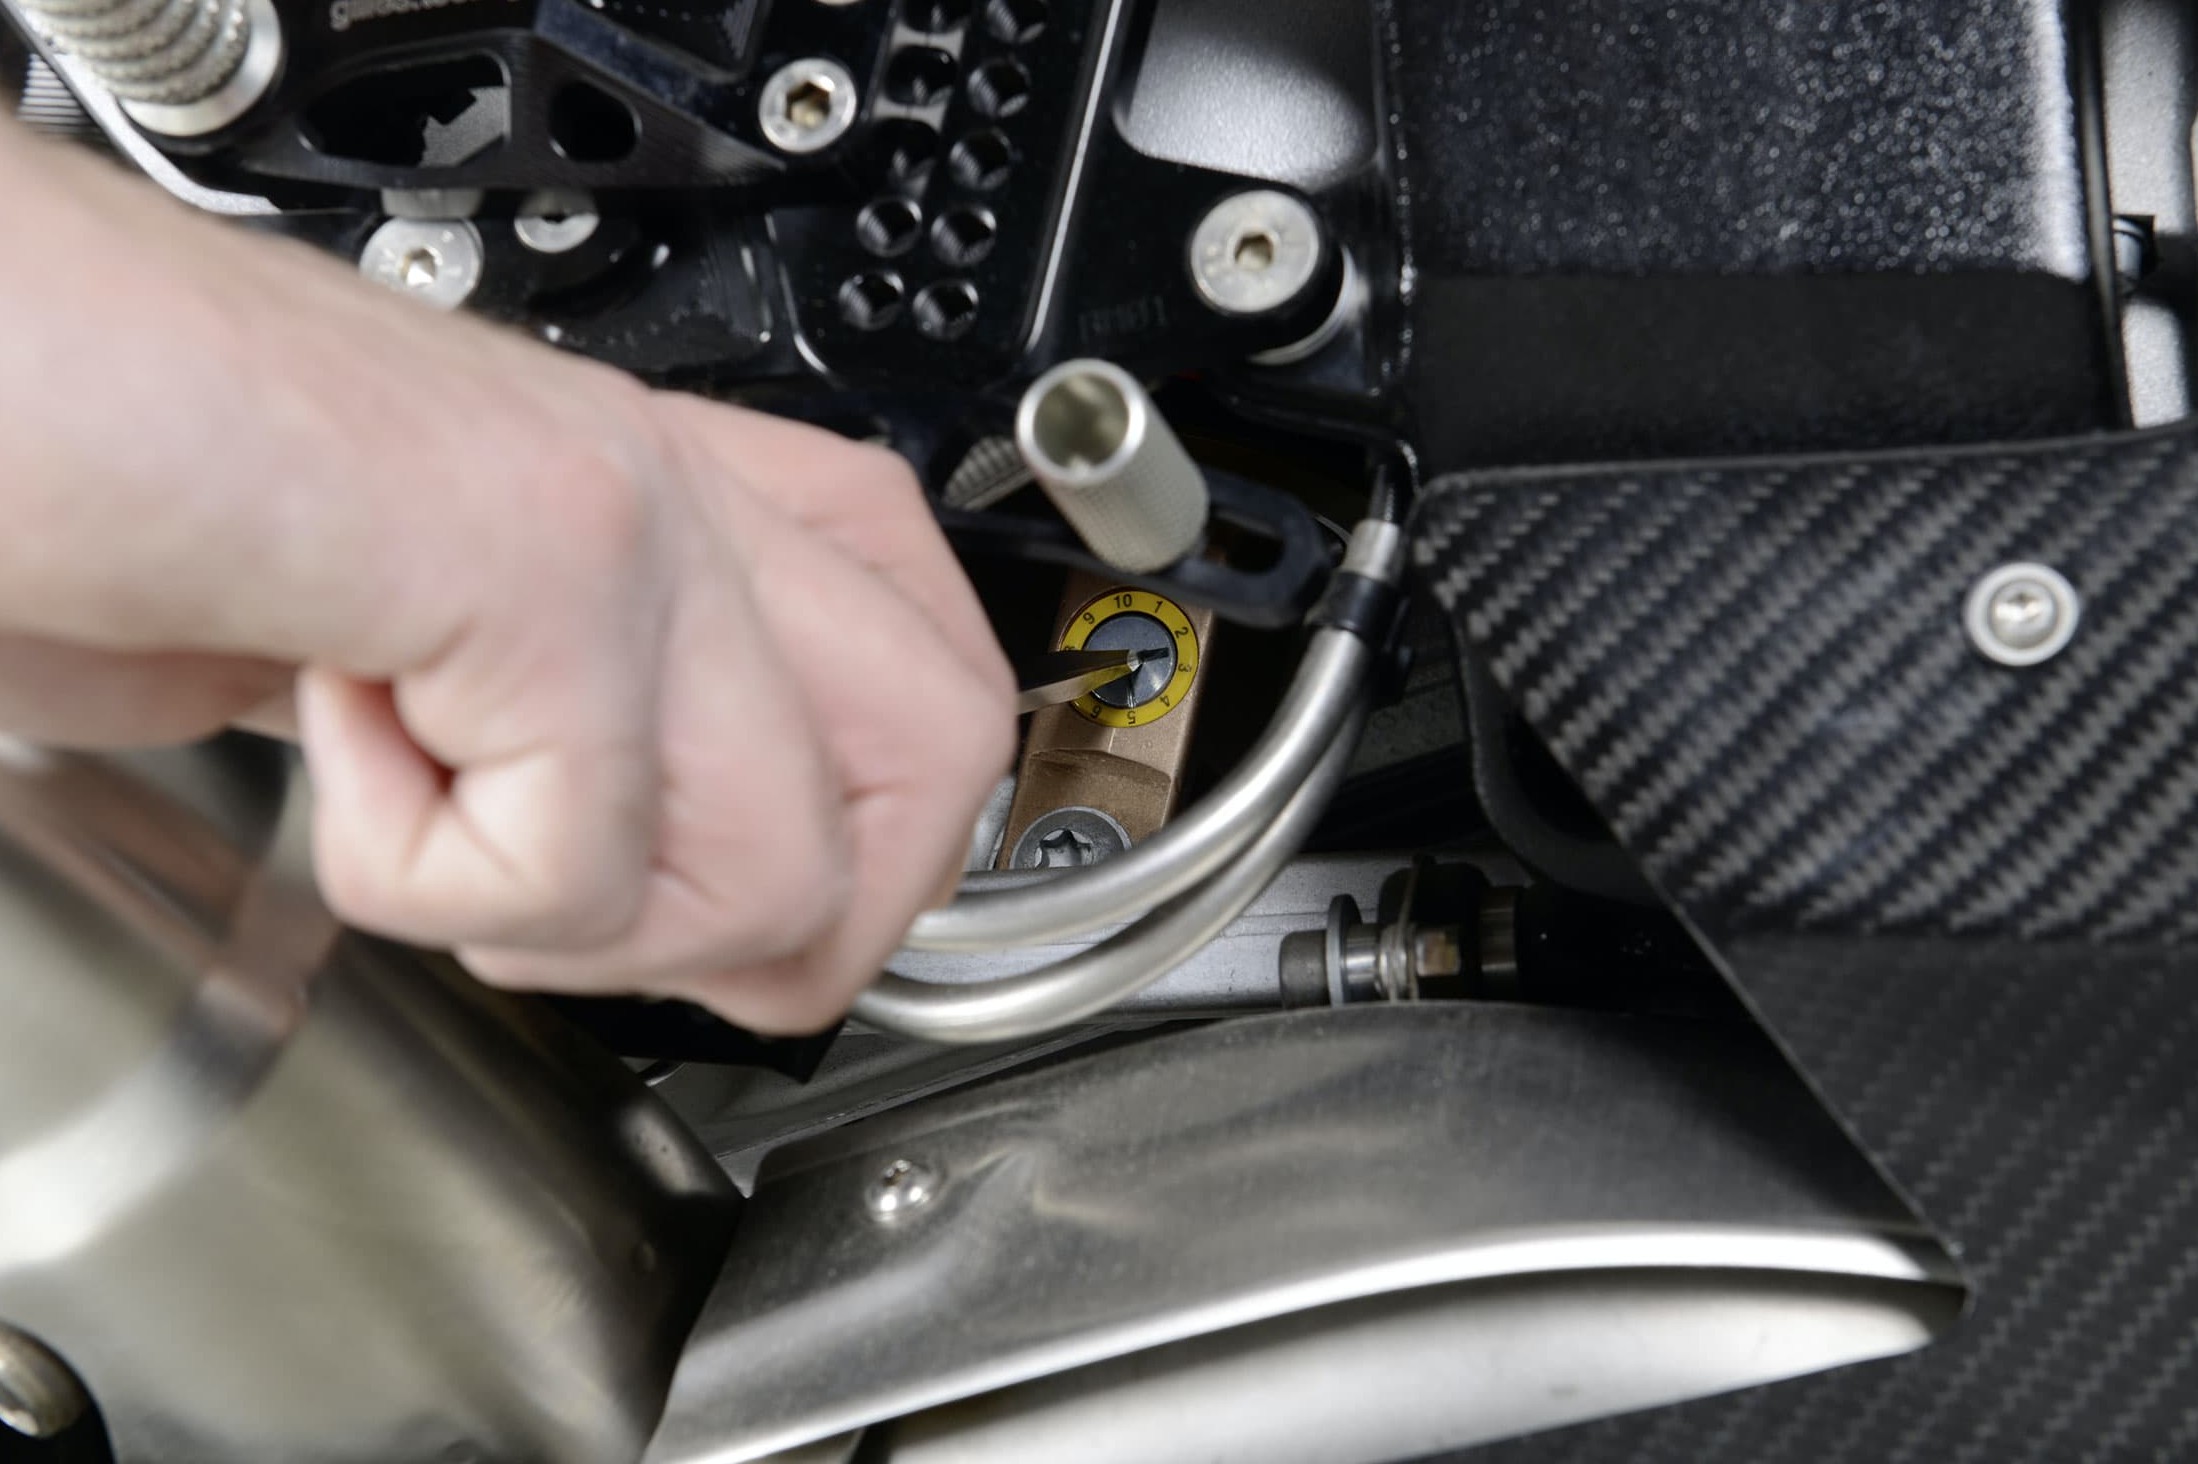
Rebound adjuster at the bottom of the shock
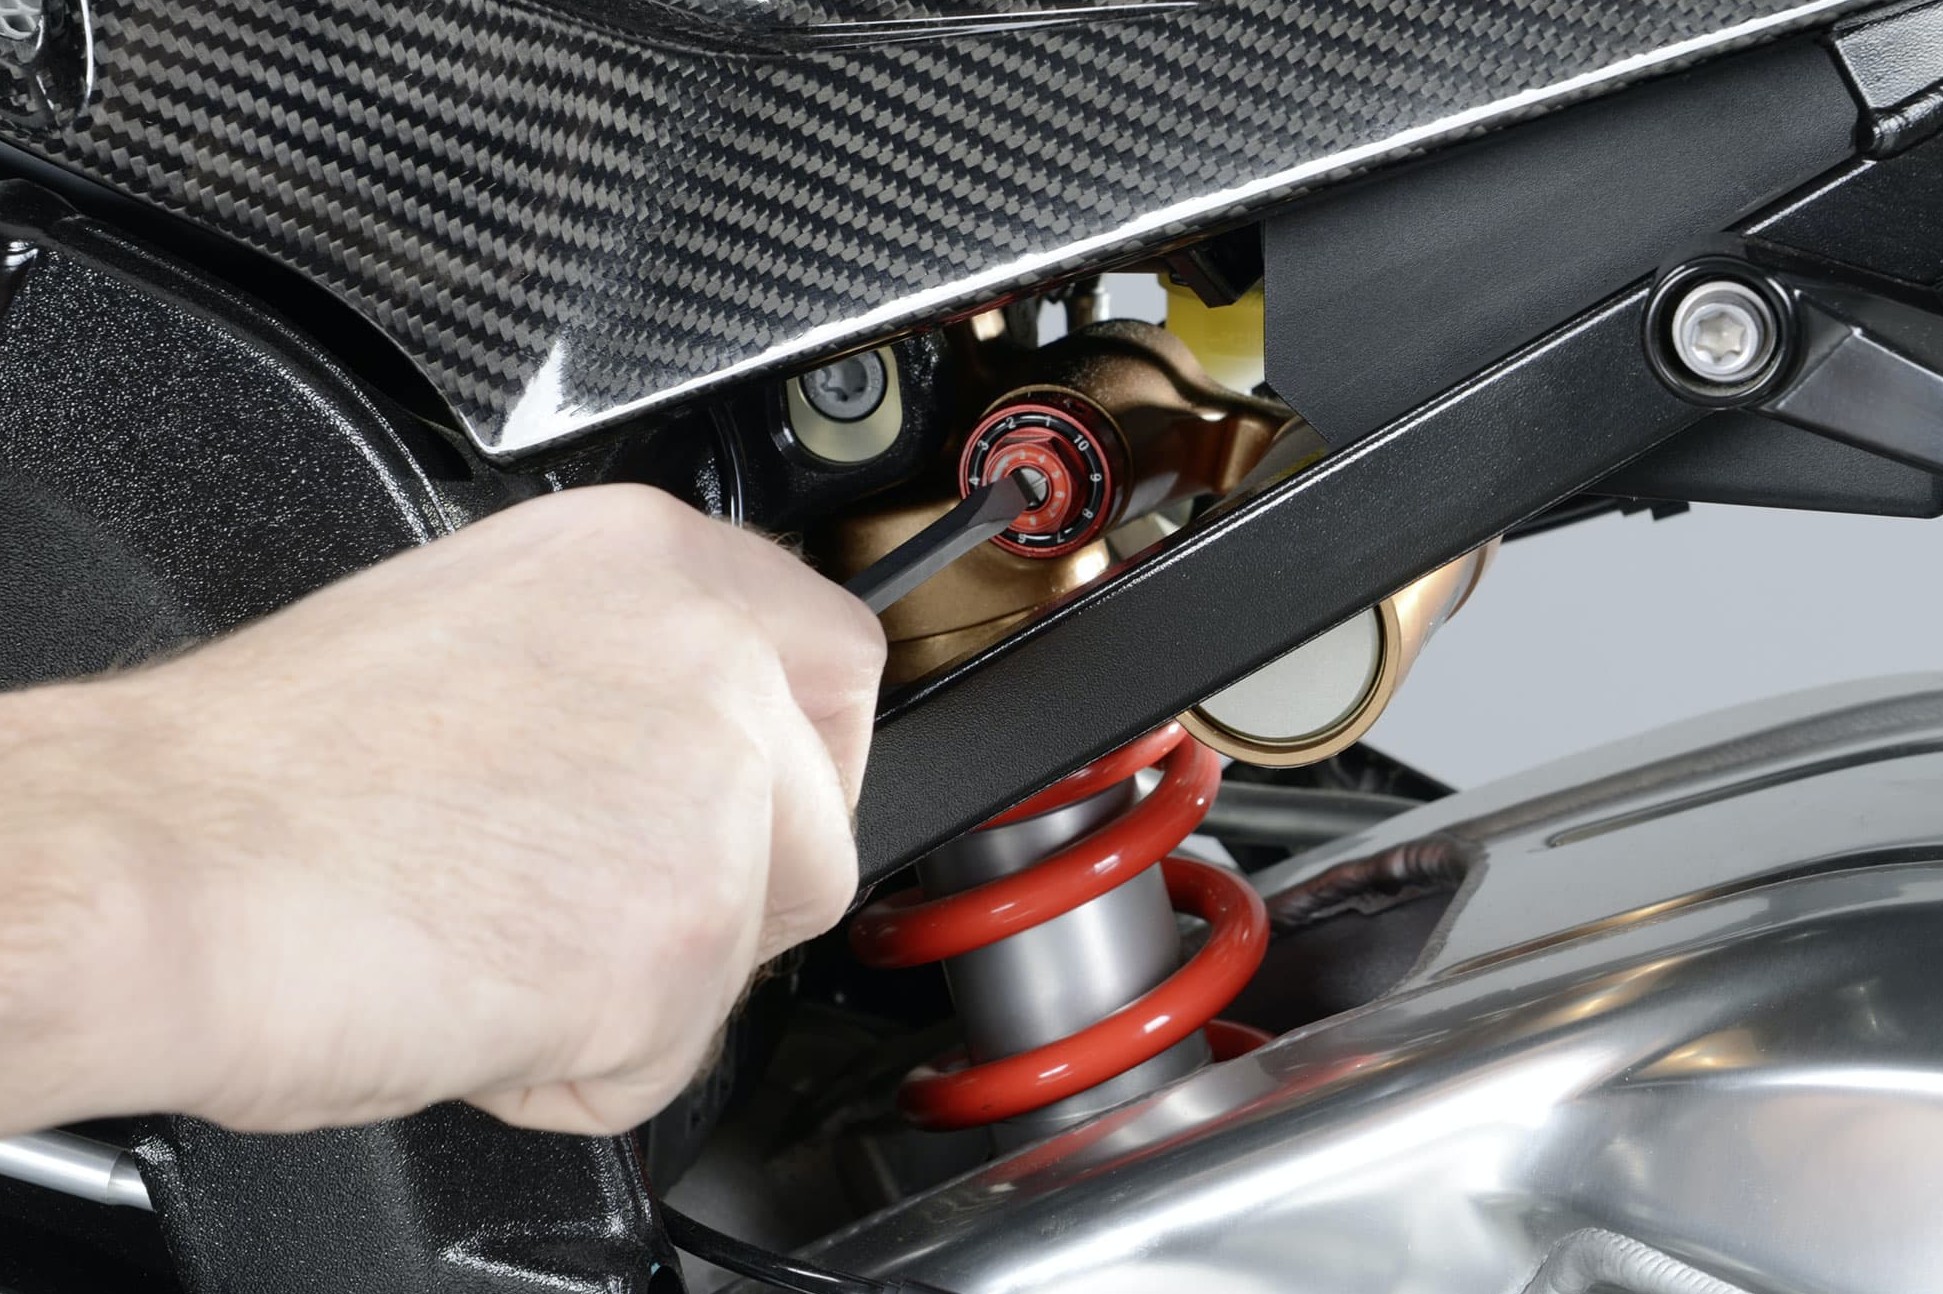
Compression adjuster between shock and hydraulic fluid reservoir
Adjusting the damping
Special oil of a precise viscosity in the fork tubes and shocks damps the up and down movement of the motorcycle and prevents the springs from bouncing. We distinguish between compression damping, when the wheel if forced upwards by hitting a bump, and rebound damping, when the wheel is forced downwards by the springs. The strength of the damping effect exerted by the oil can be roughly adjusted via valves which regulate the rate of flow. If the shock only has a means of adjusting the rebound damping, any change you make will always influence the compression damping too.
The first thing you need to know is what adjustment options are actually available on your motorcycle, and where to find the adjusters. Here too, you should consult your owner's manual.
Download table
Now that we've explained the What and the Where, we can turn to the How. Once again, it's essential to use our table to enter all the changes you make, starting from the factory setting.
Press down hard to test the shock damping
04 – Front rebound damping
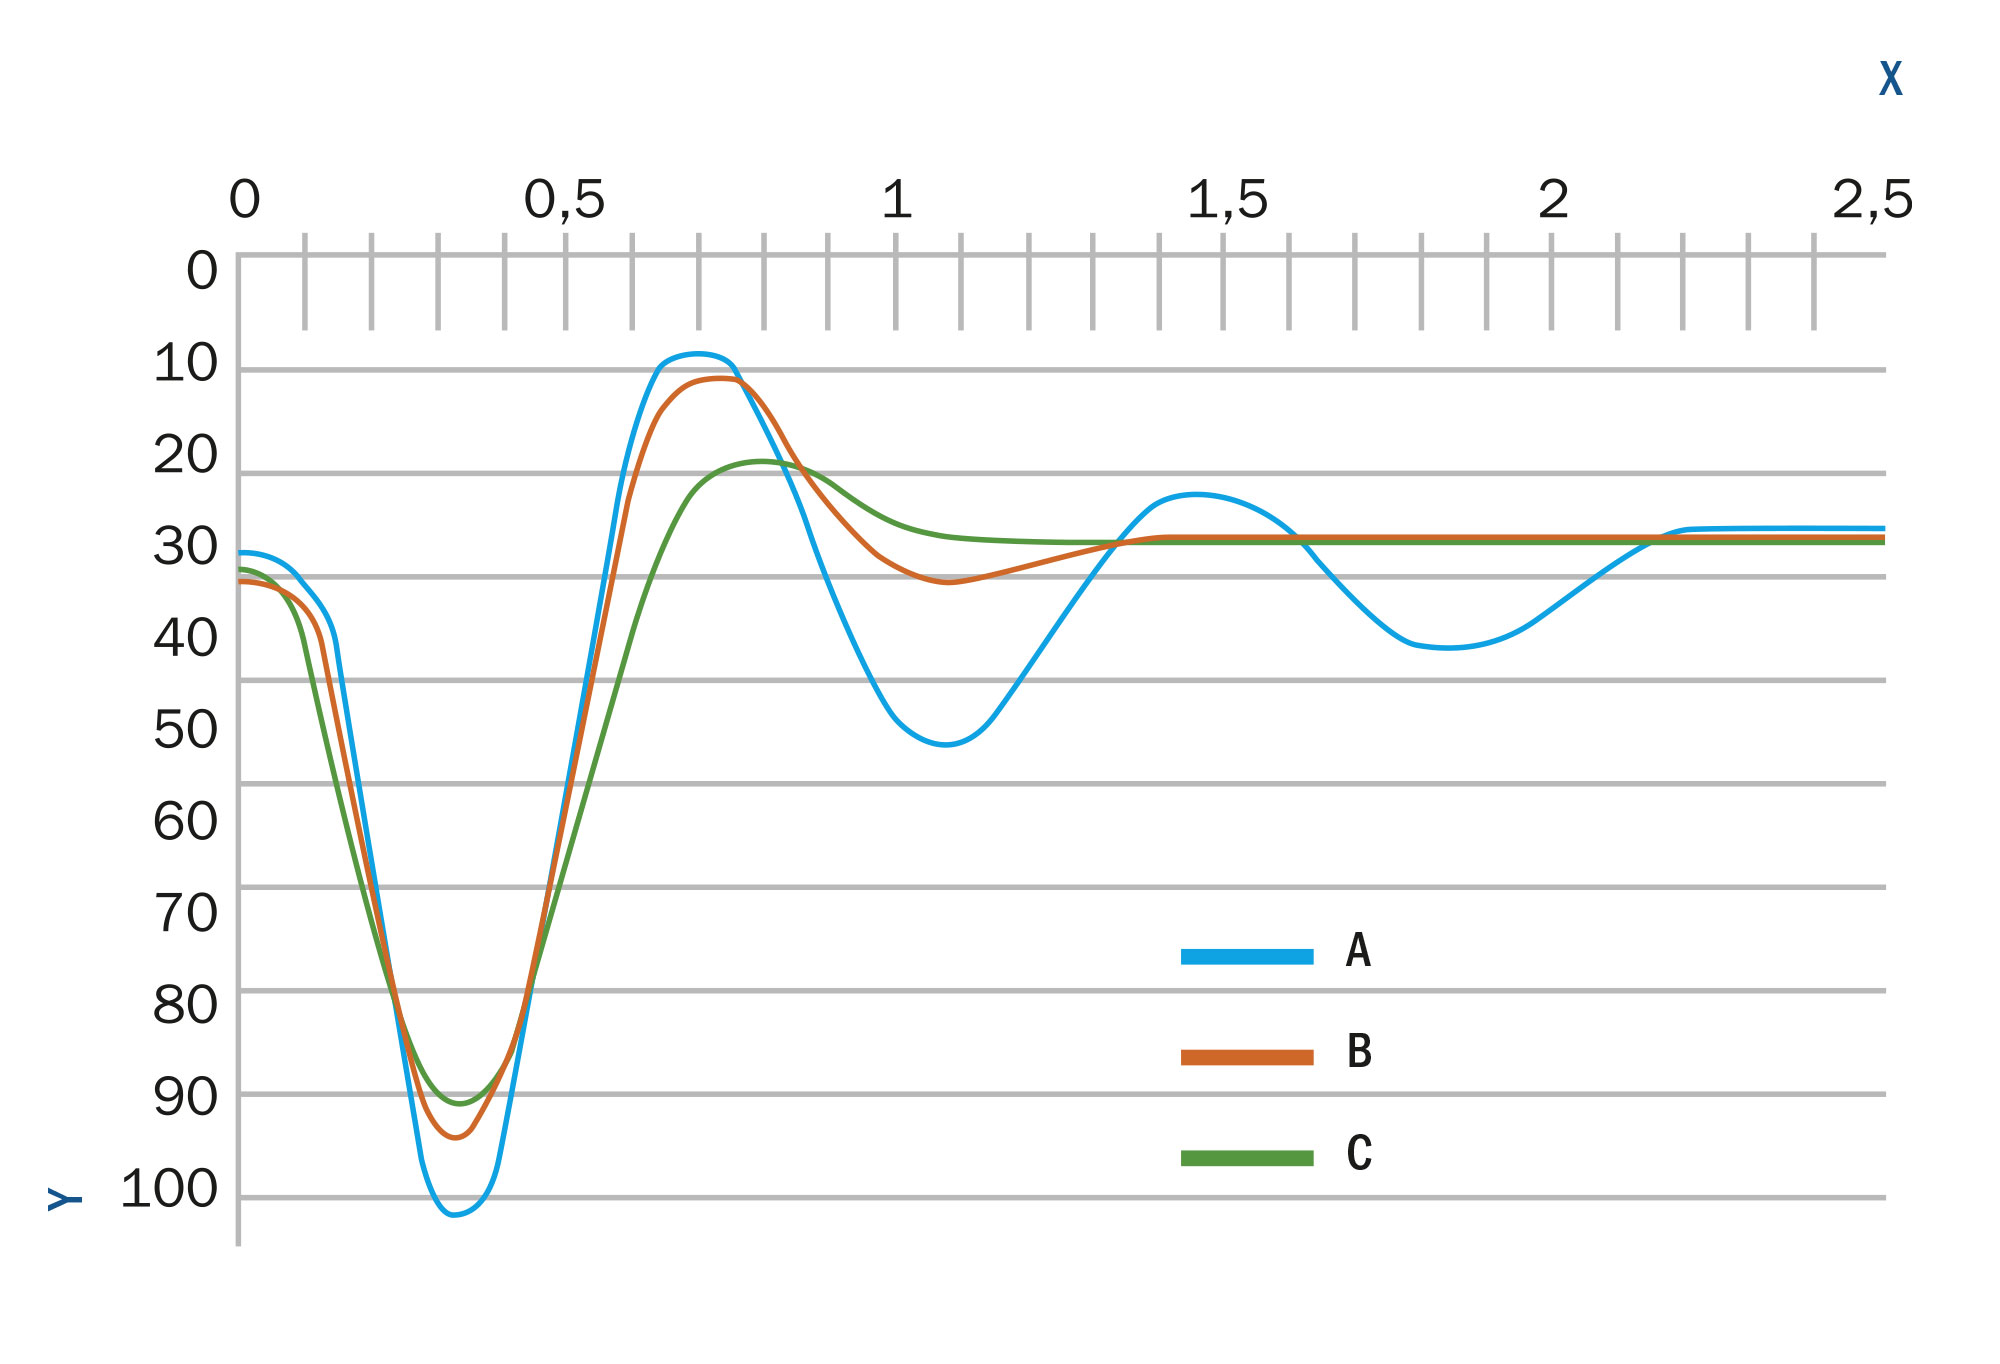
For the rebound damping, it's relatively easy to find an acceptable basic tuning with the motorcycle stationary. First press down hard on the handlebar with the brake held on. When you release the pressure, the fork must rebound without any delay, ideally a bit beyond the resting position, to which it then returns without any further bounce. If the fork rebound is noticeably sluggish, this means the fork is overdamped. Conversely, if it jumps right to the limit and even bounces several times, the fork is underdamped.
Do this test twice, first with the damper valves fully closed and then with the valves fully open. That will give you a feel for the range of adjustment. Take a look at the diagram (Graph: Effect of fork damping).
X axis) Time in seconds; Y axis) Suspension travel in mm; Line A) underdamped, Line B) optimal, Line C) overdamped,

Step 5: Press down hard to test the shock damping
05 – Shock rebound damping
To test the rebound damping of the shock (or twin shocks), press down hard on the tail of your motorcycle. It's OK for the shock to rebound rather more slowly than the fork (up to 1 second max.). But there must be no bounce at all. Here, too, you should check the adjustment range by carrying out the test once with the damping closed and once with it open.

Step 6: Always write everything down. Your reward will be more riding fun
06 – Compression damping and fine tuning
You've now got a decent base setting for the rebound damping. To complete the fine tuning, you need to take your bike out on the road.
The same applies for determining the optimal compression damping. Of course, you can try out the extreme settings here too. The softer the compression damping, the more the fork will dip when you brake, or the shock will be compressed right up to the limit when you hit a pothole. For normal riding, that feels nice and comfortable on a flat road, but when you corner at speed, it will feel pretty spongy.
Conversely, a very hard setting is good for stability when you lean into the corners on the race track, for example, and will give you good feedback. But on a bumpy road, your bike will be very bouncy and, at worst, your wheels may even leave the road surface.
So when adjusting the damping, it's all about finding the compromise that best suits your riding style, the load on the bike and the sort of terrain you typically ride. The best approach is to take your time, try out different variations and preferably concentrate on one thing at a time, i.e. only the forks or only the rear suspension.
Chassis conversion
All the tips we've given so far have been about the factory components that your motorcycle came with. If these measures do not deliver the results you're looking for, e.g. because the springs are simply too soft, or your bike doesn't offer enough adjustment options, the best advice is to upgrade the chassis components. Progressive fork springs, fork oil in different viscosities, so-called cartridge dampers or complete forks for the front, and shocks with and without compression damping or height adjustment for the rear. These high-quality chassis components enable you to maximise your bike's safety, comfort, ride dynamics and handling.
The Louis Technical Centre
If you have a technical question about your motorbike, please contact our Technical Centre, where they have endless experience, reference books and contacts.
Please note!
These tips for DIY mechanics contain general recommendations that may not apply to all vehicles or all individual components. As local conditions may vary considerably, we are unable to guarantee the correctness of information in these tips for DIY mechanics.
Thank you for your understanding.
